Lanner 1U Rack Mount User Manual
Page 8
Software User Manual
Version 2.0
6
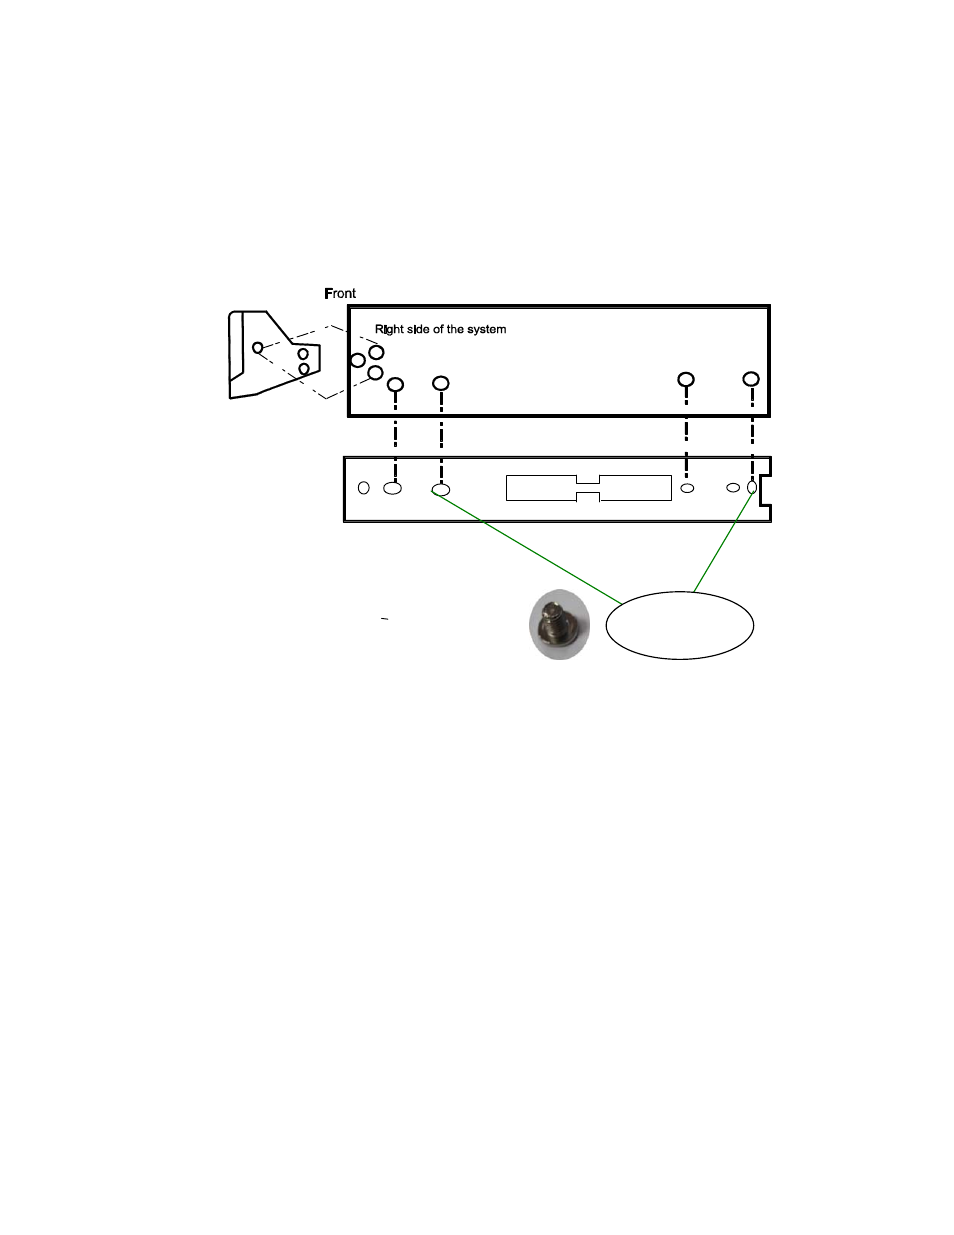
2. Align the screw holes in the rail and the mounting holes on the chassis and then
attach the inner rail to the system with three of the short flat-head screws (A).
3. Attach the front ear bracket to the system.
4. Repeat these steps to attach the other inner rail and front ear bracket to the other
side.
3.3 Attaching the L-shaped bracket to the outer rails
Use the following procedure to attach the L-shaped bracket to the outer rails.
1. The L-shaped bracket is for securing the outer rails to the rack. You should attach
the L-shaped brackets to the outer rails first.
2. Use two longer flat head screws and two nuts (B) to connect an L-shaped bracket
to the outer rail through any two of the four holes at the end of the outer rail.
Position each nut on the outside of the bracket, and attach a screw from the inside
of the outer rail through the bracket. Do not tighten the nut yet because you will
need to adjust the location of the rear bracket for the depth of your rack.
Depending on the depth of your rack, you can position the bracket to meet the
depth of the rack.
Pick three out
of these four