Edit a profibus node, For a profinet network, Refer to edit a profibus node on – Yaskawa Tag Generator User Manual
Page 21: For a profibus network
u
Edit a PROFIBUS Node
Follow this procedure to edit node settings for a PROFIBUS node.
1.
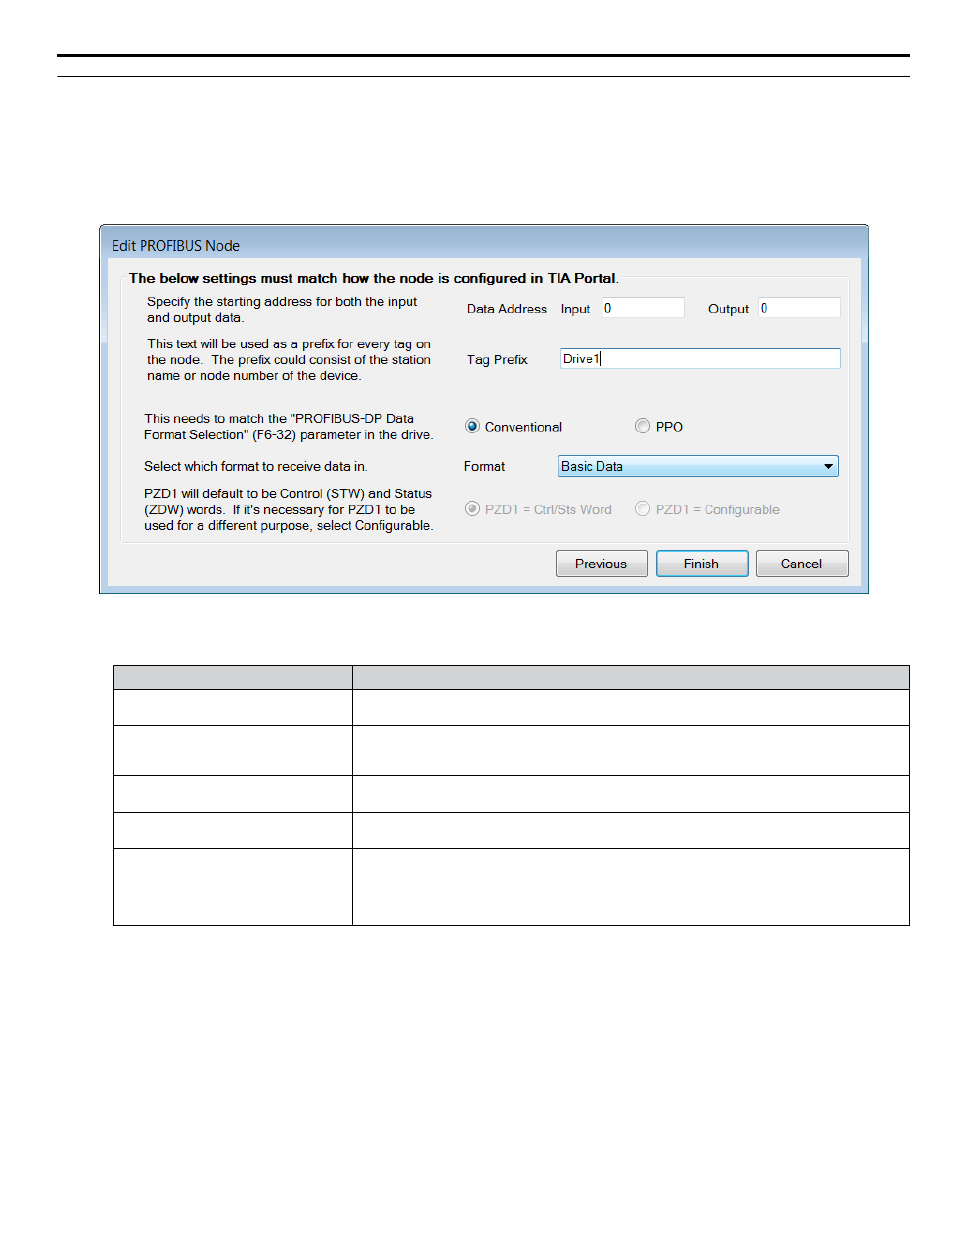
Match the fields in the "PROFIBUS Node" dialog to the configuration in TIA Portal software. Click the "Finish" button
when all values are set.
NOTICE: Abnormal Equipment Operation. Match the fields in the "Edit PROFIBUS Node" dialog to the configuration in TIA Portal
software. Invalid or mismatched tags may cause erroneous operation.
Figure 19 Edit PROFIBUS Node dialog
Table 5 Field Descriptions for the Edit PROFIBUS Node Dialog
Dialog Field
Description
Data Address-Input/Output (Textbox):
Specifies the starting address for input and output data. Enter addresses in these text boxes
to match the addresses configured in TIA Portal.
Tag Prefix (Textbox):
Enter a value to uniquely identify the node tags from other nodes. The prefix may consist of a
station name or a node number of the device. This text will be used as a prefix for every tag
on the node.
Conventional or PPO (Radio button):
Select the radio button to match the PROFIBUS-DP Data Format Selection parameter F6-32
in the drive.
Format (Drop-down list):
Select a received data format from the drop-down list to match the module configured in TIA
Portal. List choices vary based on the Conventional or PPO selection.
PZD1 (Radio button):
Choose the appropriate radio button for use with the PLC program. Select “PZD1 = Ctrl/Sts
Word” for control/status word. Select “PZD1 = Configurable” for configurable word or alternate
purpose. This radio button is enabled when PPO is set in the “Format” field. The Tag Generator
will generate multiple tags for each bit or a single tag for the whole word. PZD1 defaults to
Control (STW) and Status (ZDW) words.
5 PROFINET or PROFIBUS Projects
YASKAWA TOEP YAICOM 20A Tag Generator User Guide
21