Installation – Enviro EF3 User Manual
Page 25
Installation
25
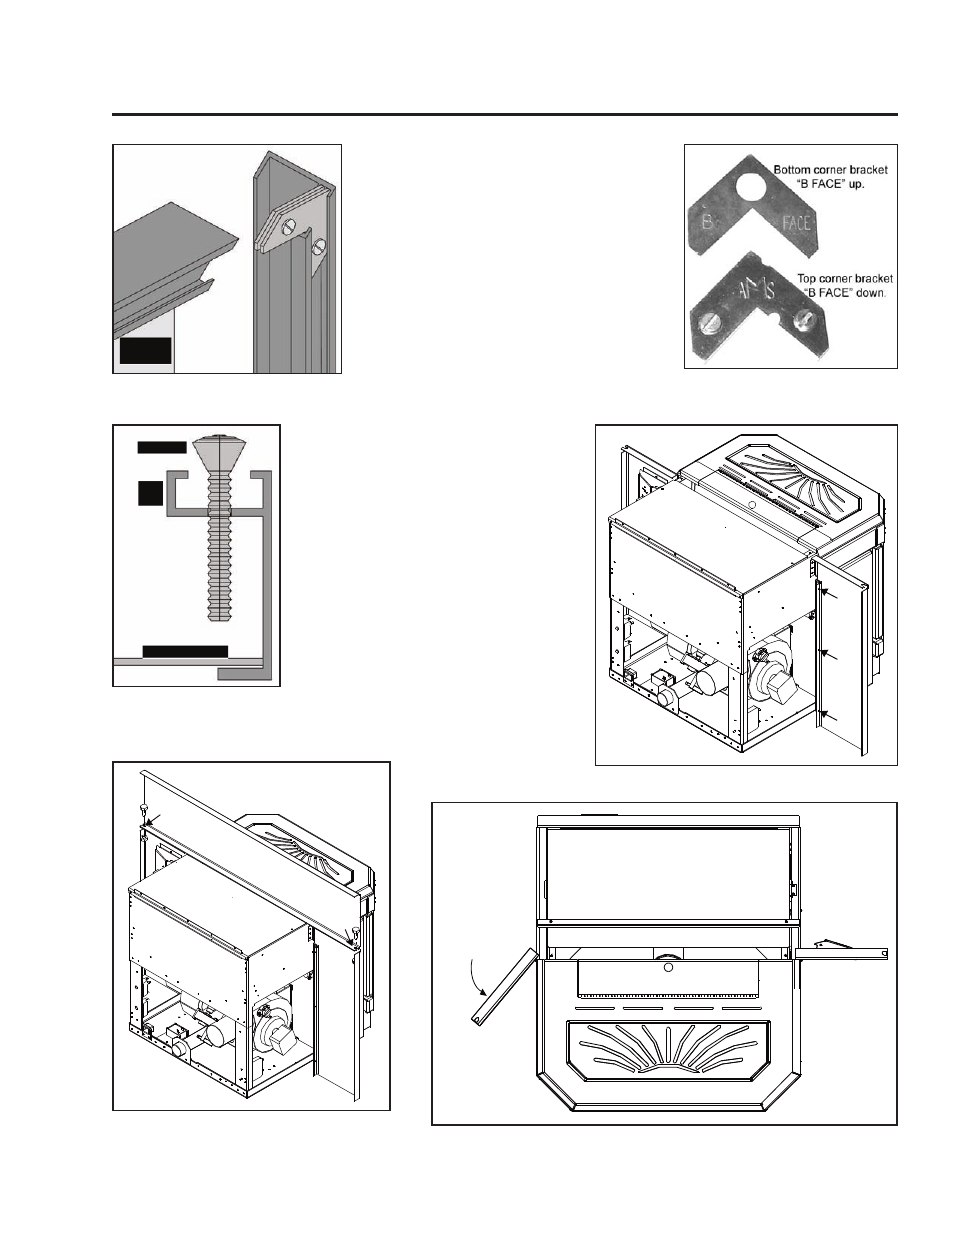
Figure 34: Corner brackets for
trim.
Figure 35: Two pieces of corner
bracket.
4. Plug the wiring harness into the control
panel (see Figure 33).
5. Loosen the front hopper lid screws and
center the top surround panel under
the hopper lid., tighten screws.
6. Insert each side panel anchor bolt
through the top panel into the
corresponding side panel holes and
tighten using a
7
/
16
” wench or socket
(refer to Figure 38).
7. Place assembled trim over the surround
assembly. On the side trims, there are
holes 2” (50 mm) from either end. Use
���� ���������
����� ���
Figure 39: Side surround panel swings forward.
Figure 38: Assembling the Surround
Panel, back view.
Figure 37: Panel placed on unit.
Figure 36: Screw to
hold the trim against
the surround.
a Phillips screwdriver to place a #8
screw 11⁄4” long in each hole and
tighten just enough to keep the
trim against the surround. (refer to
Figure 36).
REMOVAL:
When maintenance is required on the
unit the surround must be removed.
Follow steps 4 through 7 in reverse
order.
The side panel can remain attached
because they swing forward for easy
access (refer to Figure 39).