2 installing the new fan – SMA STP 60-US-10 Replacing a Defective Fan User Manual
Page 2
2 Instructions for Replacing the Fan
SMA Solar Technology AG
2
STP60-10-ATLuefter-SG-xx-10
Service Manual
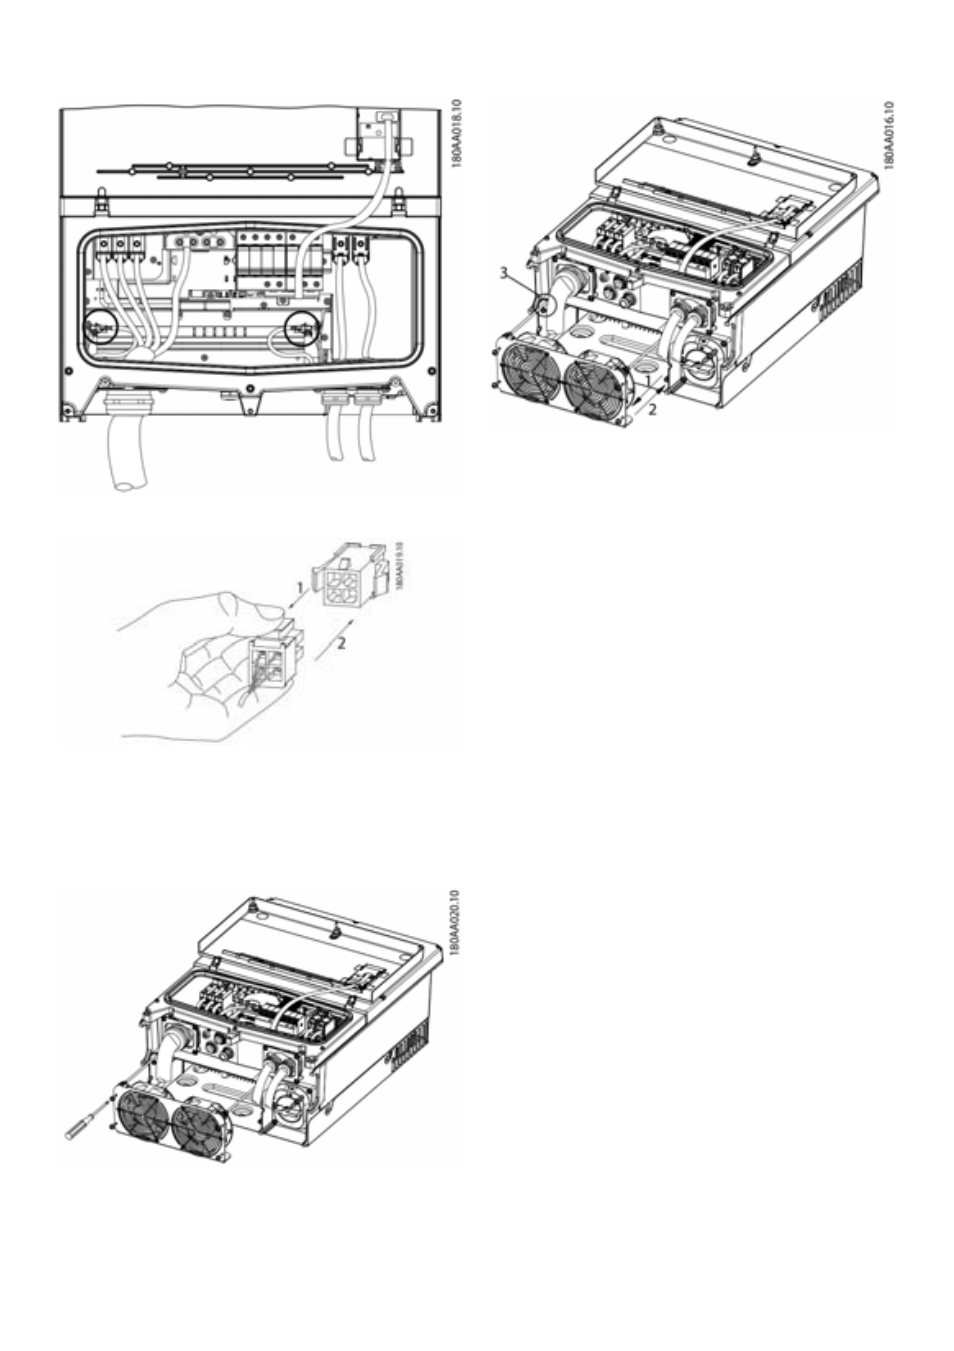
Figure 1.1
Figure 1.2
4. The fans are located on the bottom of the inverter.
Loosen the four screws (TX 20) securing the fan unit.
See figure 1.3.
Figure 1.3
5. Take out the fan unit. See (1) and (3) in figure 1.4.
Figure 1.4
2.2 Installing the New Fan
1. Insert the two black cables (one cable on each side)
through the opening at the bottom of the inverter. See
(3) in figure 1.4.
2. Insert the new fan unit. See (2) in figure 1.4. Lead the
cables in the inside of the inverter while pressing the fan
unit in the enclosure. Tighten the four screws (2.5 Nm).
3. Make sure the two plugs of both cables snap into
place. See figure 1.1 and (2) in figure 1.2.
4. Close the front cover of the inverter.
5. Tighten the three screws in the front (1.5 Nm).
6. Switch on the AC grid via the grid switch and switch on
the PV array via the installed PV load-break switch.