Suspension troubleshooting, Rear suspension set-up – Polaris 2005 RMK User Manual
Page 117

114
SUSPENSION TROUBLESHOOTING
Rear Suspension Set-Up
This chart is only a guideline to be used for initial suspension set-up. Your set-up may vary
based on your desired riding style.
Setting Initial Torsion Spring Preload (Sag Method)
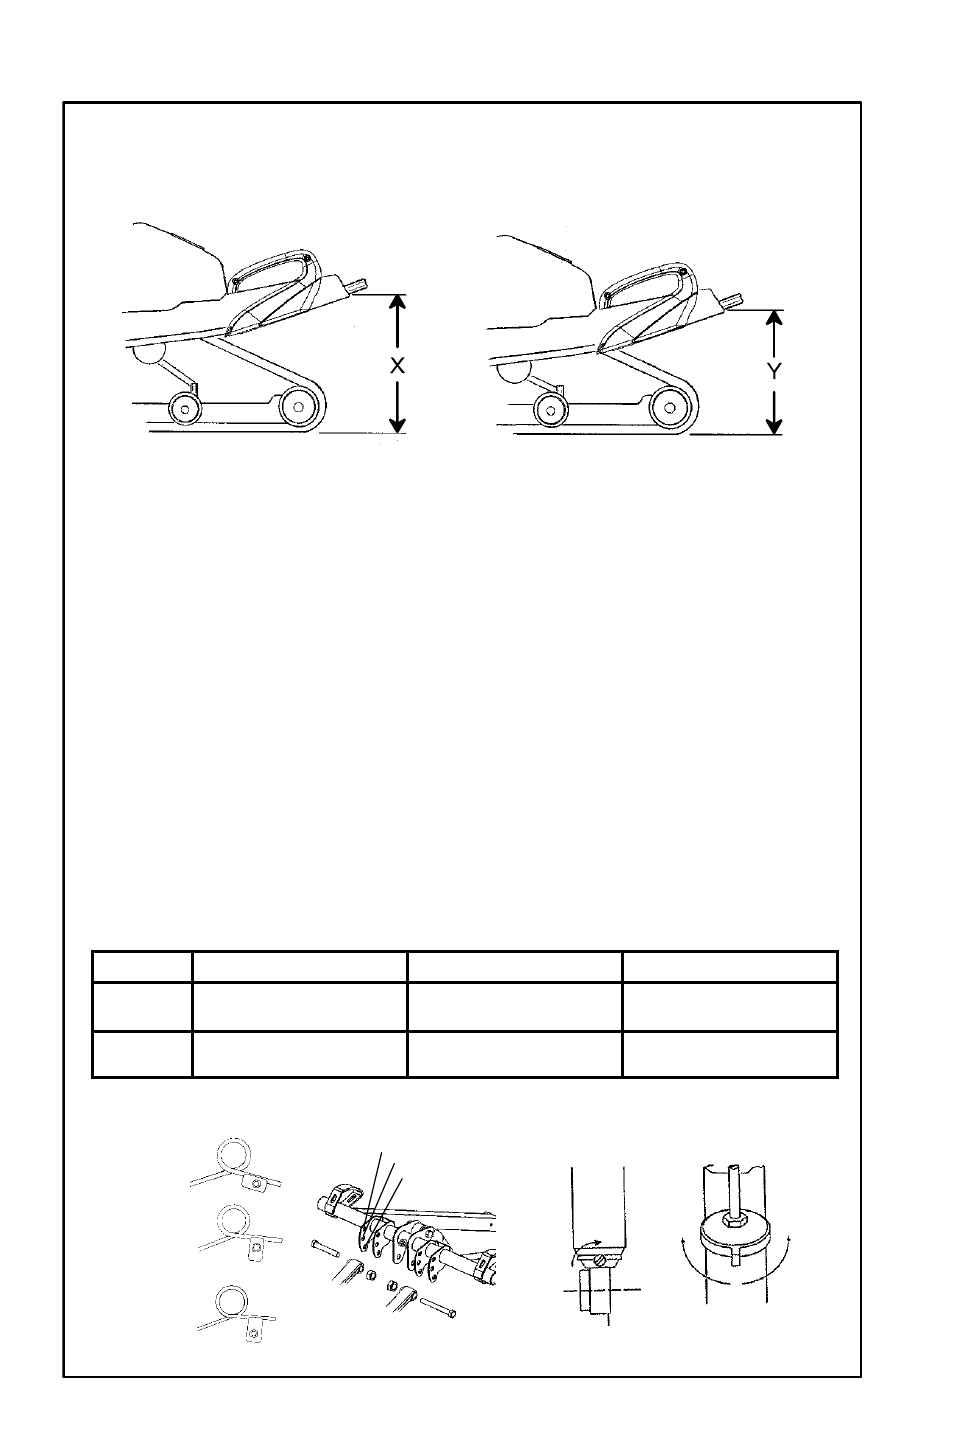
To set up the EDGE RMK rear suspension torsion spring preload, measure the distance
between the ground and rear bumper (see illustration). This measurement should be taken
with no rider and the rear suspension at full extension. This measurement, from the ground
to the rear bumper, is dimension “X”. NOTE: Sag measurements should be taken with
suspension moving freely in a warm shop or after a short warm--up ride. Rear of machine
may need to be lifted slightly to achieve full extension of rear suspension.
Next, have the rider drop down hard on the seat and bounce up and down several times,
working the rear suspension. With the rider seated, measure the distance between the
ground and the rear bumper (at the exact same location used for dimension “X”). This is
dimension “Y”.
To determine sag, commonly referred to as ride-in, subtract dimension Y from dimension
X. Therefore Sag=X-Y. Sag is adjusted by rotating the torsion spring preload cams located
on the rear torque arm (see Fig. 1). The ideal amount of sag for the EDGE RMK rear
suspension is 4″ (X-Y=4″).
If the rear suspension rides in less than 3″ or more than 5″ with the torsion spring preload
cams at their maximum range of adjustment, optional torsion springs (softer or stiffer,
respectively) may be required. This is only an initial setup, and final spring preload may
vary based on rider preference and riding conditions.
Optional Torsion Springs
Track
Soft
Standard
Firm
136″
Not applicable
7041627-067 7041628-067
.347 77_
7041629-067 7041630-067
.359 77_
144″, 151″,
156″, 159″
7042081-067 7042082-067
.347 47_
7042068-067 7042069-067
.359 47_
7042079-067 7042080-067
.378 47_
Fig. 1
Fig. 2
Fig. 3
Fig. 4
Soft/Low Tension
High Position
(Long end to front)
Standard Position
Low Position
Medium Tension
(Short end up)
Increase
Decrease
Increase
High/Firm Tension
(Long end up)
