Panel ip configuration utility, Configuring the control panel through a gateway – Grass Valley NV9000 v.1.2 User Manual
Page 8
8
Rev 1.2 • 26 Nov 14
Panel IP Configuration Utility
Operating Details
Follow these guidelines:
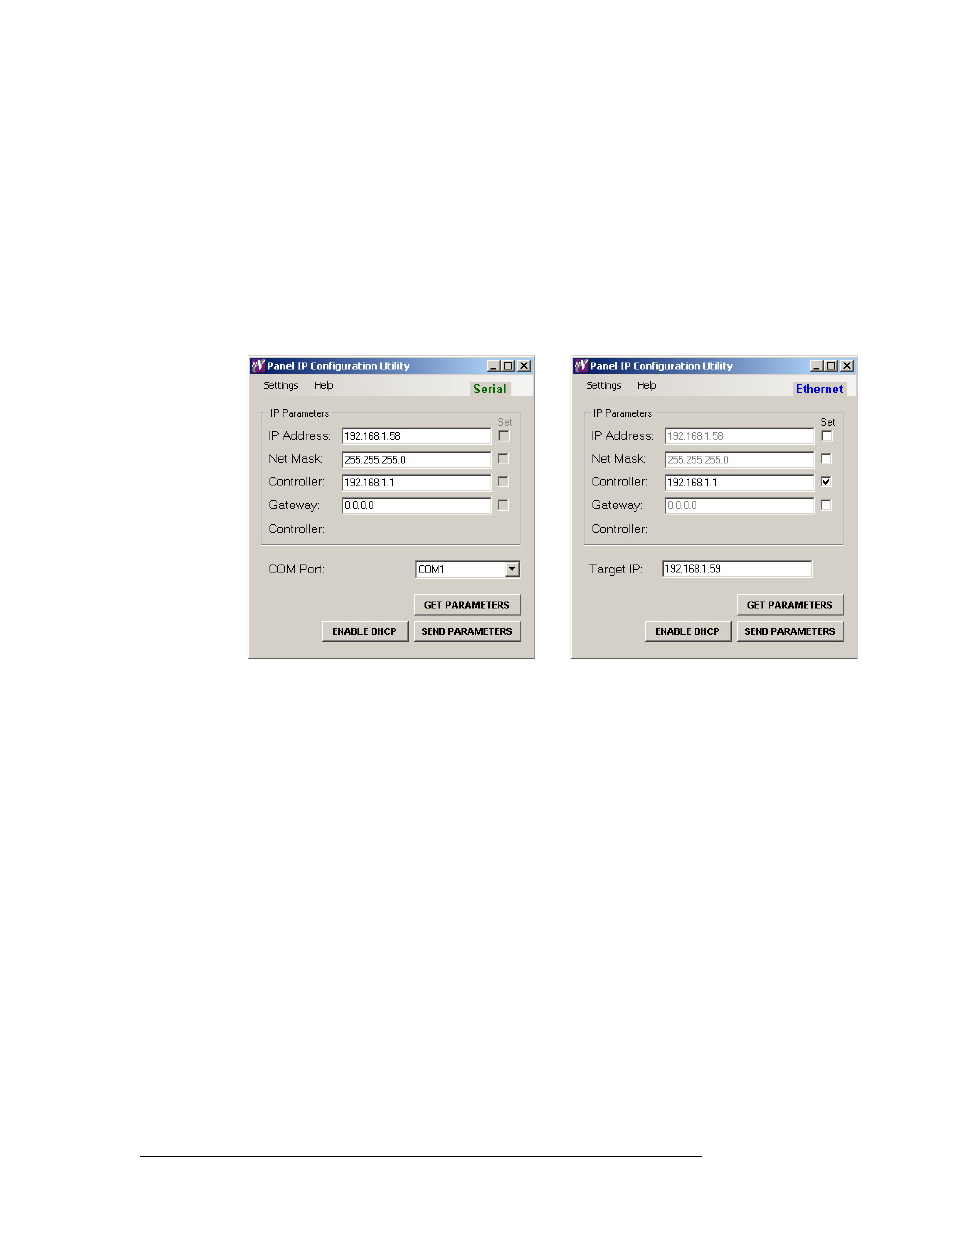
1 Choose the configuration mode.
You can make this change in serial mode or Ethernet mode.
2 Enter the new control system IP address in the ‘Controller’ text box.
Click ‘Get Parameters’. The current values of the panel’s IP configuration will display.
If you are making the change over Ethernet, you must check the ‘Set’ checkbox. You must also
enter the target IP to identify the panel of interest on the controller’s subnet. (In serial mode, the
panel is the one to which you have connected your serial cable.)
When you have finished, click ‘Send Parameters’.
In this example, we set the controller’s IP address to 192.168.1.1.
Notes
• The control system must be on the same subnet as the panel if gateway is set to 0.0.0.0.
• If Ethernet mode is in effect, use the ‘Set’ boxes and the target IP appropriately.
Configuring the Control Panel through a Gateway
If the control system and the control panel are on separate subnets, it is necessary to configure the
control panel to use the gateway which connects the two subnets together. To do this, check the
‘Gateway’ checkbox and set the value of the gateway.
1 Choose the configuration mode.
You can make this change in serial mode or Ethernet mode.
2 Click ‘Get Parameters’. The current values of the panel’s IP configuration will display.
3 Type the new gateway IP address into the ‘Gateway’ text box.
If you are making the change over Ethernet, you must check the ‘Set’ checkbox. You must also
enter the target IP for one of the panels on the controller’s subnet.
When you have finished, click ‘Send Parameters’.
Serial mode
Ethernet mode