Mounting the prm – Grass Valley 3e Student CameraMan Rev.B User Manual
Page 7
Now you can begin to connect your Student Camera System components to your CameraMan camera, and audio equipment.
Mounting the PRM
1. Mount or place the Programmable Response Module in the desired location, being sure to
leave sufficient space to allow access to the connections on the back panel.
A rackmount is also available.
2. Verify that the switch on the front of the PRM is turned OFF.
3. Mount or place the PRM power supply in a convenient location near the PRM.
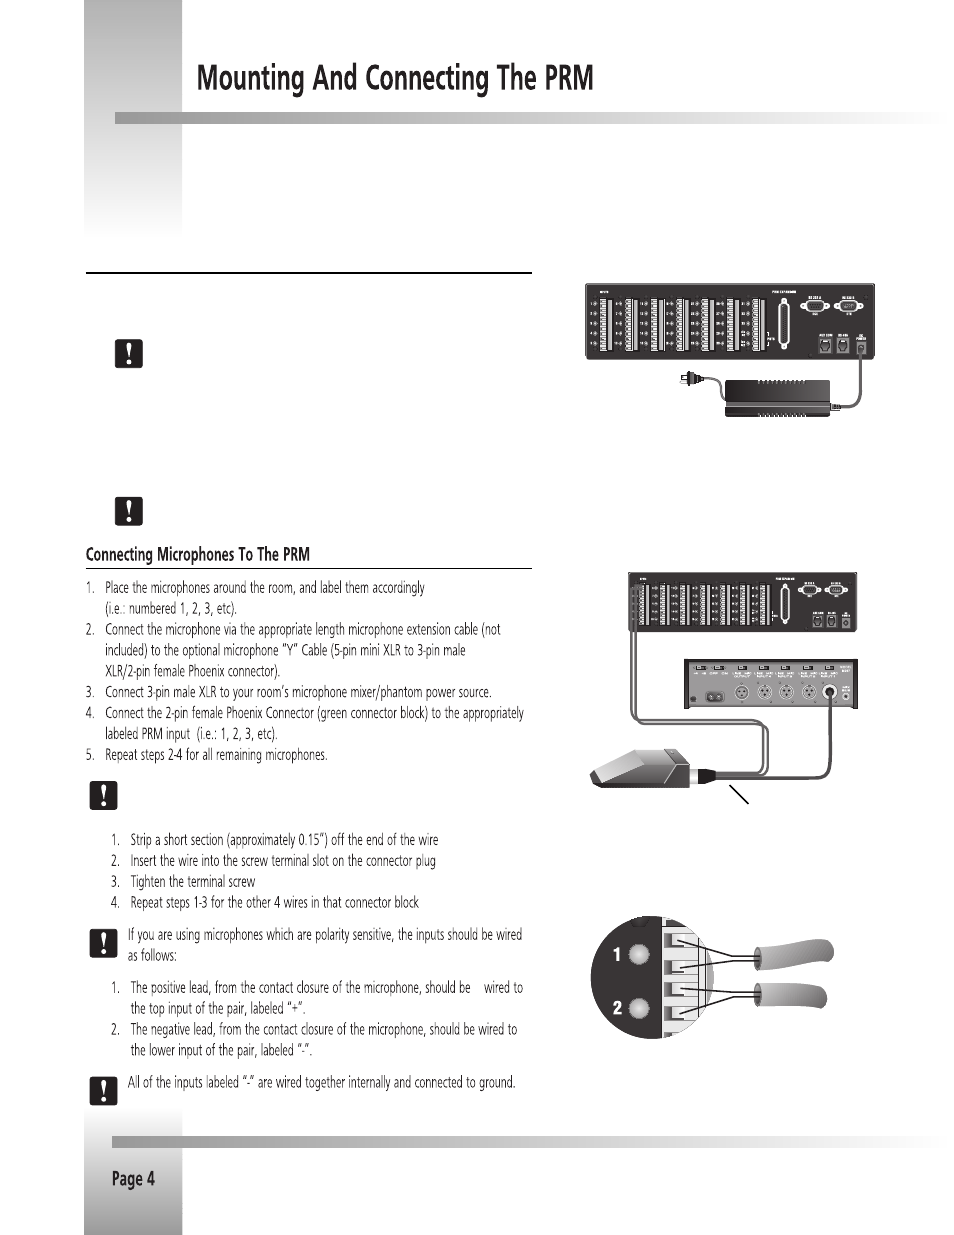
4. Plug the connector from the power supply cord into the DC POWER jack in the back of
the PRM.
5. Connect the other end of the power supply into a 100-240 VAC source.
The PRM Power Supply and CameraMan Power Supply should not be
interchanged.
If you are using non-supplied “Y” cables, follow these instructions to connect
the 2-pin female Phoenix Connector wites to the greed connector block:
3-pin male
XLR to audio
mixer with
phantom
power (not
included)
press-to-talk
microphone
Y cable
cables with
negative (-)
and positive
(+) leads
Phoenix
connector
to PRM
inputs
Microphone Inputs on the
back of the PRM
+
+
-
-
PRM with included Power Supply