ATL Telecom Delta 700 User Manual
Page 13
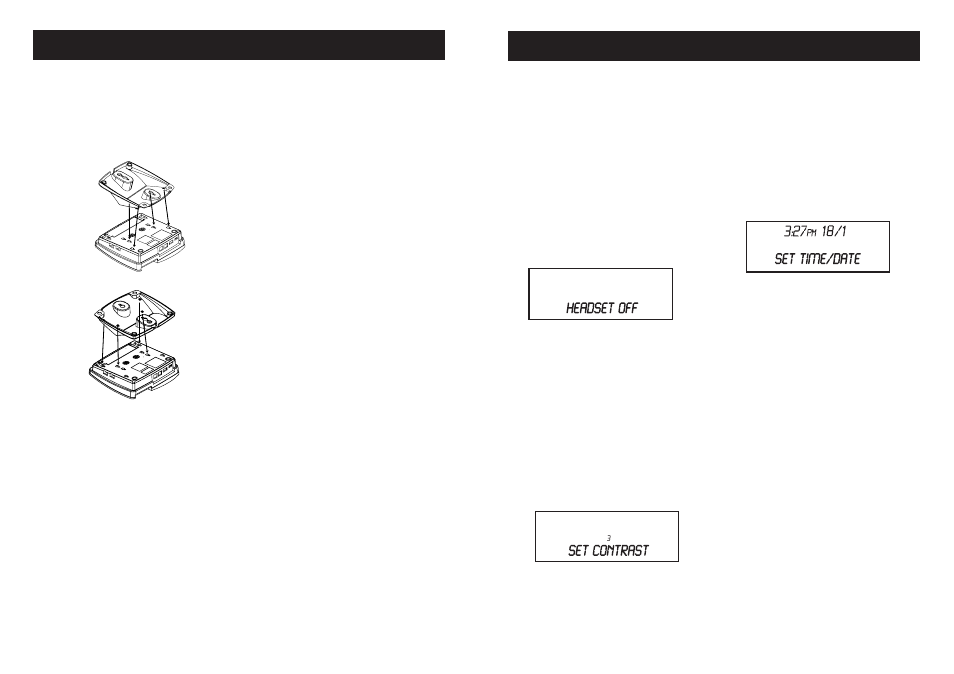
Desktop Installation
1. If you desire, you can attach the desk
wall mount to the base to elevate the
angle of view to better see the display
and keys.
2.
Connect the telephone lines as
shown in the section “Connection
your telephone lines.”
3. Plug one end of the handset coiled
cord into the handset. Plug the other
ends of the cord into the handset port
on the left side of the phone base.
4. Place the handset in the handset
cradle.
Wall Mounting
The telephone may be installed on the
studs of a standard wall phone plate or
onto two screws (not included) fastened
into the wall (see page 21 for template).
When installing screws into drywall, use
wall anchors (not included) to ensure
that the screws are secure. To install
screws properly, remove the template
(included) and use it to mark the screw
locations on the wall. Insert the screws
into the wall leaving 5mm of each screw
extending out form the wall.
1.
Connect the telephone lines as
shown in the section “Connecting
your telephone lines.”
2. Pull out and turn the handset catch
180 degrees to the wall mount
position.
3. Attach the desk/wall mount to the
base of the telephone bracket insert
hook fi rst, then lock in the others.
Make sure the cables run through
the cable grooves in the mount so
they do not impede wall mounting.
4. Slip the phone onto the wall, lining up
the wall mounting holes over the all
plate posts or screws and then slide
the telephone down so its fi rmly in
place.
5. Plug one end of the handset coiled
cord into the handset. Plug the other
end into the handset port located on
the left side of the phonebase.
6. Place the handset in the handset
cradle.
12
Programming the Telephone
Settings
Any time during telephone programming,
press [DIAL/ENTER] to advance to the
next setting, press [DELETE] to go back
to the previous setting, or press [PROG]
to move to the next setting group. Setup
will time out if idle for 30 seconds.
1. Press [PROG]. The display will say
“HEADSET OFF”. The current setting
will fl ash.
2. Press [▼] or [▲] to switch between
Headset On and Headset Off, or
use the dial pad to select (1 = On, 2
=Off).
Note
: If the headset is enabled (On),
the handsfree will be disabled.
3. Press [DIAL/ENTER] or [PROG]
to advance to next setting. “SET
CONTRAST” will display with the
current priority fl ashing.
4. Press [▼] to decrease the setting,
[▲] to increase the setting, or use
the dial pad to key in the value. The
default setting is 3. The range of
contrast settings is 1-5.
5. Press [DIAL/ENTER] or [PROG] to
advance to next setting. The display
will show “SET TIME/DATE”. The
current time and date setting will
display with the hour fl ashing. Press
[PROG] to skip setting the time and
date.
6. Press [▼] to decrease the setting,
[▲] to increase the setting, or use
the dial pad to key in the value (press
[1] for AM and [2] for PM). Press
[DIAL/ENTER] to move between
the different settings. The default
time date setting is 12:00 am 1/01.
The local clock will also be updated
automatically when a caller ID is
received.
13
TELEPHONE SETUP
INSTALLATION