Amer Networks WAP33DC User Manual
Page 10
WAP3xDC Series Wireless Indoor AP
Installation Manual
Chapter 3 AP Installation
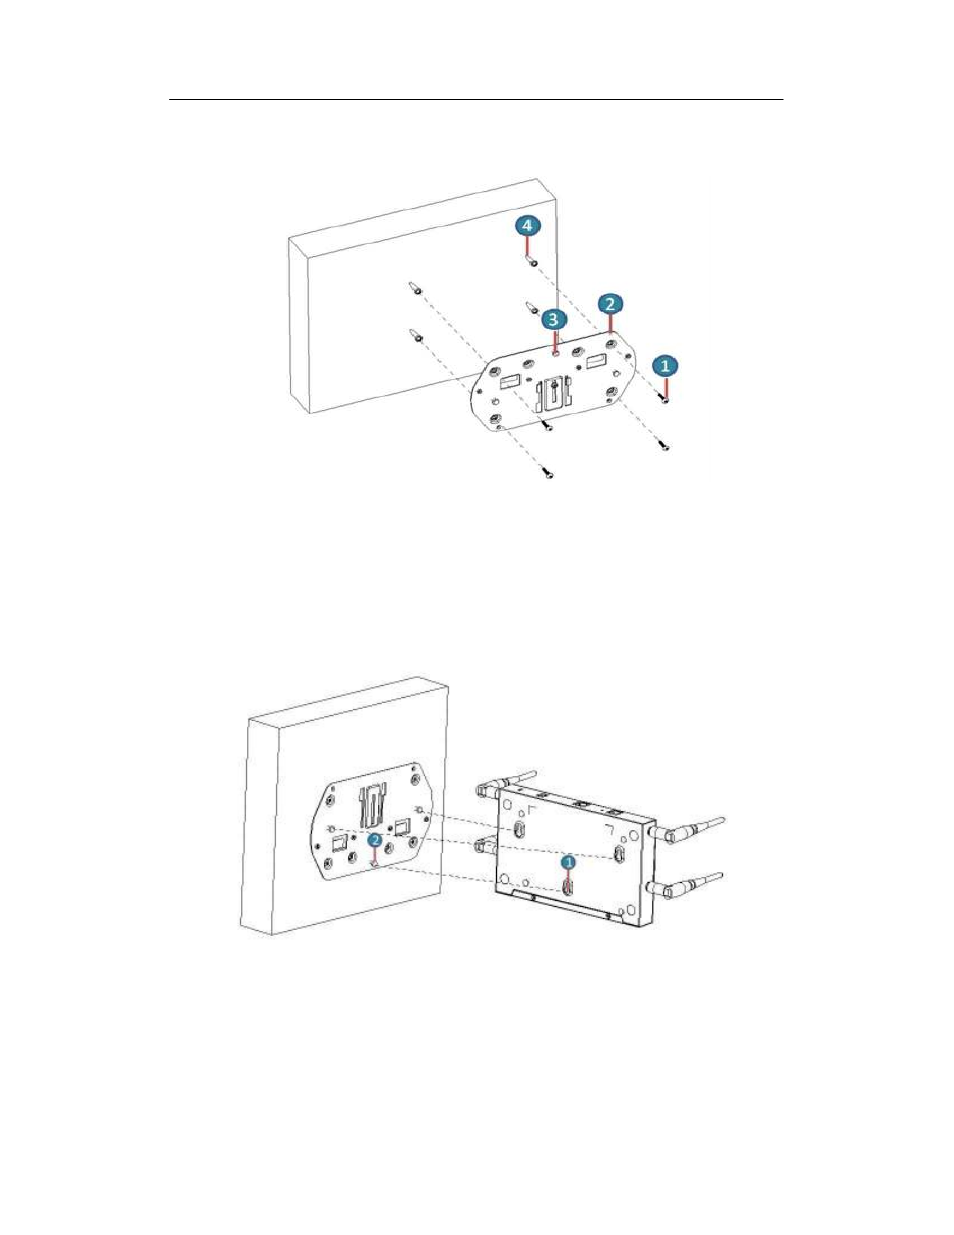
Match the screw holes to the expansion bolt holes on the wall. The screws should pass
through the installation holes of the wall mounting kit. Lock the wall mounting kit to the
wall.
Fig 3-3 Installing the wall mounting bracket to the wall
1: Expansion screws
2: Wall Mounting Kit
3: Pegs
4: Expansion bolts
(2) Match up the mounting holes on the back of AP to the position of the pegs on the wall
mounting kit:
Fig 3-4 WAP33DC back mounting holes
1: Peg Mounting Hole
2: Pegs
(3) Hang the AP onto the pegs of the wall mounting kit
(4) Place the AP onto the mounting kit, aligning the peg with the peg holes. Slide until the
pegs move to the bottom of the holes
3-4