Front panel operation, cont’d – Extron Electronics MTPX Series User Manual
Page 14
Refer also to the MTPX User’s Manual at www.extron.com.
3-7
Refer also to the MTPX User’s Manual at www.extron.com.
Defining the Audio/RS-232 Wire Pair
(and Configuring the Remote Port)
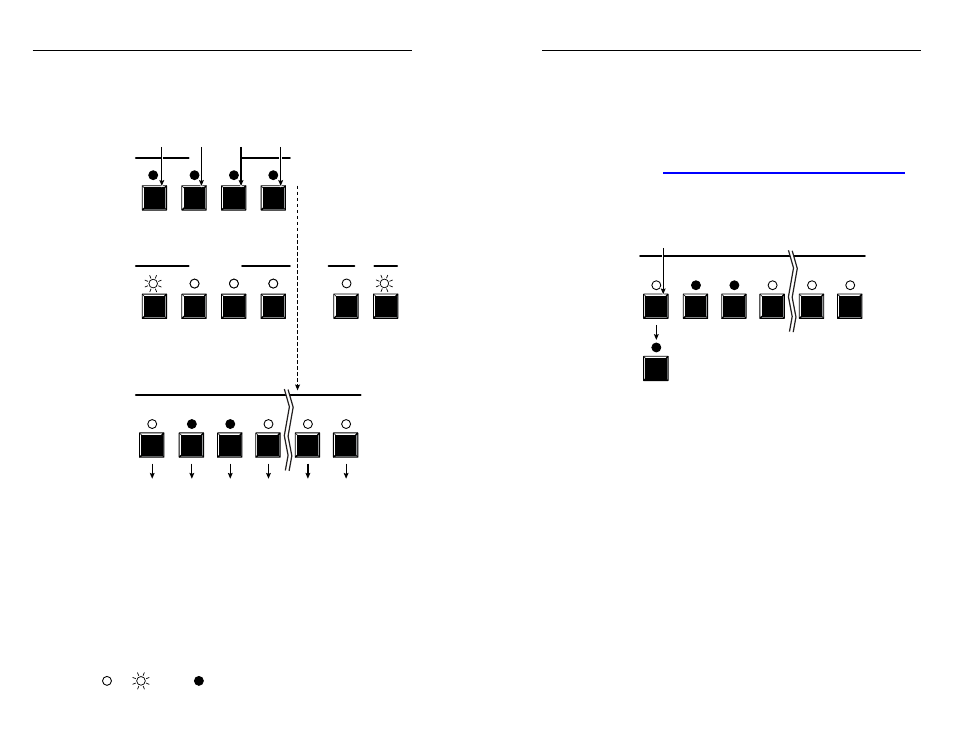
1
.
To enter Configuration mode, simultaneously press and
hold the Enter, Preset, View, and Esc buttons.
ENTER PRESET VIEW
ESC
CONTROL
ENTER PRESET VIEW
ESC
CONTROL
1
2
3
4
15
16
VIDEO AUDIO
I/O
Press and
hold the Control buttons.
Release the Control buttons.
Lit input LEDs indicate RS-232 is selected.
Unlit LEDs indicate audio is selected.
Protocol:
RS-422
RS-232
After
2 seconds
Both I/O buttons light
with one flashing.
Flashing LED indicates
the baud rate.
9600
Baud
rate:
115200
19200
38400
All Control buttons light with one flashing.
Flashing LED indicates the baud rate.
N
The Control and I/O LEDs indicate the Remote port baud
rate and protocol as shown.
The input LEDs show the audio/RS-232 wire pair
configurations.
2
.
Release the Control buttons.
N
These settings are protected when front panel Lock mode 2
is selected. You can view the configurations in Lock mode 2
but you cannot change them from the front panel; the
actions are ignored and the Enter, Video, and Audio LEDs
flash.
See “Selecting Lock mode 2 or toggling between mode 2
and mode 0” on page 3-4 to unlock the front panel.
3
.
To change an input’s audio/RS-232 wire pair
configuration, press and release the input button to toggle
that input’s configuration.
1
2
3
4
15
16
Press and release the Input 1 button
to toggle the RS-232 / audio setting.
The input changes state; in this example,
from an RS-232 input to an audio input.
N
You can also change the Remote port baud rate and/
or protocol by pressing the associated Control and/or
I/O buttons.
4
.
Press and release an output button to exit the Serial Port
Selection and Configuration mode.
= lit,
= unlit
= blinking,
MTPX • Front Panel Operation
Front Panel Operation, cont’d
3-6
MTPX • Front Panel Operation