Installation procedures, Step 1: drill the holes – ACTi Indoor Dome (B6x) on Tilted Wall User Manual
Page 3
Installation Guide
Installation Procedures
This section describes the procedures in installing the camera directly on the wall. Prepare a
screwdriver and network cable for this installation; no additional mounting accessories are
required. Before installation, make sure the wall can bear more than the weight of the camera.
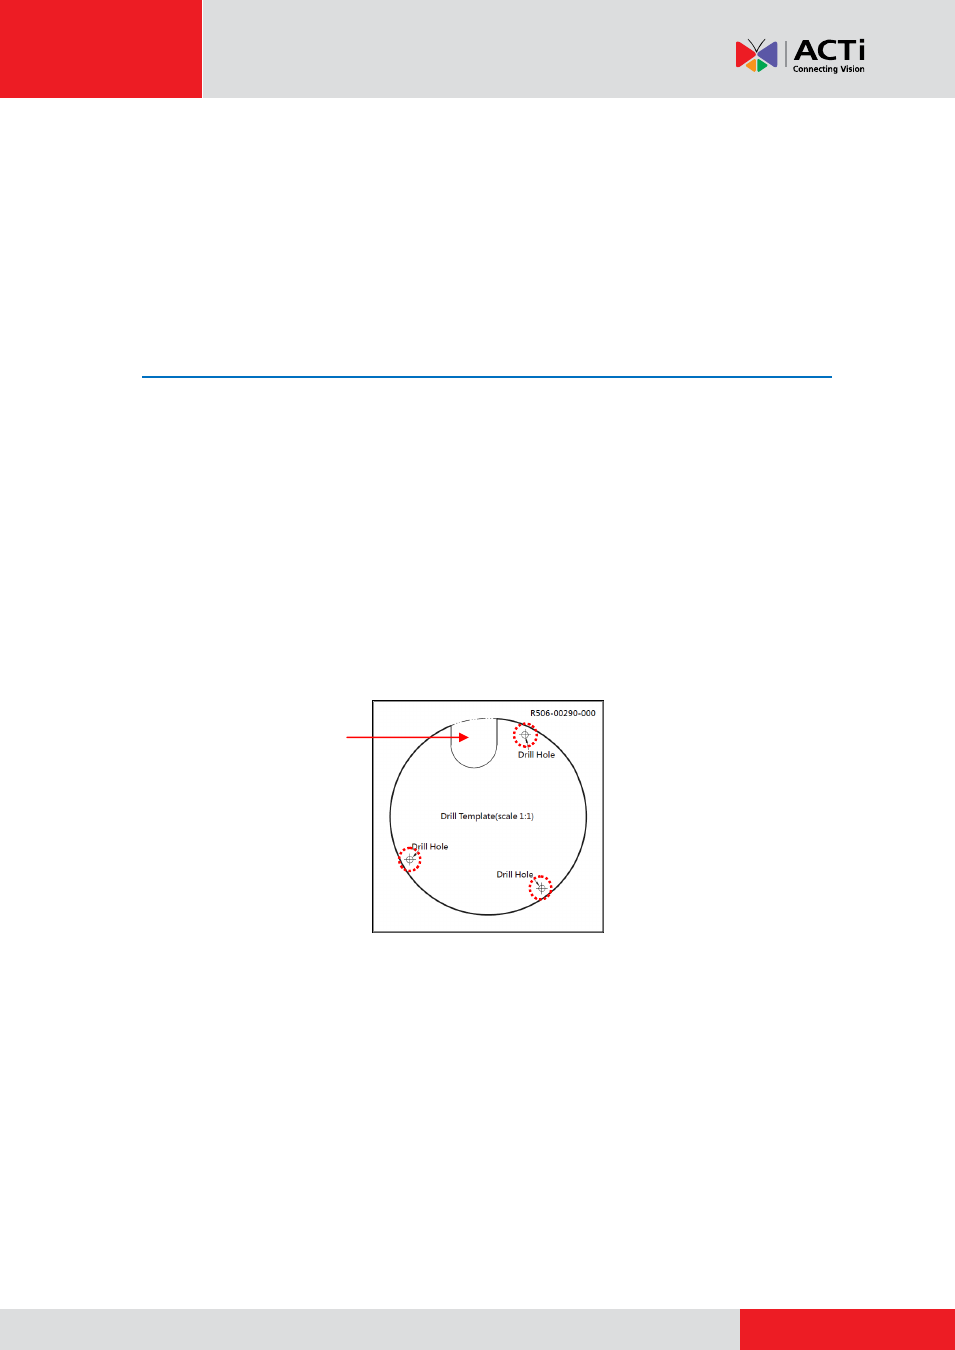
Step 1: Drill the Holes
Before drilling the holes on the wall, note the direction of the connectors side of the camera,
which is also the opposite side of the camera logo. This influences the camera placement and
where you should drill the hole where the cables will pass through or how the cables will go along
the wall.
1.
Attach the supplied drill template sticker on the surface according to the preferred orientation.
2.
Determine how the cables will be routed:
pass through the surface
or
along the surface
.
If the cables will pass through the surface
, drill the cable hole and the three (3)
screw holes on the surface.
If the cables will be routed along the surface
, just drill the three (3) screw holes on
the surface.
3.
Detach the drill template sticker from the surface and insert the plastic plugs into the screw
holes.
Cable hole