Timex 084 User Manual
Page 2
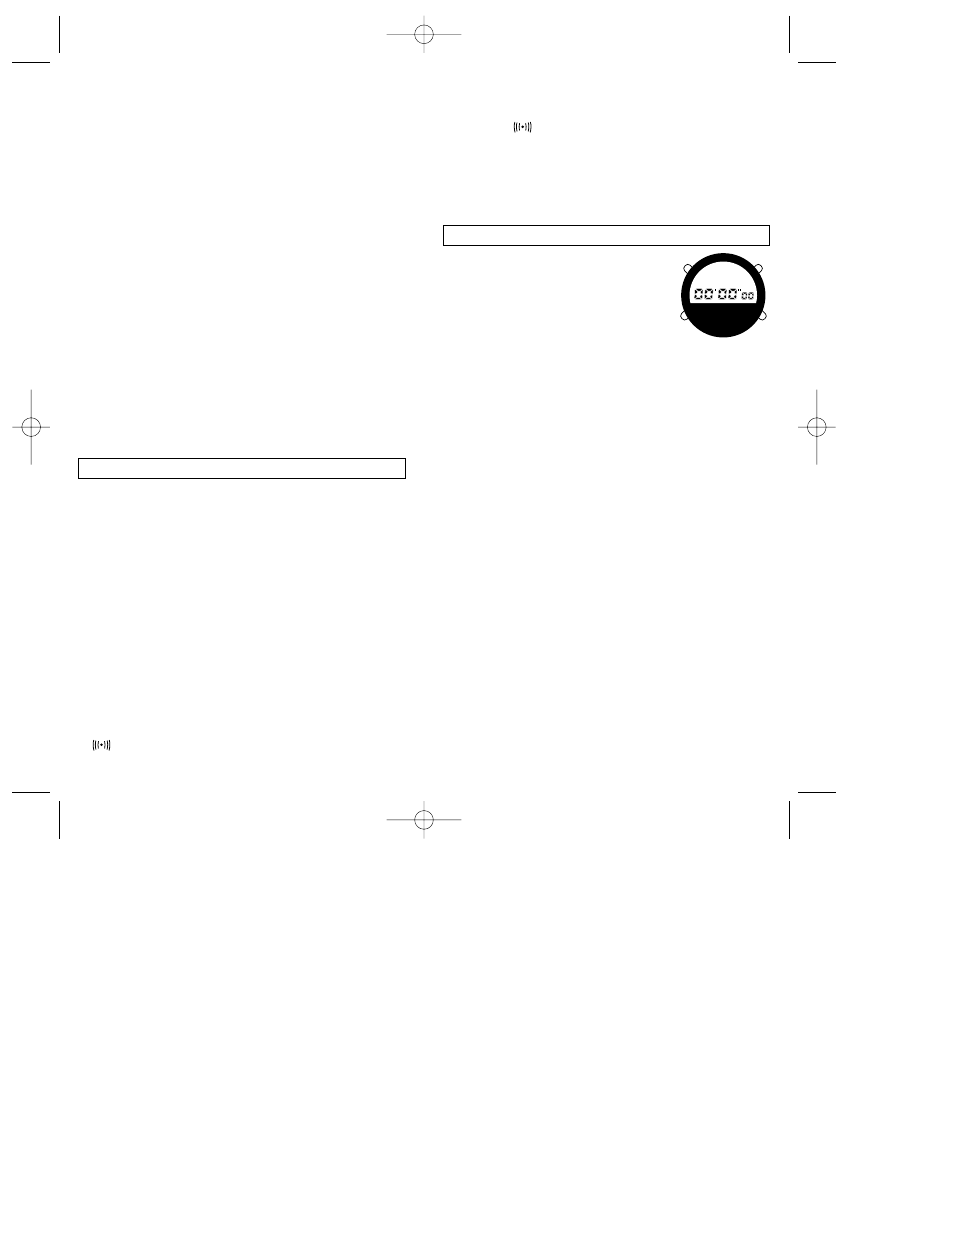
SECTION 7 – HOW TO USE THE CHRONOGRAPH
From NORMAL TIME press MODE twice
to view the chronograph (stopwatch)
display.
1. Press RESET/LIGHT to set the display to
00'00"00.
2. Press START/STOP to start the
chronograph.
3. Press
START/STOP
to stop the chronograph.
4. Press RESET/LIGHT to clear the chronograph.
SPLIT MODE: Split-time is used to mark the times of multiple
finishes (first place, second place, etc.) and lap times.
1. Press START/STOP to start the chronograph.
2. Press RESET to record lap time or first finish (digits stop
advancing but the chronograph continues running.
3. Press RESET to release lap time.
4. Press RESET to record second lap time or second finish.
5. By pressing START/STOP the chronograph will stop running.
6. Press RESET for the total elapsed time.
7. Press RESET to clear the chronograph.
TO RECORD ONLY FIRST AND SECOND PLACE FINISHES:
This is the best way to record the finish times if there are only two
competitors.
1. Press START/STOP to start the chronograph.
2. Press RESET to record first place finish. The chronograph
continues running.
3. Press START/STOP to record (but not view) second place
finish.
4. Press RESET to view second place finish.
5. Press RESET to clear the chronograph.
NOTE:
A) YOU MAY USE ANY OTHER WATCH MODE WHILE THE
CHRONOGRAPH IS RUNNING.
B) IF THE INDIGLO
®
NIGHT-LIGHT IS USED WHILE IN THE
CHRONOGRAPH MODE, A SPLIT-TIME WILL BE
DISPLAYED. TO RETURN TO THE ACTUAL ELAPSING TIME,
PUSH THE BUTTON AGAIN.
NOTE:
A) TO DEACTIVATE THE ALARM BEFORE IT SOUNDS. PRESS
START/STOP WHILE IN THE ALARM MODE. THE ALARM
SYMBOL WILL DISAPPEAR.
B) WHEN THE ALARM SOUNDS, IT WILL CONTINUE FOR
APPROXIMATELY 20 SECONDS UNLESS DEACTIVATED BY
PRESSING ANY BUTTON.
C) YOU MAY USE ANY OTHER WATCH MODE WHILE THE
ALARM IS ARMED.
HOURLY CHIME: When viewing the NORMAL TIME display,
press START/STOP to set the hourly chime. The colon remains
constantly displayed when the chime is “OFF”, or flashes when the
chime is set to “ON”.
SETTING THE ALARM: From NORMAL TIME press MODE once.
“ALM” will flash on the display.
1. Press SET and hold for 2 seconds. The hour will flash.
2. Press START/STOP to advance the hour. In the 12-hour format,
look for the “A” for AM or the “P” for PM and set the hour
accordingly.
3. Press MODE to change from hours to tens of minutes. The tens
of minutes digit will flash.
4. Press START/STOP to advance the tens of minutes.
5. Press MODE to change from tens of minutes to single minutes.
6. Press START/STOP to advance the the single minutes.
7. Press SET after adjustments are completed.
8. Press START/STOP to activate the alarm. The alarm symbol
will appear.
9. Press MODE twice to return to NORMAL TIME.
3. Press START/STOP to advance the minutes from 0 through 9.
4. Press MODE to change from single minutes to tens of minutes.
The tens of minutes digit will flash.
5. Press START/STOP to advance the tens of minutes from 0
through 5.
6. Press MODE to change from tens of minutes to hours. The
hours digit will flash.
7. Press START/STOP to advance the hours. Look for the “P” for
PM or the “A” for AM marking and set the hour accordingly.
NOTE: 12/24 HOUR TIME IS SELECTED BY PRESSING
RESET/LIGHT
ONLY
WHEN THE HOURS MARKER IS
FLASHING. THE “A” OR “P” WILL DISAPPEAR WHEN THE
WATCH IS SET TO 24-HOUR TIME.
8. Press MODE to change from hours to month. The time will
disappear and the number of the month will appear and flash.
9. Press START/STOP to advance the month digit.
10. Press MODE to change from month to date. The date will flash
in the upper right corner.
11. Press START/STOP to advance the date.
12. Press MODE to change from date to day. The day marker will
flash.
13. Press START/STOP to move the day marker until it is flashing
under the appropriate day of the week.
14. Press SET after adjustments are completed.
SECTION 6 – HOW TO SET THE HOURLY CHIME AND ALARM
084Instr 1/17/97 3:46 PM Page 3