Soundtube RSi Series User Manual
Page 2
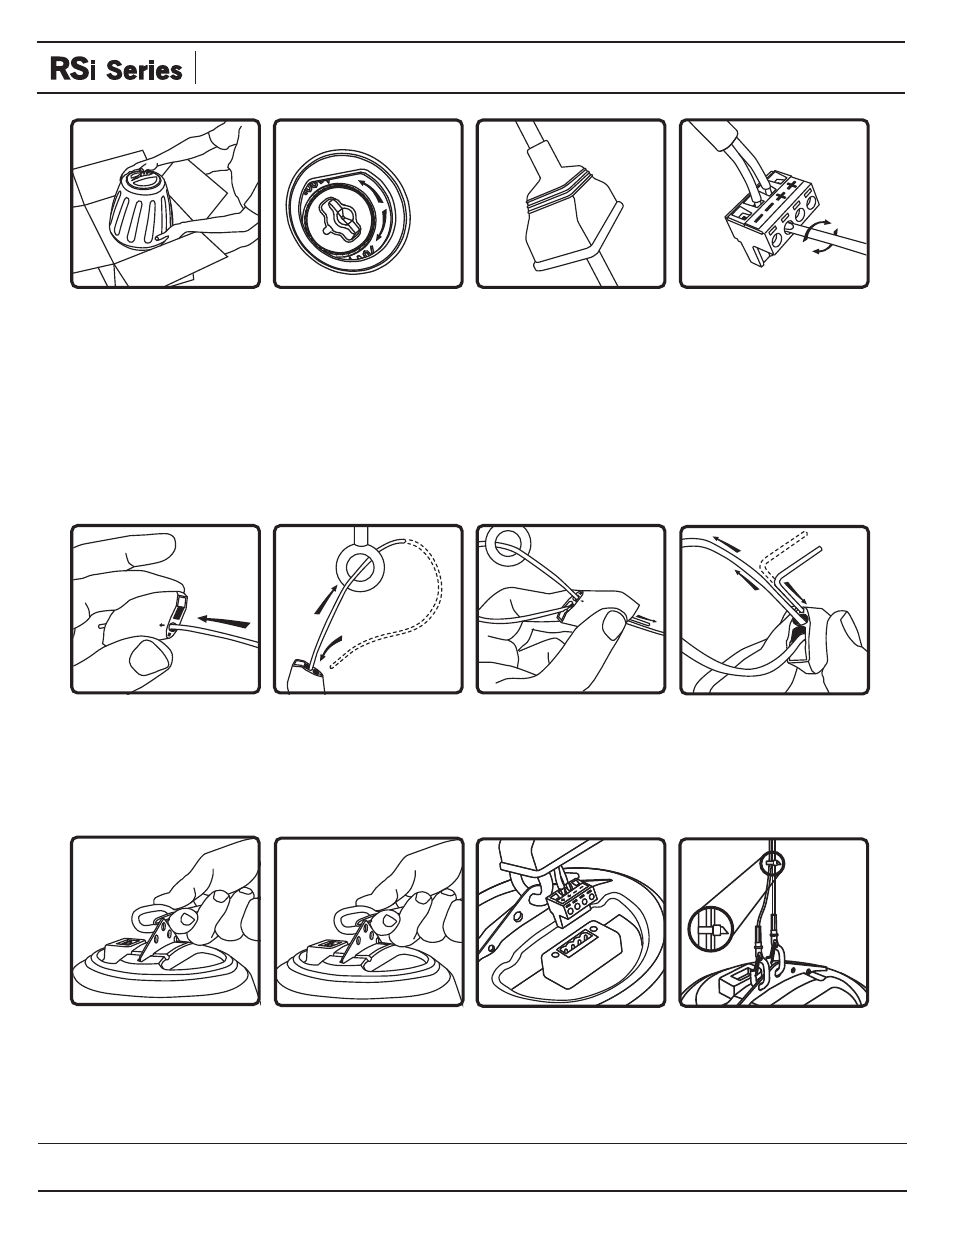
1. Unpack speaker and
SpeedClamp™ mounting
hardware.
2. Select the tap position by
removing the rubber plug on
grille to access rotary switch.
Switch is preset to maximum
tap setting in 70.7 V mode.
Select desired setting and
reinsert rubber plug. Note: The
grille-mounted tap switch
cover is keyed; be sure flat
edge of plug lines up with flat
edge of hole in grille.
3. Slip terminal weather
boot over signal wire. For
environmental applications,
put RTV silicone around
nipple and base when
installation is complete.
4. Connect signal wire to
4-pin Euroblock plug. Tighten
unused terminal screws. Use
inside positive and negative
inputs for either voice coil or
distributed systems. For daisy
chaining, use outside positive
and negative terminals.
9. Attach hanging cable to
the center hole in the
speaker hanging bracket.
11. Insert 4-pin Euroblock
plug into Euroblock jack on
rear of speaker. Connectors
are keyed for polarity.
12. Use zip or twist-lock ties
to secure safety cable & signal
wire to main hanging cables.
Cable cover available for
asthetic applications (SLT-10).
5. Thread hanging or safety
cable through SpeedClamp™
mechanisms as shown.
7. Thread cable end(s)
through SpeedClamp™
mechanisms as shown.
6. Attach the hanging cable
by securing it and safety
cable to structure as shown.
10. Attach the safety cable to
one of the secondary holes in
the hanging bracket.
8. Adjust speaker hanging
height with SpeedClamp™
mechanism. Pull to tighten &
insert release key (small hex
wrench) into SpeedClamp ™
as shown to loosen or adjust.
Install Instructions For:
RS4-EZ, RS400i, RS500i, HP590i, RS600i, HP690i, RS800i, HP890i, RS1001i-II, HP129i & HP1290i speakers
SoundTube also provides optional surface mount brackets for both the RS and HP lines of products.
Installation instructions for these accessories are included with specific accessory packaging.