Sim2 HT300 E-Link User Manual
Page 23
23
����������
ORIENTATION
Select the option that best describes the installation i.e. desktop
front, ceiling front, desktop rear and ceiling rear.
1
2
CLA
SS 1
LAS
ER P
ROD
UCT
3
-
Fig. 23
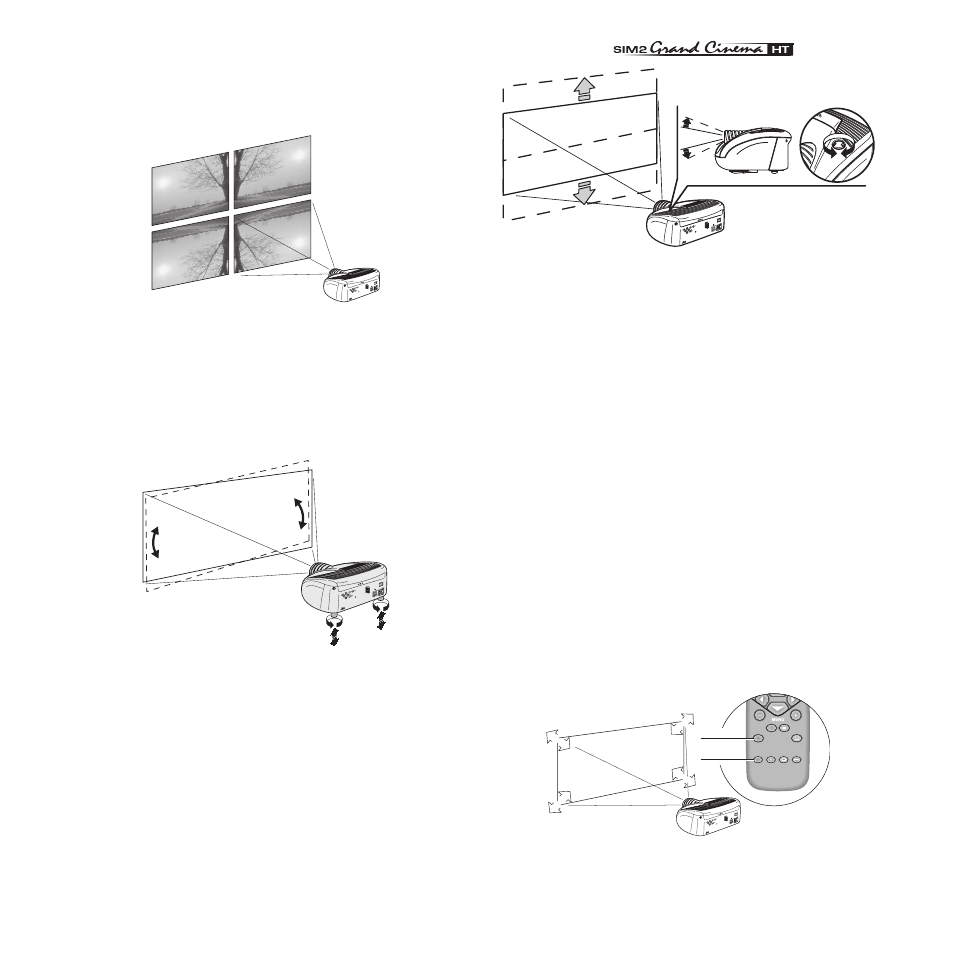
HORIZONTAL/VERTICAL KEYSTONE
To obtain maximum quality of the projected image, we recom-
mend the installation of the projector on a level platform parallel
and central to the screen.Adjust the feet underneath to obtain
a level position, lining up the base of the projected image to
the base of the projection screen (Fig. 24).
1
2
CLAS
S 1 L
ASER
PRO
DUC
T
3
-
Fig. 24
If the projected images needs to be centred horizontally, the
manual lens shift adjustment allows the projected image to be
moved vertically, up or down, in relation to the centre of the
screen; the maximum adjustment being equal to half the height
of the image in either direction (Fig.25).
1
2
CLA
SS 1
LASE
R PR
ODU
CT
3
-
Fig. 25
In the event you are unable to centre the image within the screen
area, tilt the projector until the image is correctly positioned. Any
keystone error can be removed by the Keystone adjustment
in the Set up menu.
The keystone adjustement helps to compensate possible ho-
rizontal tilts of the projector.
LENS
The
Zoom adjustment impacts on the motorized zoom lens
allowing to increase or decrease the dimension of the projected
image. The
Focus adjustment impacts on the motorized lens
focus, allowing to obtain the highest definition on the projected
image, an accurate focus setting should allow the viewer to
distinguish each pixel that create the image one from another. If
the video signal used is not suitable for this purpose,the HT 300
E-LINK system provide two test pattern ,each available with the
ajustment mentioned above,in order to select the appropriate
value for
Zoom and Focus.
This test pattern is displayed by pressing the • key,once the
right adjustments are reached using the fl and ‡ keys,the
test image can be easly removed pressing again the • key of
the remote control.
ZOOM
ZOOM
ZOOM
ZOOM
FOCUS
FOCUS
FOCUS
??
?
ZOOM
FOCUS
1
2
CLASS 1 LA
SER PR
ODUCT
3
-
Fig. 26