8 on screen menu, Fig. 18a fig. 18b – Sim2 HT300 E-Link User Manual
Page 18
18
����������
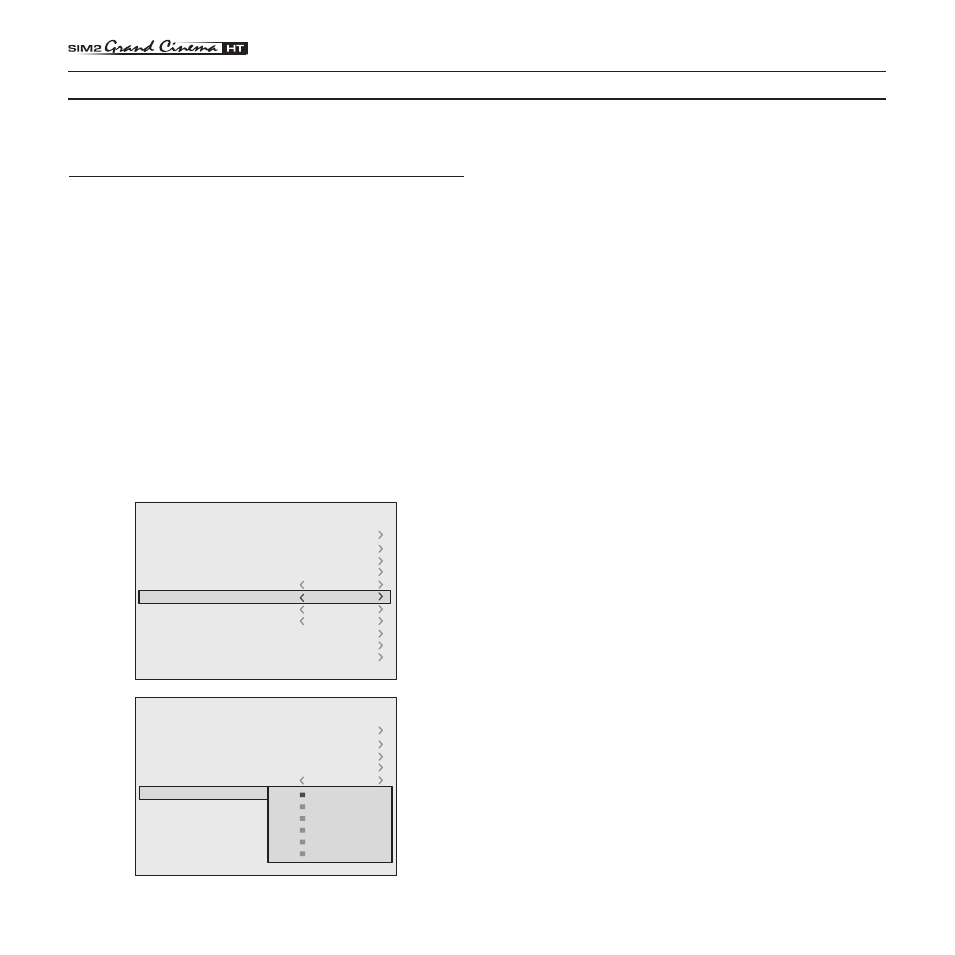
Fig. 18a
Fig. 18b
8 ON SCREEN MENU
INPUTS
The input selection menu (Inputs) is called by pressing 0 on the
remote control and, when no other menu is displayed, using the
·
and ‚ keys on the keypad. To select an input, scroll the list
with the · and ‚ keys until the desired input is highlighted, then
press ‡. Display of the input selection menu is terminated
by pressing the ESC key, or when the time allowed for displaying
the on-screen menu has lapsed (set in the Set-up Menu).
Input 5 can accept RGB and YCrCb signals with a scan fre-
quency up to 32Khz.
Inputs 6, 7 and 8 can receive RGB and YCrCb signals, at 15
kHz, 32 kHz or higher. The association between the input and
the type of signal is made from the pull-down menu that appears
on the right of the < symbol after pressing the fl key (Fig. 18b).
In the pull-down menu it is also possible to choose the hori-
zontal frequency or use the AutoSync feature;in this case the
system detect the horizontal frequency signal (15KHz,32KHz
or higher) automatically.
Inputs
1
VIDEO 1
2
VIDEO 2
3
S-VIDEO 3
4
S-VIDEO 4
5
COMP/RGB 5
6
COMP/RGB 6
7
COMP/RGB 7
8
COMP/RGB 8
9
GRAPH RGB 9
10
GRAPH RGB 10
11
DVI-D 11
12
HDMI 12
1
2
3
4
5
YCrCb 32kHz
6
RGBS 15kHz
7
YCrCb
8
YCrCb 15kHz
9
10
11
YCrCb
12
Inputs
1
2
3
4
5
YCrCb 32kHz
6
RGBS 15kHz
7
YCrCb
8
YCrCb 15kHz
9
10
11
YCrCb
12
YCrCb AutoSync
YCrCb 15KHz
YCrCb
RGB AutoSync
RGB 15KHz
RGB
1
VIDEO 1
2
VIDEO 2
3
S-VIDEO 3
4
S-VIDEO 4
5
COMP/RGB 5
6
COMP/RGB 6
7
COMP/RGB 7
8
COMP/RGB 8
9
GRAPH RGB 9
10
GRAPH RGB 10
11
DVI-D 11
12
HDMI 12
All system functions can be activated from the keypad or remote control with the aid of a practical and comprehensive system
of on screen menus.
Input 11 is capable of receiving YCrCb or RGB signals coming
from DVI-D sources.
The selection should be made from the drop menu following
the indications described above.
After selecting the source signal (by means of the · and ‚
keys), press MENU+/MENU - to confirm and close the pull-down
menu; the value you have just set will be displayed on the right
of the < symbol.
As with the other inputs, you can now select the input just set
by pressing the ‡ key.
During the short time it takes to find the signal, a box appears
showing the signal requested. As soon as the signal is shown
in the box additional information is displayed concerning the
video standard (for video signals) or resolution (for graphic
signals), and format.
Fom the SETUP menu it is possible to choose to visualize or not
this information, for more details check the “SOURCE INFORMATION”
in “MENU” section.