Introduction, Setting up the rs‐232c serial connection – Sim2 RS‐232 Control User Manual
Page 3
SUPERLUMIS
RS‐232 Control
3
1. Introduction
This document describes how to interface the SUPERLUMIS projector with a Home Theatre control system (or a PC)
over a direct serial connection.
1.1.
Setting up the RS‐232C Serial connection
Follow these steps to configure the control system (or the PC) serial port.
Switch off the control system (or the PC) and the projector.
Use a standard straight
1
serial cable with 9 pin female to the control system (or the PC) and 9 pin male to the
Projector:
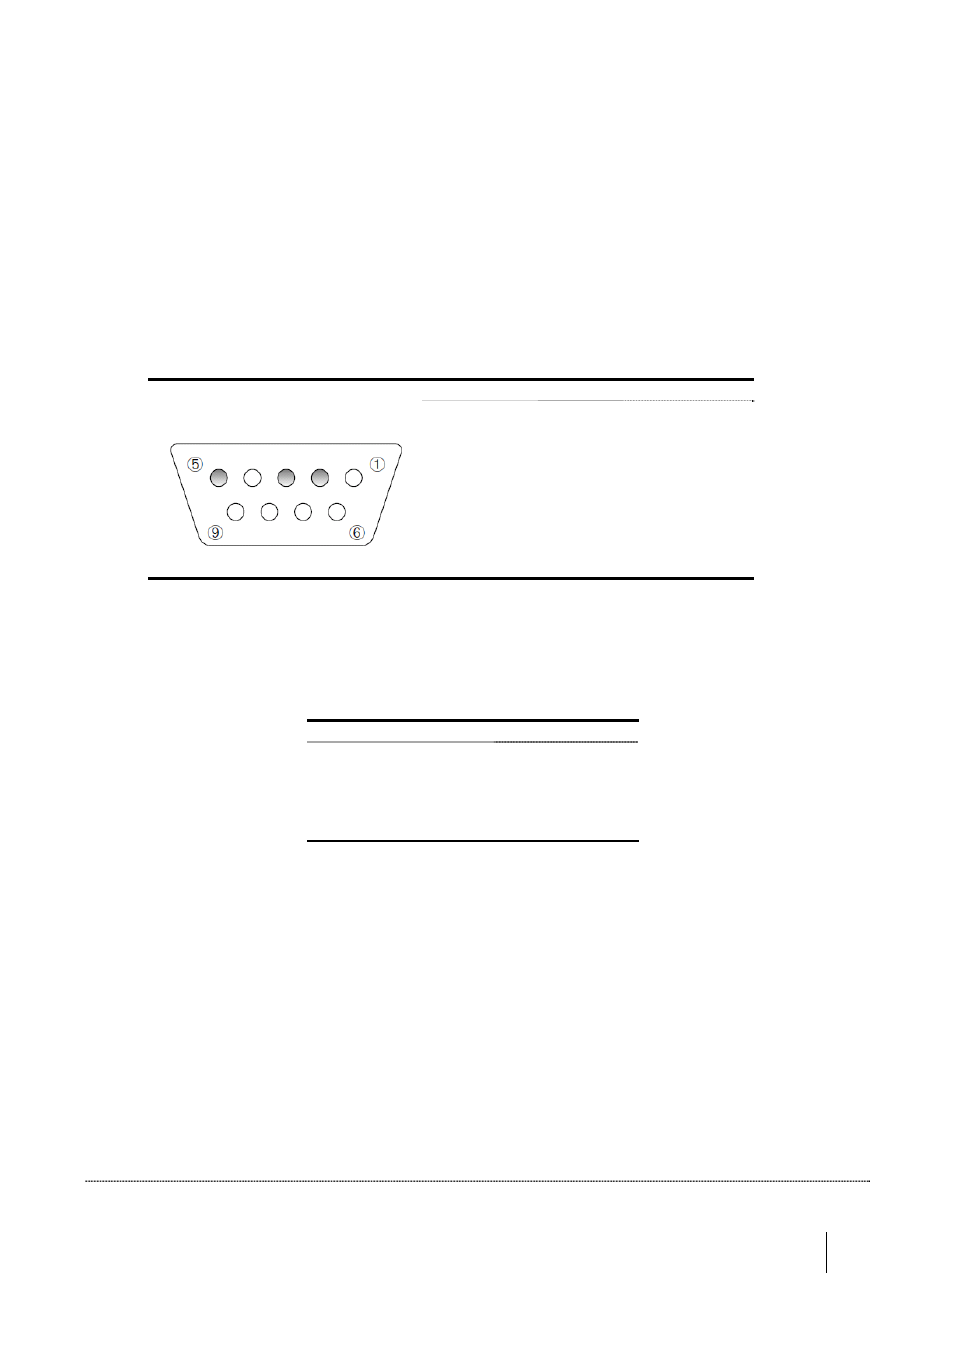
RS‐232C Control Port
Pin No
Signal
Definition
1
‐
Not Used
2
TD
Transmit Data
3
RD
Receive Data
4
‐
Not Used
5
GND
Ground
6
‐
Not Used
7
‐
Not Used
D‐SUB 9‐pin (female)
8
‐
Not Used
9
‐
Not Used
Make sure the distances between equipment do not exceed the specifications of the interface (15 m or 50
feet).
Switch on the control system (or the PC) and, after start up, switch on the projector.
Set the Serial Port Parameters as shown below:
Communication Parameters
Parameter
Value
Transfer Rate
19200 bps
Data Bits
8
Parity Bit
None
Stop Bit
1
Flow Control
None
Set the control system (or the PC program) Communication Mode to Binary (or Hex). ASCII mode is not
supported.
Set the control system interface (or the PC communication program) Display Mode to Hex.
1
A cable that connects identical pin numbers in each connector: pin 2 connects to pin 2, pin 3 to pin 3 and pin 5 to pin 5.