Initial operation, Operation – REMKO ETF 220 User Manual
Page 8
8
Initial Operation
Prior to initial operation or to meet local requirements,
the air intake and outlet openings must be inspected for
foreign bodies and the air intake filter for dirt.
Blocked or dirty grilles and filters must be cleaned im-
mediately. See chapter “Maintenance and Service“.
Operation
Control panel
The display and the buttons for operating the unit are lo-
cated on the control panel.
Unit operating modes
The unit has four operating modes:
1. AUTOMATIC 45%-55%
In this operating mode, the unit dehumidifies for one
hour at a low fan speed regardless of the humidity
measured in the room. After this time period has
elapsed, the unit dehumidifies automatically. The re-
quired fan speed is set automatically by the unit.
2. COMFORT 55%-65%
If the integrated sensor measures a humidity level of
more than 65%, the unit dehumidifies.
If the humidity falls below 55%, the unit no longer de-
humidifies. If the humidity rises above 65%, the unit
dehumidifies again. The fan speed can be set as
necessary.
3. MAXIMUM
In this operating mode, the unit dehumidifies continu-
ously after being switched on regardless of the hu-
midity measured in the room. The fan speed can be
set as necessary.
4. VENTILATION
In this operating mode, the air in the room is circu-
lated. The unit does not dehumidify. The lowest fan
speed is set.
Important instructions prior to operation
◊
Extension cords must be sufficiently thick.
◊
Extension cords can only be used if they are com-
pletely extended or rolled up!
◊
The condensation collector must be inserted prop-
erly.
Otherwise the unit does not work!
At room temperatures below 10 °C and a relative
humidity of less than 40 %, we no longer guaran-
tee that the unit performs efficiently.
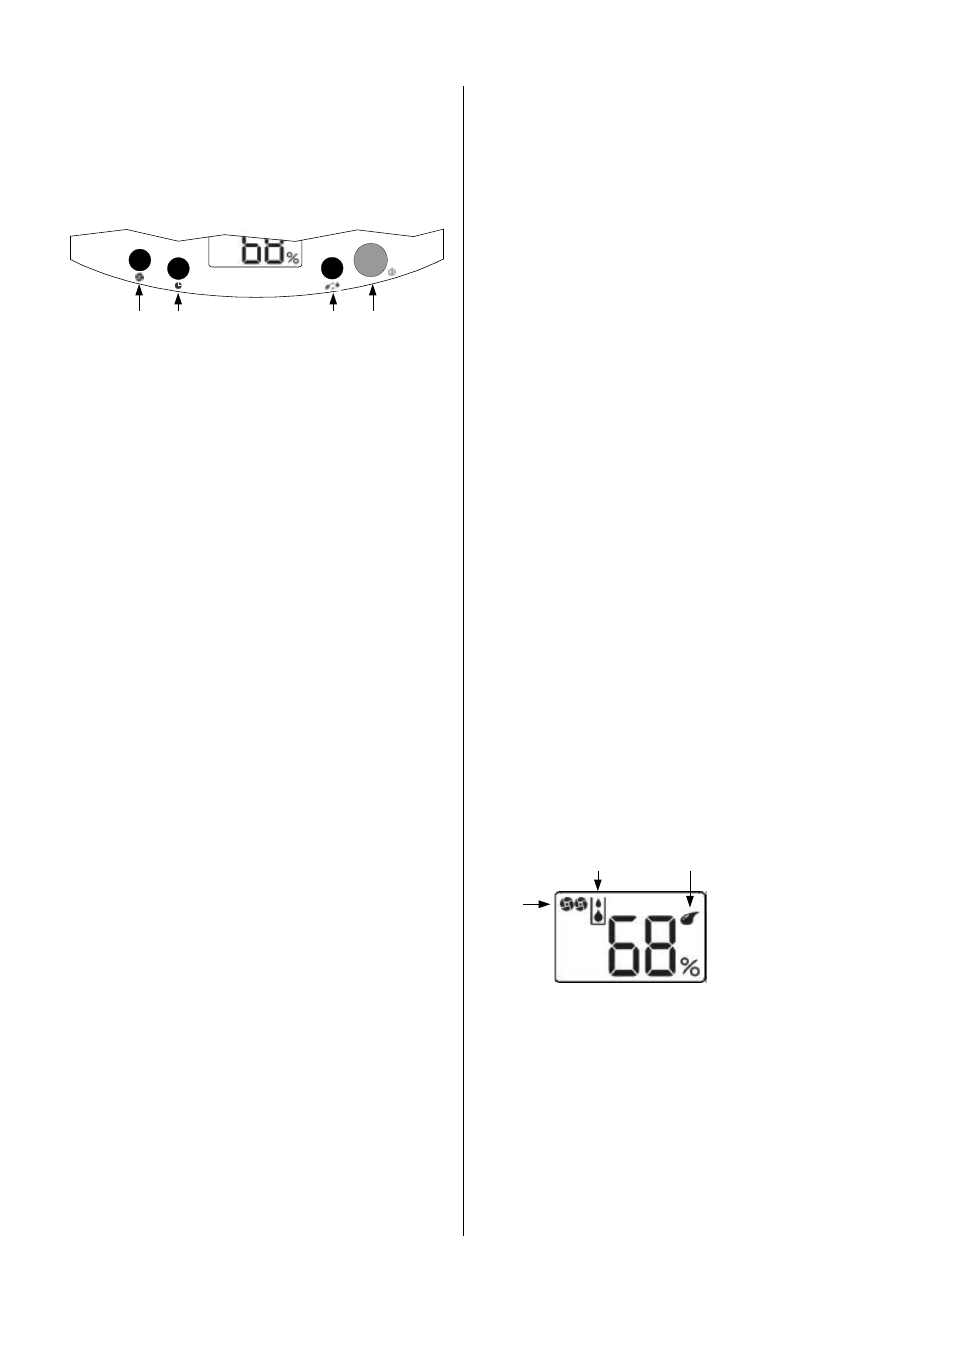
1 "On/Off“ button
You can use this button to switch the unit on or off.
2 "Fan speed“ button
You can use this button to select one of the two fan
speeds in the Comfort and Maximum operating
modes. Each time the button is pressed, the fan
switches to a different speed.
3 "Timer“ button
You can use this button to program the unit to switch
on and off automatically.
4 "Operating mode“ button
You can use this button to switch the unit to the op-
erating mode you want.
Initial operation of the unit
1. Insert the power plug into a correctly fused plug
socket.
230V / 1~ / 50 Hz / 10 A.
2. Open the air flap on the top of the unit.
3. Switch the unit on with the “On/Off” button.
Each time a button is pressed, the display lights up
for approximately 10 seconds.
4. Select the operating mode you want by pressing the
“Operating mode” button several times.
The Symbol A only appears on the display when the
compressor is working and the unit is dehumidifying.
5. Make sure that the Symbol B indicates the set oper-
ating mode.
6. Select one of the two fans speeds with the “Fan
speed” button in the COMFORT and MAXIMUM op-
erating modes.
In the VENTILATION operating mode, the fan gener-
ally rotates at a lower speed, in the AUTOMATIC op-
erating mode, the speed is automatically set depend-
ing on the humidity.
7. Make sure that the Symbol C displays the set fan
speed.
One symbol on the display = low speed
Two symbols = high speed.
B
C
A
AUTOMATIC 45%-55%
COMFORT 55%-65%
MAXIMUM
VENTILATION
1
4
3
2
VENTILATION
The fan remains in continuous operation until the
unit switches off to ensure that the integrated sen-
sor can always correctly measure the humidity.