Initial operation – REMKO ETF 240 User Manual
Page 8
8
Initial Operation
Prior to initial operation or to meet local requirements,
the air intake and outlet openings must be inspected for
foreign bodies and the air intake filter for dirt.
Blocked or dirty grilles and filters must be cleaned im-
mediately. See chapter “Maintenance and Service“.
Important instructions prior to operation
◊ Extension cords must be sufficiently thick.
◊ Extension cords can only be used if they are com-
pletely extended or rolled up!
◊ Do not use the power cord to pull the unit.
◊ After being switched on, the unit operates fully auto-
matically until it is switched off by the float regulator
of the full condensation tank.
◊ The condensation tank must be inserted properly.
Otherwise the unit does not work!
◊ If, in continuous operation, the unit is to work with an
external condensation connection, read the corre-
sponding section on this page.
◊ The unit is equipped with a safety mechanism which
stops the compressor from the switching right back on
again after the unit has been switched off, thus pre-
venting damage to the compressor.
The compressor switches on only after 3 minutes
have elapsed.
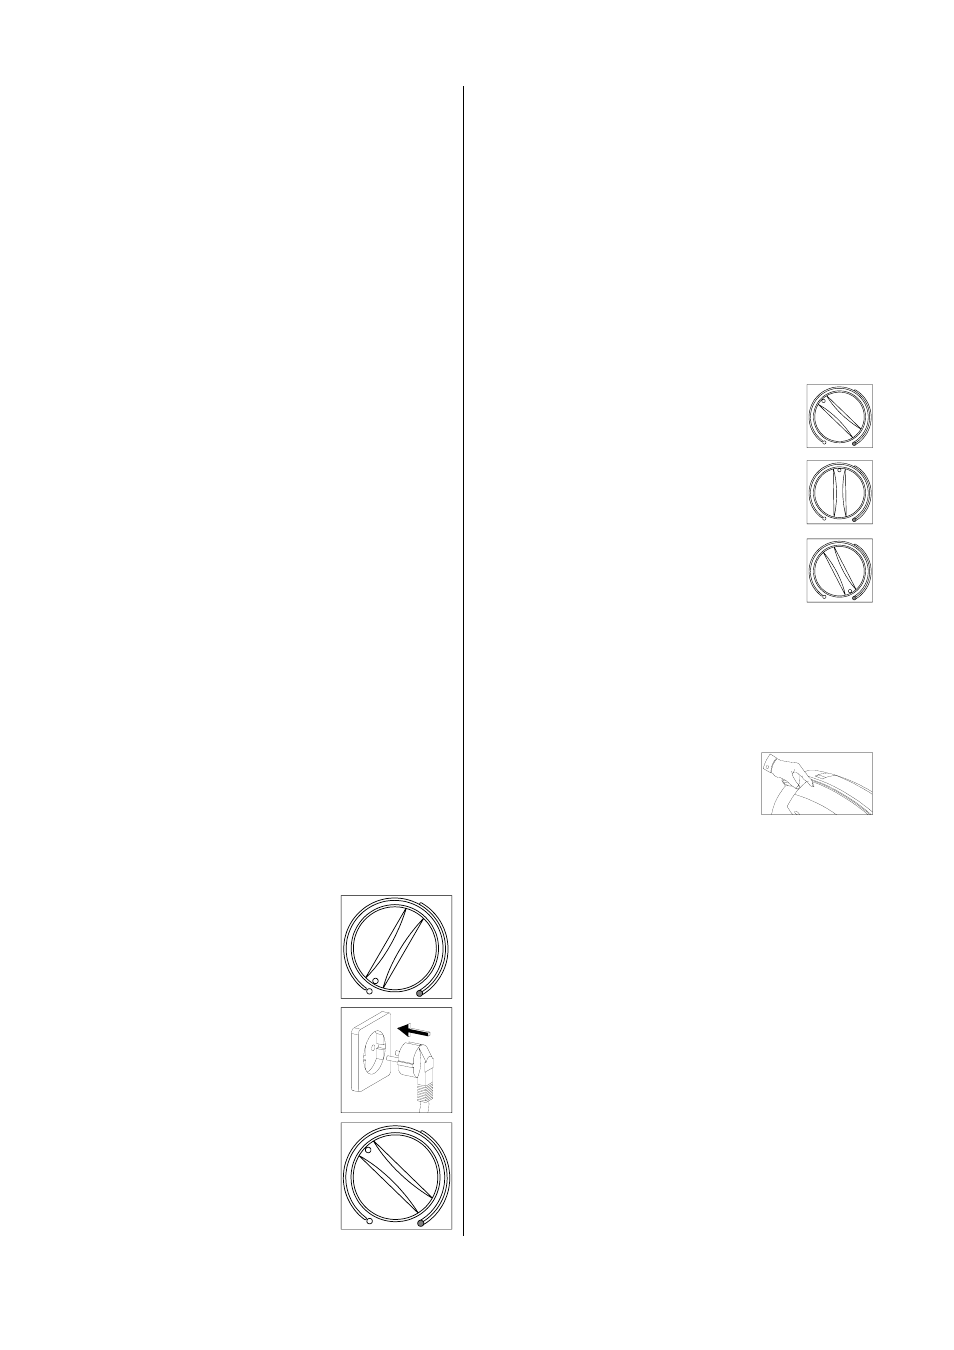
1. Turn the knob on the operating
panel counterclockwise to the
“OFF” position.
2. Insert the power plug into a cor-
rectly fused plug socket.
3. Select the required humidity in the
room where the unit is located on
the hygrostat.
4. You can find the approximate ad-
justment value in the following sec-
tion.
5. Keep in mind that the compressor
only switches on after 3 minutes
have elapsed.
Safety mechanism.
Initial operation of the unit
To open the air flap, press on the rear
surface.
The front side opens upwards. You
can adjust the direction of the air any
way you want.
Hygrostat setting for the recommended
humidity in residences.
Approx. 50 %.
Hygrostat setting for the recommended
humidity in archives.
Approx. 40 %.
Hygrostat setting for minimum humidity
in the room where unit is located.
The unit is in continuous operation.
Please also observe the following.
◊ If possible, create a flow of air going upwards by
opening the flap completely.
◊ Make sure that nothing is blocking the air from being
expelled.
This is the only way to guarantee optimum unit op-
eration.
◊ Make sure that sensitive objects, such as plants in
the room, are not directly in the path of the expelled
air.
Condensation tank
It is necessary to empty the integrated condensation
tank from time to time.
The unit stops dehumidifying when the tank is full. The
“Tank full” control light indicates that the unit has
switched off for this reason.
*
At room temperatures below 10 °C and a relative
humidity of less than 40 %, we no longer guaran-
tee that the unit performs efficiently.
Information on dehumidification performance
The dehumidification performance is dependent only on
the spatial composition of the room, the room tempera-
ture, the relative humidity and following the instructions
in the chapter entitled “Setup”.
The maximum dehumidification performance is
achieved by opening the air flap completely.
The higher the room temperature and the relative hu-
midity, the greater the dehumidification performance is.
For use in residences, a humidity level of approximately
45 to 60 % is sufficient while a humidity level of 40 to 45
% may not be exceeded in storage areas, archives, etc.
Setting the air outlet direction
The dehumidified ambient air is expelled from the top of
the unit. The adjustable air flap can be used to change
the direction of the air being expelled.