Step, Diagram of parts, Quick start guide – Mr. Coffee BVMC-ECMP55 User Manual
Page 4: Brewing coffee, Frothing milk
1
Turn the ON/OFF Switch
ON.
2
Check and make sure the
Brew/Steam Switch is at
the BREW
“ ”
position.
3
When the Brew/Steam
Indicator Light is ON (
Green), turn the control
knob to the BREW
“ ”
position.
4
When the cup is filled to
the desired level, turn the
knob to the OFF position.
5
If you are done with you
espresso maker then turn
the ON/OFF Switch to
the OFF position. If you
want to use the froth
attachment then continue
to STEP 4.
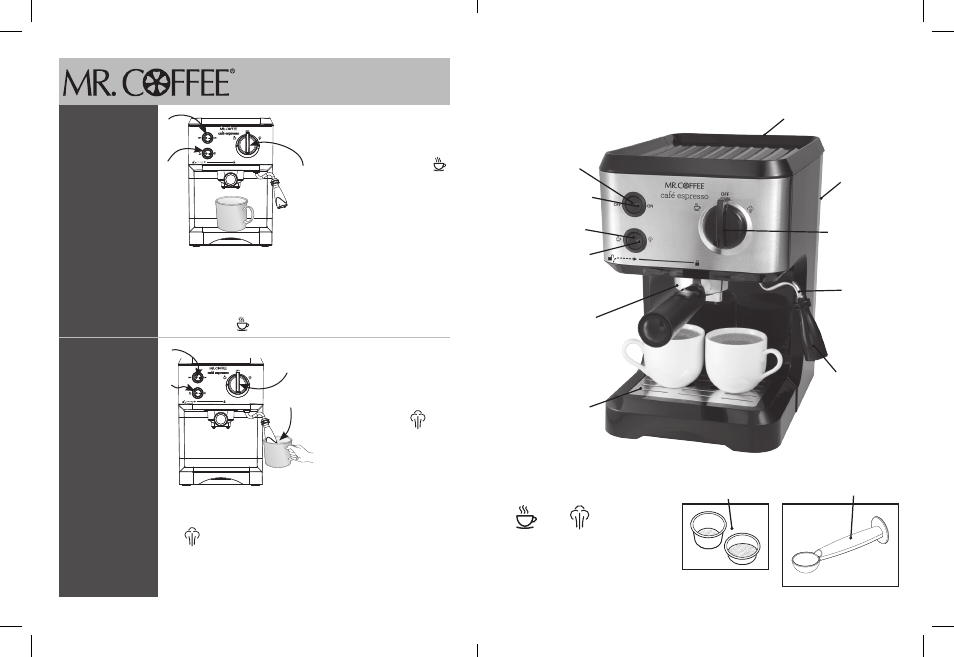
E6
E5
M
easuring
s
coop
/ T
aMper
B
rew
s
TeaM
F
ilTers
(
For
1 & 2
deMiTasses
)
NOTE: Demitasse cups
pictured arenot included.
O
n
/O
ff
S
witch
P
Ower
i
ndicatOr
L
ight
(r
ed
)
B
rew
/S
team
i
ndicatOr
L
ight
(g
reen
)
B
rew
B
aSket
/
f
iLter
h
OLder
w
ater
r
eServOir
L
id
r
emOvaBLe
L
arge
/
c
Lear
w
ater
r
eServOir
c
OntrOL
k
nOB
f
rOthing
t
uBe
f
rOthing
t
uBe
c
aP
r
emOvaBLe
d
riP
t
ray
and
d
riP
g
rid
B
rew
/S
team
S
witch
DIAGRAM OF PARTS
1
Press the Brew/Steam
Switch to the STEAM
“ ”
position on the
front of the unit.
2
When the Brew/Steam
Indicator Light turns solid
green then hold a cup of
milk under the frothing tip.
The tip should be slightly
submerged under the milk.
3
Turn the control knob
to the STEAM
“ ”
position.
4
When steam is no longer
desired then turn the
control knob back to
the OFF position. (Note:
typically 35-45 seconds
will deliver the proper
milk temperature)
5
Turn the ON/OFF Switch
OFF and ensure the
espresso maker is no
longer on.
1
2
5
3/4
2
1/5
3/4
Quick Start Guide
STEP
3
Brewing
Coffee
STEP
4
Frothing
Milk
BVMC-ECMP55_13ESM1.indd 7-8
2/22/13 2:26 PM