Hardware setup, Hardware setup caution caution caution caution – Measurement Computing WBK30 User Manual
Page 2
2 WBK30 User's Guide
p/n 1025-0901 rev 2.0 (per EO# 2116R3)
Hardware Setup
CAUTION
CAUTION
CAUTION
CAUTION
Turn power off to all connected devices before performing the setup.
To avoid pin damage, make sure the memory card is aligned correctly with the mating
connector J101. Gently press them together.
Perform the setup in a static-free work area using tools, wrist strap, containers, and
procedures that are ESD-safe. One or more components are sensitive to damage from
electrostatic discharge.
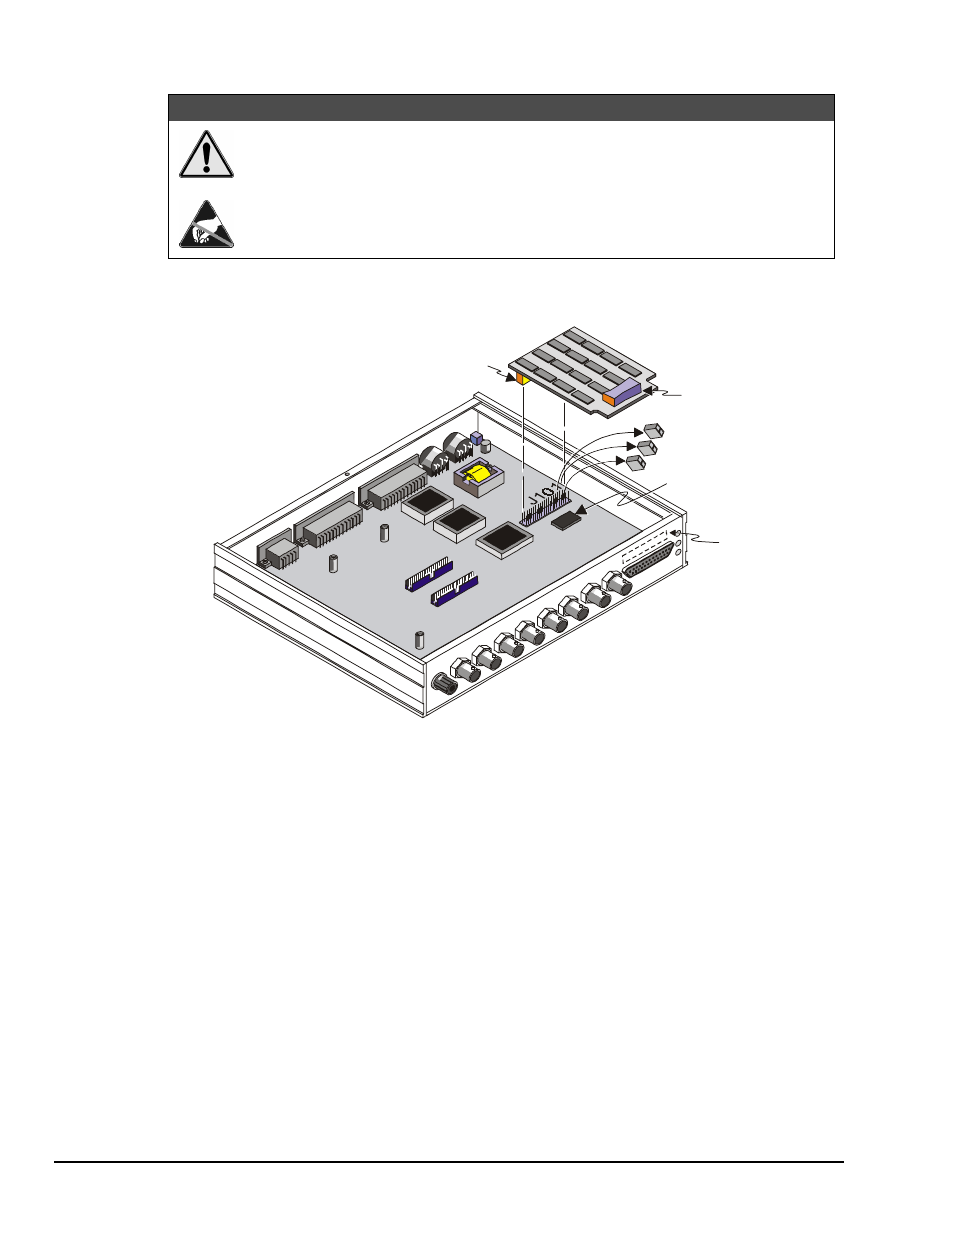
WBK30 Connection to a WaveBook
WBK30
Foam Pad
Remove 3 jumpers
from J101.
P1
262-0303 chip must be
stamped "MEM A". If not,
an upgrade is required.
Card guide on
inside of
WaveBook/516
front panel
Note: The figure shows a WaveBook/512;
the /516 is similar. Not all components are shown.
Install the WBK30 into a WaveBook as follows:
1. Turn off all system power, and unplug the power adapter from the WaveBook.
2. Remove the WaveBook's top cover plate.
3. Verify compatibility. The WBK30 is compatible with all WaveBook/516s and upgraded
WaveBook/512s. To determine /512 compatibility, locate p/n 262-0303 (the FPGA IC) on the
WaveBook's motherboard (see figure). The 262-0303 chip must be stamped "MEM A" for the
WBK30 to work properly. By serial number, the following WaveBook/512s are not compatible:
148010 and below, 148253, 149322, 150411-150413, 150415, 150418, 151597, 153335. If not
compatible, contact the factory about an upgrade. After a WaveBook/512 is modified for the
WBK30, it must have a WBK30 to work—to return to operation without the WBK30 would
require another factory modification.
4. Remove all 3 jumpers from the WaveBook's 40-pin connector J101.
5. Align the WBK30 so its P1 connector is directly over J101. [In a WaveBook/516, before pressing the
connectors together, slip the opposite end of the WBK30 into the plastic card guide above the D-sub
connector on the front panel.] Gently press the connectors together—be careful to avoid pin damage.
Verify the setting is secure (in the /512, the foam pad helps brace the WBK30 against the top cover
plate).
6. Replace top cover plate, and power up the system.