Working with usb-5100 series data loggers – Measurement Computing USB-5100 Series User Manual
Page 4
USB-5100 Series Software: Getting Started
Launching the Logger
4
2. Plug the large end of the mini-USB cable into a USB port on the computer.
3. Plug the small end of the mini-USB cable into the port on the data logger. Refer to the logger hardware user
guide if you need help finding the port.
Windows
: When connecting a device for the first time, it may take several seconds to detect the new hardware
and report that it has connected successfully. A message may display indicating that you need to reboot before
you can use the device – this is optional; you do not need to reboot at this time.
The device name appears in the status bar once it is recognized by the software. The status bar also lists the total
number of devices connected. At this point, you can access the device using the software.
To disconnect the device, unplug it from the USB cable.
Working with USB-5100 Series Data Loggers
This section covers the basics of working with USB-5100 Series data loggers, including launching, checking the
status, reading out data, and plotting data. We recommend that you perform a trial launch and readout as
described in this section to familiarize yourself with the procedures before you deploy your logger.
Launching the Logger
To launch the logger, click the
Launch device
toolbar icon.
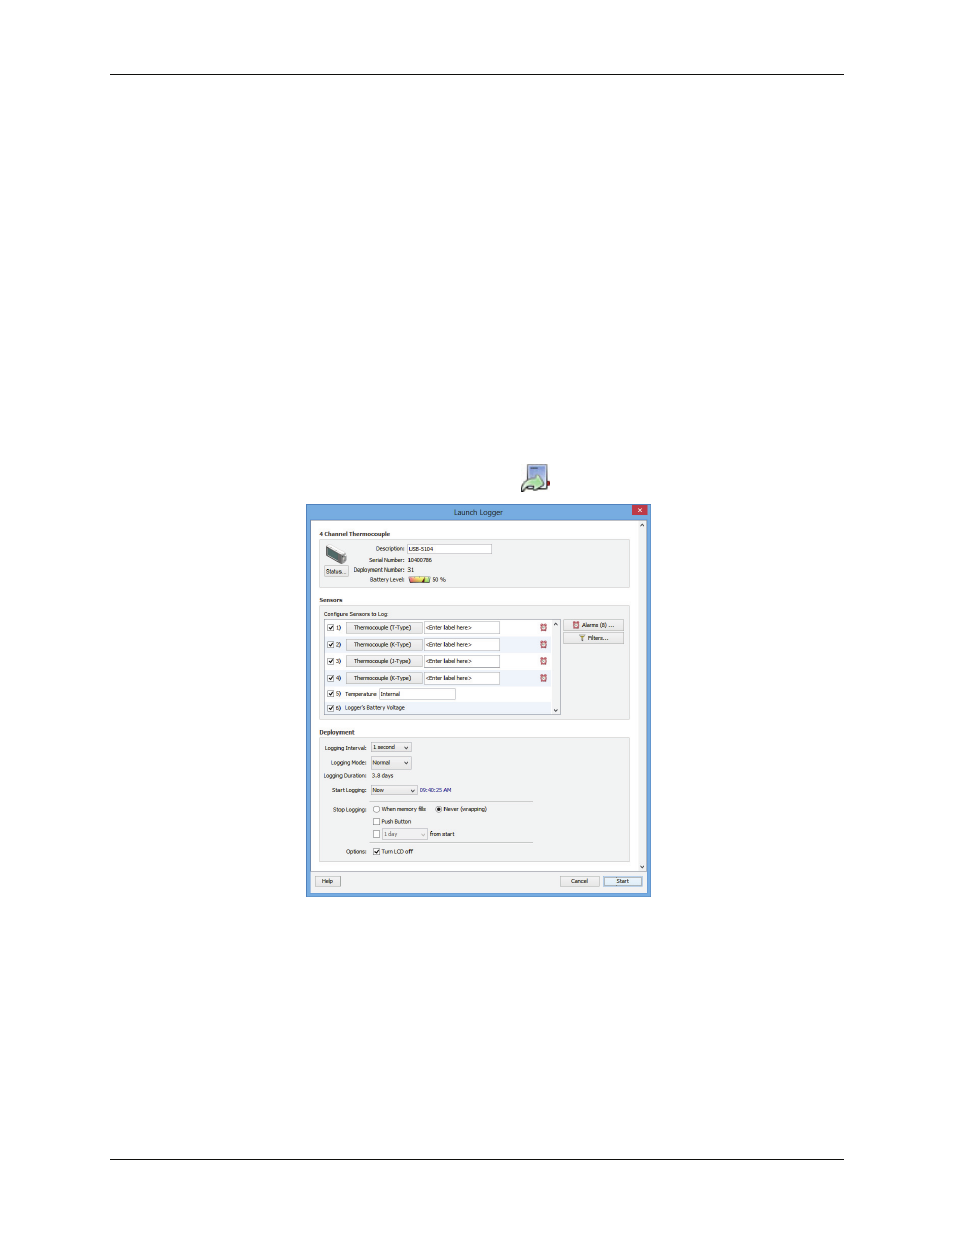
The
Launch Logger
window opens:
This window is divided into three panes:
Logger Information
: The name of the logger currently selected appears at the top of this pane, which also
includes the serial number, deployment number, and current battery level.
Use the
Description
field to enter up to a 40-character name for the logger deployment. This value is used
as the default file name when you read out the logger and save the data, and is the default title on the plot.
The description is set to the serial number by default.
Click the
Status
button to see the current status of the logger and the settings used on the previous launch.
Sensors
: This pane displays the type of sensor connected to each input channel.
Select the checkbox for each thermocouple sensor to log in this deployment, and enter an optional
description if desired.