Unpacking the board, Installing the software, Configuring the cio-diso48 – Measurement Computing CIO-DISO48 User Manual
Page 9: Base address
CIO-DISO48 User's Guide
Installing the CIO-DISO48
8
Unpacking the board
As with any electronic device, you should take care while handling to avoid damage from static
electricity. Before removing the CIO-DISO48 from its packaging, ground yourself using a wrist strap or by
simply touching the computer chassis or other grounded object to eliminate any stored static charge.
If any components are missing or damaged, notify Measurement Computing Corporation immediately by
phone, fax, or e-mail:
Phone: 508-946-5100 and follow the instructions for reaching Tech Support.
Fax: 508-946-9500 to the attention of Tech Support
Email:
Installing the software
Refer to the Quick Start Guide for instructions on installing the software on the Measurement Computing Data
Acquisition Software CD. This booklet is available in PDF at
Configuring the CIO-DISO48
The CIO-DISO48 has one base address switch, six banks of AC input filter switches, and one wait state jumper
which you must set before installing the board in your computer. The InstaCal calibration and test program
included with the CIO-DISO48 will show you how to set the switches. Run InstaCal before you open your
computer and install the board. The CIO-DISO48 is shipped with the factory-default settings listed below.
Factory-configured default settings
Switch/jumper
Default setting
Base address switches
300h (768 decimal)
AC Input Filter switches
all ON
Wait State jumper
OFF position
Base address
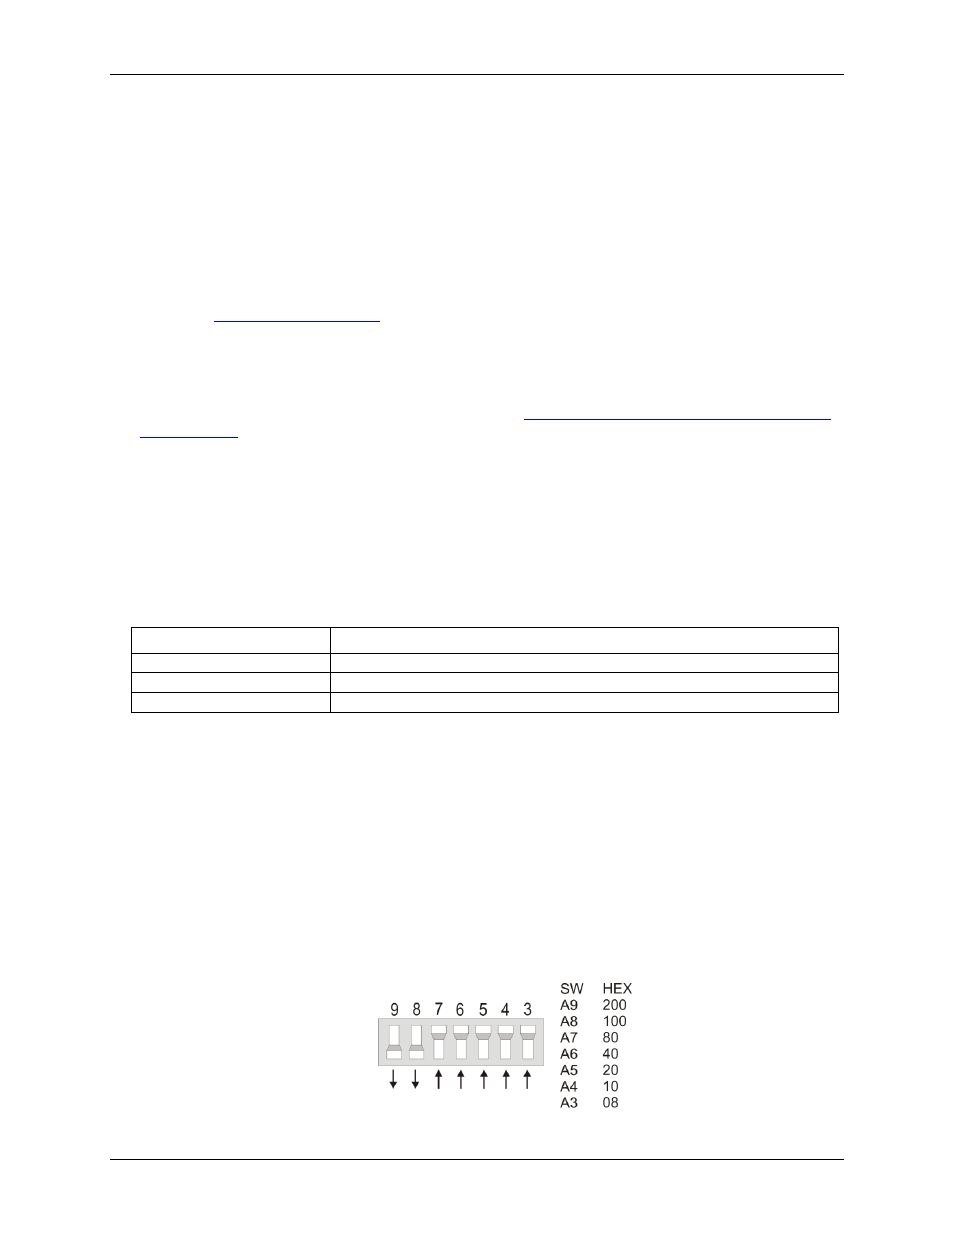
The base address switch sets the starting I/O location where the CPU can access the registers of the CIO-
DISO48. The factory default is 300h (768 decimal).
Before you install the CIO-DISO48 in your computer, set the base address by using the dip switch labeled
ADDRESS
located on the board. The easiest way to set the base address switch is to let InstaCal show you the
correct settings. However, if are already familiar with setting ISA base addresses, you may use the base address
switch description below to guide your base address selection.
Unless there is already another board in your system using address 300 hex (768 decimal), leave the switches as
they are set at the factory. The example shown in Figure 1 shows the settings for the factory-default base
address of 300 hex.
Figure 1. Base address switches