0 securing the wall plates, Step 12 – wooden studs step 13 - concrete – Marantz WB4001T User Manual
Page 10
- 10 -
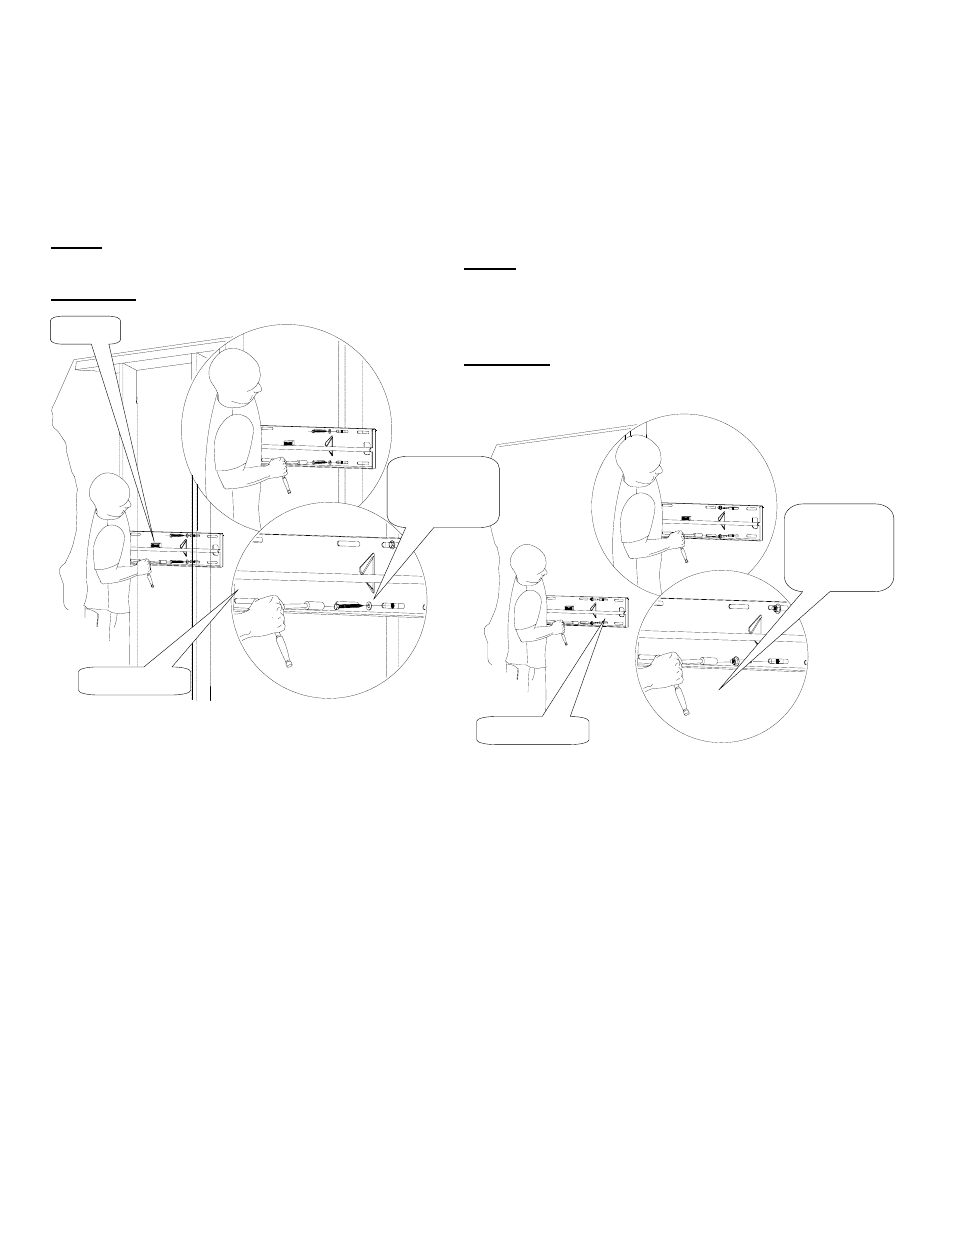
7.0 SECURING THE WALL PLATES
Step 12 – Wooden Studs
Step 13 - Concrete
Level and secure the plate to the wall with the
reference arrow facing up to the ceiling.
Secure the plate using the four (4) 5/16" lag
bolts and flat washers (Figure 12).
NOTE:
Use a minimum diameter of 5/16” x
3” long wood screws.
CAUTION: Do not over tighten the lag bolts.
Level and secure the plate to the wall
with the reference arrow facing up to the
ceiling. Use a minimum diameter of 5/16”
x 2 ¼” lag concrete wedge anchors
(commercially available). See Figure 13.
NOTE: Use a minimum diameter of
5/16” x 2 ¼” long wedge
anchors
commercially
available).
CAUTION: Do not over tighten the
wedge
anchors
bolts.
Figure 12
Figure 13
Wall plate
(4) 5/16" x 3"
lag bolts and
(4) flat
washers
Level
Wall plate
(4) 5/16" x 2
¼” wedge
anchors
(commercially
available)