Zone system – Marantz AV8003 User Manual
Page 55
CONNECTIONS
SETUP
BASIC
OPERA
TION
REMOTE
CONTROLLER
TROUBLESHOOTING
OTHERS
NAMES AND
FUNCTION
ADV
ANCED
OPERA
TION
51
ENGLISH
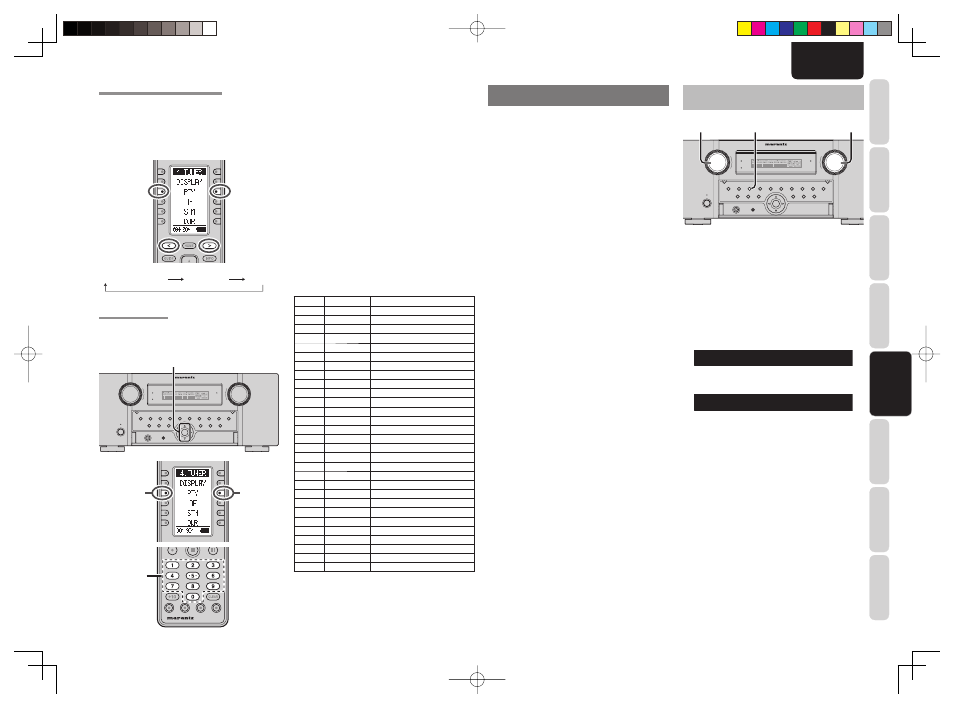
PROGRAMME TYPE (PTY) DISPLAY
The RDS system categorizes programmes according
to their genre into different programme type (PTY)
groups. To display the programme type information
of the current station, switch the remote controller to
TUNER mode and press the < / > button until 004 is
displayed. Press the PTY button.
RT (RADIO TEXT)
PS (Program Service Name)
Frequency
PTY AUTO SEARCH
Your unit is equipped to automatically search for
stations transmitting any of 29 different programme
types. To search for a PTY, follow these procedures:
1.3.4
1.3.4.
2.
TOP
TOP
ZONE
ZONE
SPEAKER
SPEAKER
DISPLAY
DISPLAY
INPUT
INPUT
7.1CH
7.1CH
DIRECT
DIRECT
PURE
PURE
PHONES
PHONES
THX
THX
M-DAX
M-DAX
MODE
MODE
SURROUND
SURROUND
CLEAR
CLEAR
MEMORY
MEMORY
T-MODE
T-MODE
BAND
BAND
EXIT
EXIT
MENU
MENU
ZONE
ZONE
DOWN
DOWN
VOLUME
VOLUME
UP
UP
INPUT
INPUT
SELECTOR
SELECTOR
AUTO
AUTO
SETUP MIC
SETUP MIC
HDMI
HDMI
M-DAX
M-DAX
PURE DIRECT
PURE DIRECT
POWER ON/OFF
POWER ON/OFF
STANDBY
STANDBY
AV PRE TUNER AV8003
AV PRE TUNER AV8003
ENTER
ENTER
2.
1.
Press
the
PTY button in the TUNER MODE on
the remote controller. The current station’s PTY
will be displayed, or the currently selected PTY
group will be displayed in blinking if no station
or RDS data is present.
2.
To change to a new PTY type, press the
TUNING
3
or
4
button on the front panel or
numeric buttons on the remote controller until
the desired PTY is shown in the display.
3.
Once the desired PTY group or type has
been selected, press the PTY button while
the display blink (approx. 5 seconds). The
PTY Auto search will start, and the tuner will
pause at each station broadcasting RDS PTY
information corresponding to the selected
choice.
4.
To advance to the next RDS station with the
desired PTY, press the PTY button again within
5 seconds.
NUMBER
DISPLAY
PROGRAMME TYPE
1
POP
Pop Music
2
ROCK
Rock Music
3
MOR
M. O. R. Music
4
LIGHT
Light classical
5
CLASSIC
Serious classical
6
NEWS
News
7
AFFAIR
Current Affairs
8
INFO
Information
9
SPORT
Sport
10
EDUCATE
Education
11
DRAMA
Drama
12
CULTURE
Culture
13
SCIENCE
Science
14
OTHERS
Varied
15
OTHER
Other Music
16
WEATHER
Weather
17
FINANCE
Finance
18
CHILDREN
Children’s programmes
19
SOCIAL
Social Affairs
20
RELIGION
Religion
21
PHONE IN
Phone In
22
TRAVEL
Travel
23
HOBBIES
Hobbies
24
JAZZ
Jazz Music
25
COUNTRY
Country Music
26
NATION
National Music
27
OLDIES
Oldies Music
28
FOLK
Folk Music
29
DOCUMENT
Documentary
ZONE SYSTEM
The Zone System mode allows the same source or
different sources to be heard in two ZONEs other
than where this unit is installed.
To use the zone system, connect the audio from the
ZONE OUT A and B AUDIO output terminals to the
ZONE A and B amps.
Connect the VIDEO output (ZONE OUT) terminal to
the monitor in Zone A.
(ZONE OUT terminal is linked to the source selector
in Zone A.)
If a surround channel back speaker or speaker C
(see page 18) are not used in the ZONE where this
unit is installed, the zone speaker system can be
used with the amp for the surround back channel.
Also, the COMPONENT VIDEO MONITOR OUT
2 terminal can be used for the monitor output of
ZONE A.
This unit supports zone system functions such as
source selectors, OSD menu systems, sleep timers
and remote control.
ZONE PLAYBACK USING THE ZONE OUT
TERMINALS
TOP
TOP
ZONE
ZONE
SPEAKER
SPEAKER
DISPLAY
DISPLAY
INPUT
INPUT
7.1CH
7.1CH
DIRECT
DIRECT
PURE
PURE
PHONES
PHONES
THX
THX
M-DAX
M-DAX
MODE
MODE
SURROUND
SURROUND
CLEAR
CLEAR
MEMORY
MEMORY
T-MODE
T-MODE
BAND
BAND
EXIT
EXIT
MENU
MENU
ZONE
ZONE
DOWN
DOWN
VOLUME
VOLUME
UP
UP
INPUT
INPUT
SELECTOR
SELECTOR
AUTO
AUTO
SETUP MIC
SETUP MIC
HDMI
HDMI
M-DAX
M-DAX
PURE DIRECT
PURE DIRECT
POWER ON/OFF
POWER ON/OFF
STANDBY
STANDBY
AV PRE TUNER AV8003
AV PRE TUNER AV8003
ENTER
ENTER
3.
4.
1.
1.
Pressing
the
ZONE button on the unit one time
accesses the ZONE A settings. Pressing it two
times accesses the ZONE B settings. Then,
pressing it a third time turns the zone feature
off.
2.
When the ZONE setting mode is engaged, one
of the following screens appears on the display
for 10 seconds.
* Display when ZONE A is selected
Z A D V D - 1 8 d B
* Display when ZONE B is selected
Z B D V D - 1 8 d B
3.
Select an input source with the INPUT
SELECTOR knob.
4.
Turn
the
VOLUME knob to set the volume of
the ZONE used in the zone system as you
like.
Note:
• The sleep timer, monaural output and other features
can also be set using the MAIN MENU.
(See page 35)
AV8003N.indb 51
AV8003N.indb 51
08.4.28 10:49:31 AM
08.4.28 10:49:31 AM