Correct handling of machine, Points in operation and how to stop – Dolmar EDGING TRIMMER PE-251 User Manual
Page 11
11
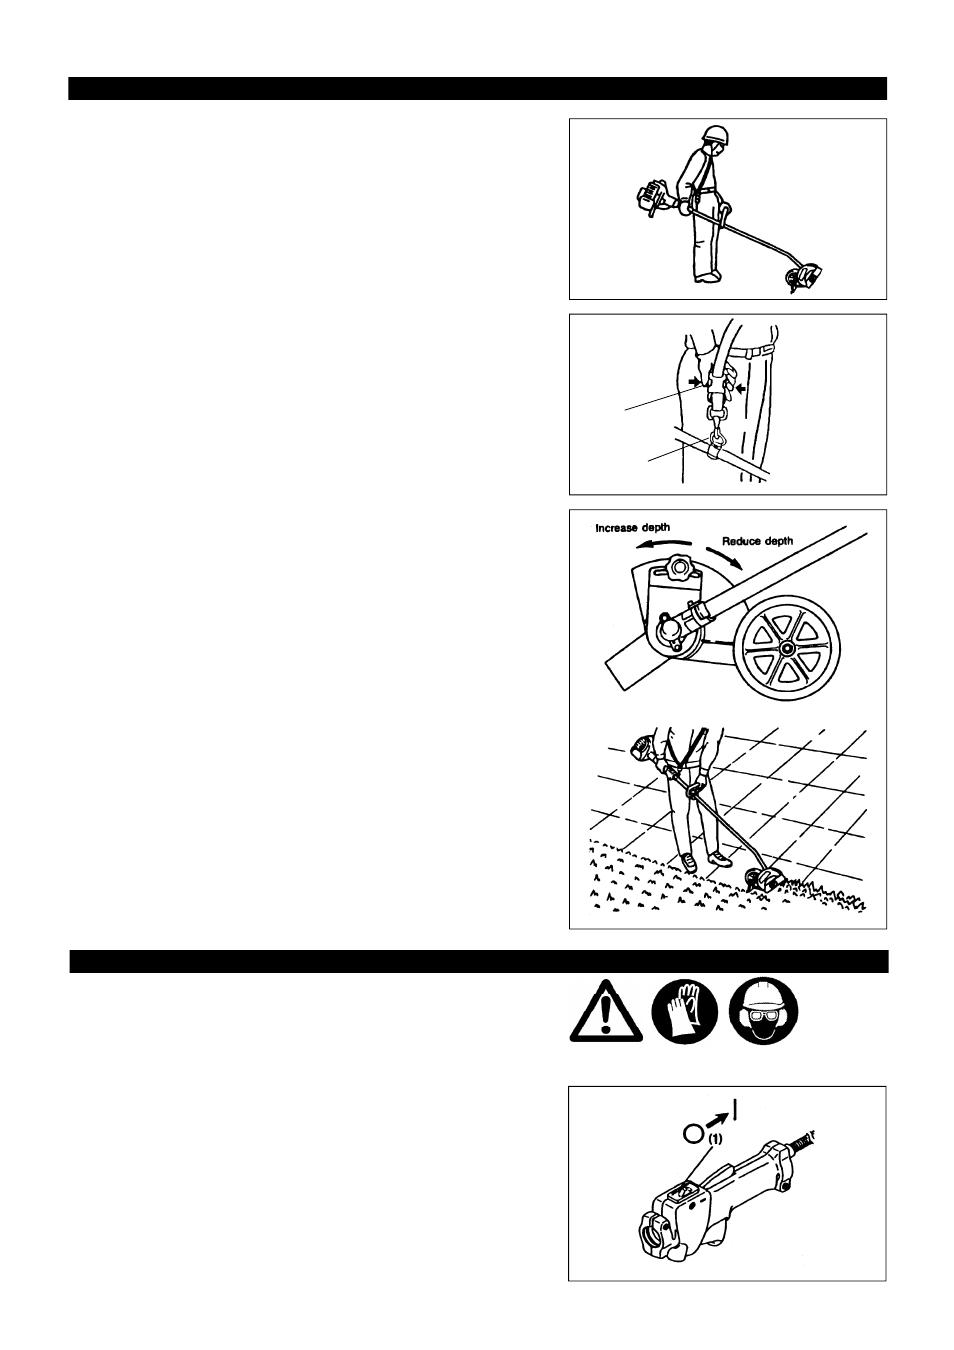
CORRECT HANDLING OF MACHINE
Attachment of shoulder strap
– Adjust the strap length so that the wheel will be kept on the ground.
Detachment
– In an emergency, push the notches (1) at both sides, and you can detach
the machine from you.
Be extremely careful to maintain control of the machine at this time. Do not
allow the machine to be deflected toward you or anyone in the work
vicinity.
WARNING: Failure to maintain complete control of the machine at all could
result in serious bodily injury or DEATH.
– Before edging, water the area to soften the ground and make edging easier.
– Before edging, check the area and remove all obstacles and objects that
could be thrown..
– Plan to edge regularly to make it easier to keep a neat edge and to avoid
having to make more than one pass.
Note:
Blade depth may have to be adjusted due to differences in height between the
hard surface and the top of the grass.
– Adjust the blades’ depth of cut to produce a fine cut between sidewalk and
grass using a minimum blade depth, usually with about 1/2” of the blade into
the ground.
Note:
– The blades’ depth of cut is adjusted by moving the blade guard.
– Adjust blades’ depth of cut by loosening the grip bolt, moving the guard
toward the operator to reduce depth or away from the operator to increase
depth, and then retightening the bolt.
– When starting to edge, run the engine at full throttle, and lower the blade
gently into the ground, being careful not to hit the concrete with the blade.
– Do not force the blade rotate more than the normal rotation.
POINTS IN OPERATION AND HOW TO STOP
Observe the applicable accident prevention regulations.
Starting
Move at least 3m away from the place of refuelling. Place the edging trimmer on a clean piece of ground taking care that the cutting blade
does not come into contact with the ground or any other objects.
Cold start
– Push the I-O switch (1) in the direction shown by the arrow.
(1)
Hanger