Kleenmaid RH14 User Manual
Page 6
Use:Two systems are available
Exhaust mode (S)
Vapours are extracted outside through an
exhausting pipe that is affixed to the
connection ring above the
rangehood.
Diameter of the exhausting pipe must be
equal to that of the connection ring.
Attention!
If the
rangehood is supplied with active
carbon filter, then it must be removed.
Filter version (K)
The air and vapours are filtered through an
active carbon filter (for its installation see
paragraph "Active carbon filter") and
recirculated into the room through the grating
on the lower side of the chimney.
Attention!
If the
rangehood is not supplied with carbon
filter, then it must be ordered and mounted.
This version is used when there is no
exhausting pipe for venting outdoors or
when it is impossible to install one.
Installation
When installed, the distance between
rangehood and burners must be not less
65 cm above electric, gas or mixed fuel
burners.
Electric connection
The electrical tension must correspond to
the tension noted on the label placed inside
the
rangehood. Connect the electrical plug
where provided, to the an easily
accessible
outlet in conformity with local
standards
in force.
Where an electrical plug is provided (for
direct connection to electrical network) place
a standards approved bipolar switch with
an aperture distance of not less than 3mm
(accessible) from the contacts.
Fastening of shelves (optional)
Fasten the four side supports I to the
adjacent cabinets and place the shelf on
the supports (Fig. 4).
Using the
rangehood
— The
rangehood is provided with a motor
with several speeds.
For the best performance, we
recommend using the low speeds in
normal conditions and the high speeds
in particular cases of strong odour and
vapour concentration.
— We recommend starting up the
rangehood
a few minutes before cooking and keeping
it running until all the odours
have been
eliminated.
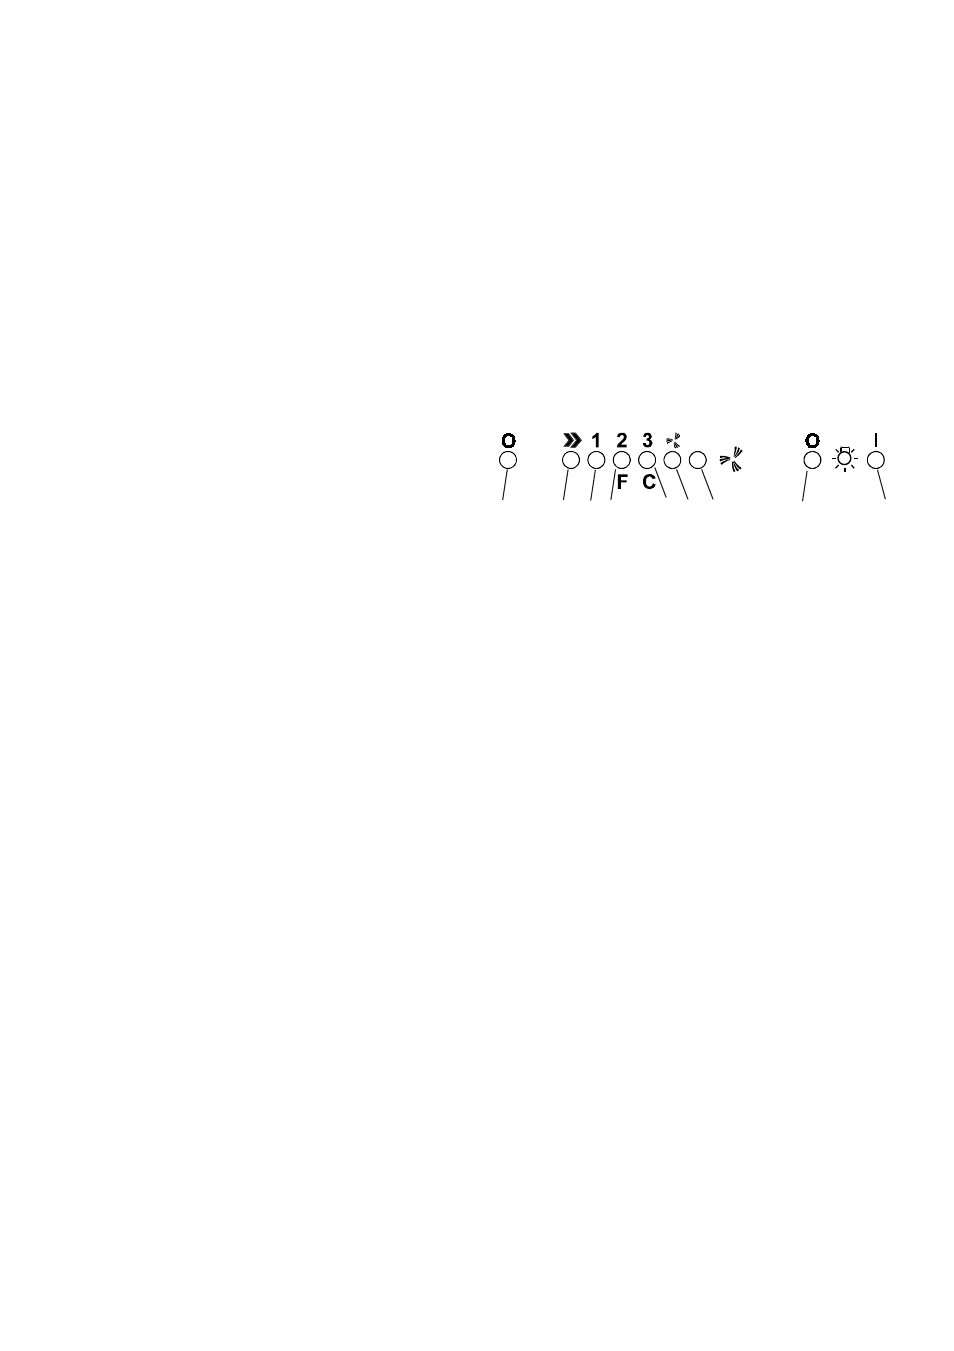
Push Button Control Panel
1- Motor OFF button
2- ON button and motor speed selection
button 1 - 2 - 3 - 1 - 2 - . . . .
3- Speed 1 LED
4- Speed 2 LED and metal grease filter
saturation LED (in this latter case, the
LED will flash - See instructions on
grease filter cleaning).
5- Speed 3 LED and active carbon filter
saturation LED
(in this latter case, the
LED will flash - See instructions on active
carbon filter replacement).
Warning!
The active carbon filter saturation LED is not
activated.
In order to activate the active carbon filter
saturation indicator, press buttons 2 and 7
simultaneously for 3 seconds. Initially, only
LED 4 will flash, then after the 3 seconds
have passed, LED 5 will also
start flashing,
indicating that the active
carbon filter
saturation control system is
active.
To switch off the system, re-press the same
two buttons
. After 3 seconds LED 5 will stop
flashing and the device
will be switched off.
6 - Intensive speed
LED
1
2 3 4
5 6 7
8
9