Instructions for installation and connection, Safety precautions for the technician, Cooker support bracket – Kleenmaid FEC605W User Manual
Page 24: Warning
Instructions for use, installation and connection
24
Instructions for installation and connection
Safety precautions for the technician
• Installation must be carried out only by qualified
personnel.
• The electric installation shall be equipped with a
safety device, able to disconnect the appliance
from mains in all wires, with the distance
between contacts of not less than 3 mm in open
position. Good protection is provided by the
LS-switches and/or fuses.
• The connection may be carried out by rubber
mains lead (type HO5RR-F with green/yellow
earth wire), PVC insulated mains lead (type
HO5VV-F with green/yellow earth wire) or other
cables of equal or better quality.
• Distance between the cooktop and the kitchen
hood must be at least the distance, indicated in
the instructions for use of the kitchen extraction
hood.
• Panels, glue and furniture lining from artificial
materials, adjacent to the appliance must be
temperature resistant (>75°C), otherwise they
might be deformed.
• Mains lead behind the cooker must be placed in
such manner to avoid touching the back panel
of the cooker because of the heat it develops
during operation.
• Remove any packaging materials (foils, artificial
foam, nails, etc.) from the reach of children,
because they represent potential danger.
Children may swallow small parts, or suffocate
with foils.
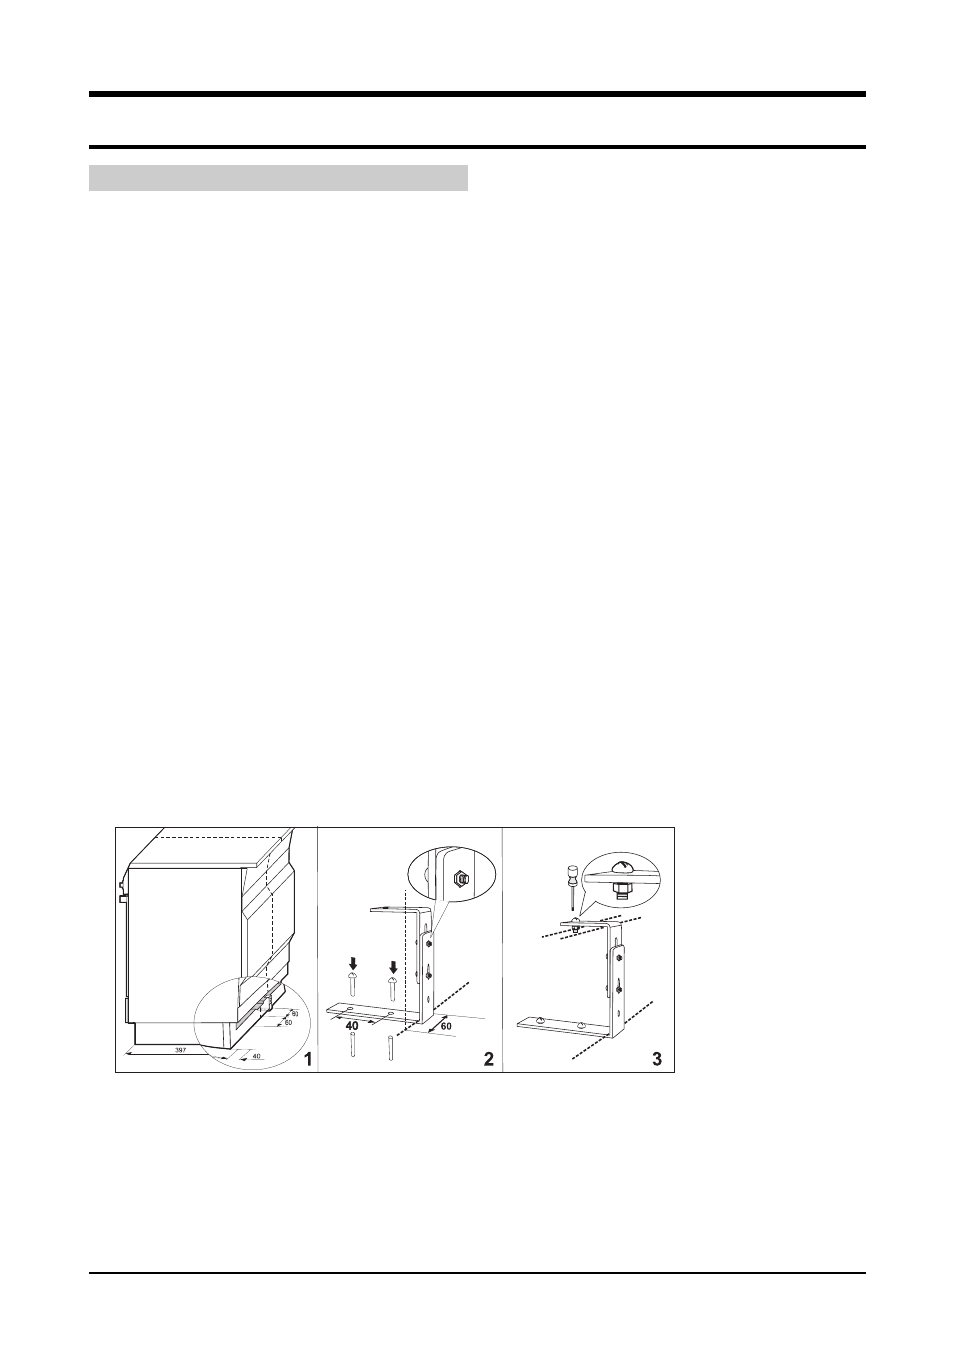
Cooker Support Bracket
• After installing and leveling the appliance using
the adjustable legs, use a pencil to mark a line
on the floor in front of the appliance (marking
the lower edge of the appliance front panel) and
determine the middle of the appliance.
• Then add a marking 60 mm to the left and 60
mm to the right of the center and remove the
appliance (Figure 1).
• Mark the point that is located 397 mm from the
center marking on the line marked on the floor
(position of hole No. 1), perpendicularly to the
line, towards the back of the appliance; from
there, mark the point located 40 mm further in
the same direction (± 0,1 mm) (position of hole
No. 2).
• At the marked spots, drill two holes in the floor
and insert the plastic dowels supplied. Adjust
the height of the support bracket as necessary
and fix the two parts of the bracket by tightening
the two screws. Then, screw the bracket into
the holes drilled in the floor (Figure 2).
• Push the appliance back into its original
position.
• Remove the appliance drawer (see section
"Appliance Drawer") and insert the screw into
the bracket from the inside (Figure 3).
NOTE: If the supplied screws and dowels are
inadequate to securely fix the bracket to the floor,
please obtain appropriate hardware for securing
the bracket in such way that it cannot be pulled
out.
WARNING
"In order to prevent tipping of the appliance, this
stabilizing means must be installed. Refer to the
instructions for installation."