Kleenmaid CH700X User Manual
Page 5
•
The cooking hob must be connected to 240V
single phase mains supply by the intermediary of a
two phase + earth homologated CEI83 plug or a
single pole cut-off device with a contact opening by at
least 3mm.
Warning: The protection wire (green /yellow) is
connected to the earth terminal
of the apparatus
and must be connected to the
earth terminal
of the installation.
P
P
a
a
r
r
t
t
1
1
:
:
F
F
o
o
r
r
t
t
h
h
e
e
I
I
n
n
s
s
t
t
a
a
l
l
l
l
e
e
r
r
•
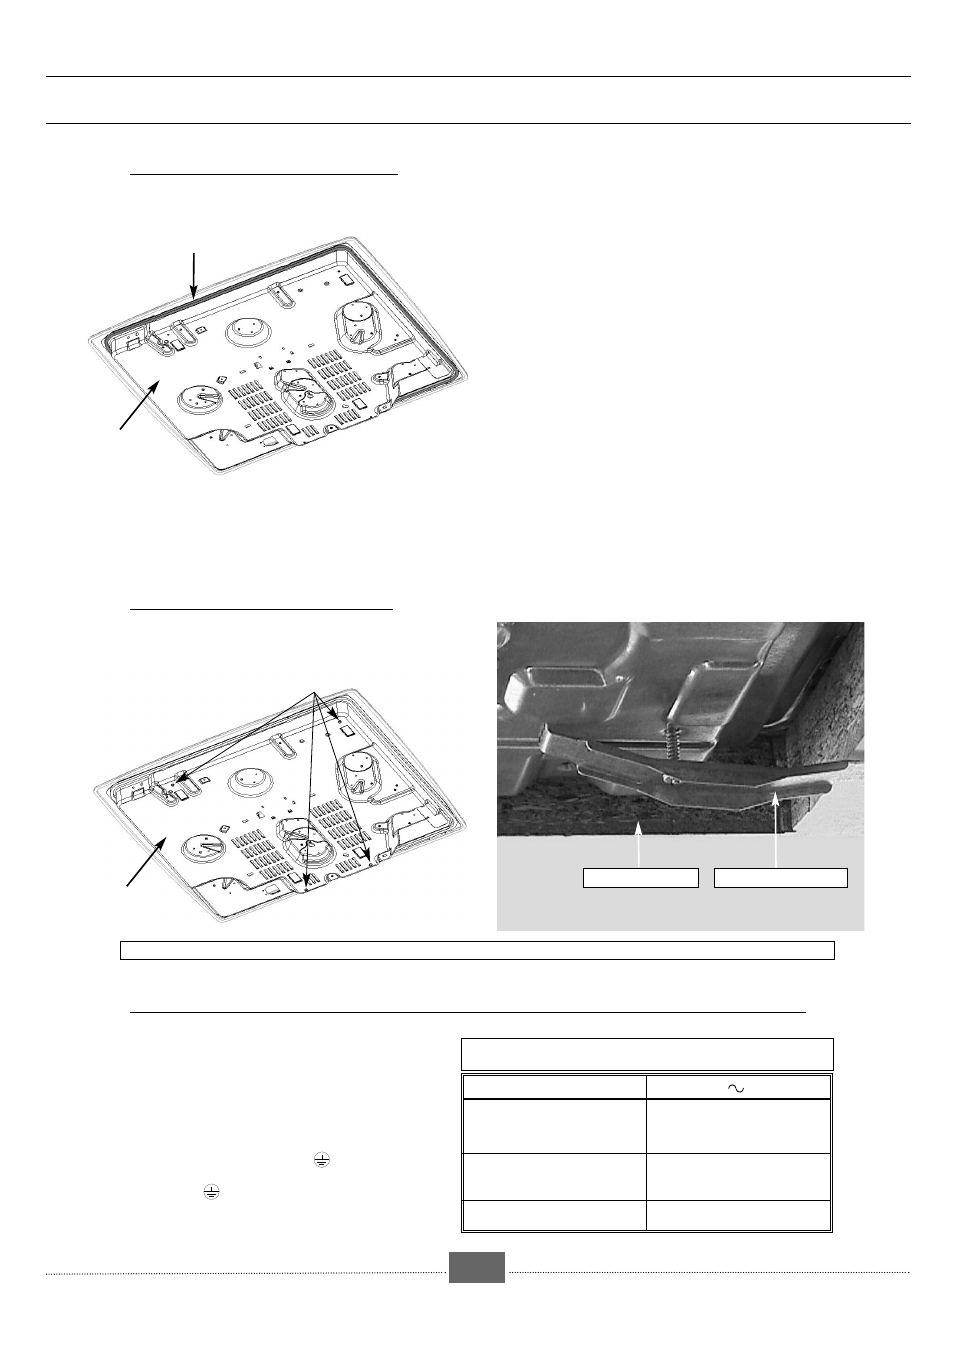
Glue the seal supplied in the sachet before
installing the hob.
Before inserting the hob:
1- Turn over the hob and place it with precaution
above the opening of the support in order not to
damage the knobs, lighting stubs and the metal gas
security rods.
2- Glue the foam joint delivered with the apparatus to
the external rim of the carter. This joint ensures
sealing between the cooking hob and the work
surface.
3- Place the cooking hob in the opening of the support
unit taking care to centre it well in the cut-out..
4- Fit the burner heads, burner caps and the grids..
5- Connect the hob power supply cable to the
electrical installation of the kitchen. See "How to
connect the cooking hob to the electrical supply".
6- Connect the gas. See "Gas connection".
-5-
Network
Cable H05V2V2F - T90
Ref. SAV : 77X9060
.
Cross section of
conductors in mm2
Fuse
240 V
- 50 Hz
3 conductors of which 1 is
to be earthed
1
10 A
CROSS SECTION OF THE CABLE TO USE
Seal
Worktop
Fastening bracket
HOW TO INSTALL THE HOB
●
HOW TO FASTEN THE HOB
●
HOW TO CONNECT THE COOKING HOB TO THE ELECTRICAL SUPPLY.
●
Under
surface of
the hob
(carter).
holes for fixing
Under
surface of
the hob
(carter).
If you wish to clamp the hob, ensure that the four fixation plates supplied in the sachet are used.