2 using the inside controls, 3 hanging the device – Kemppi ArcFeed 200 User Manual
Page 15
EN
4.2
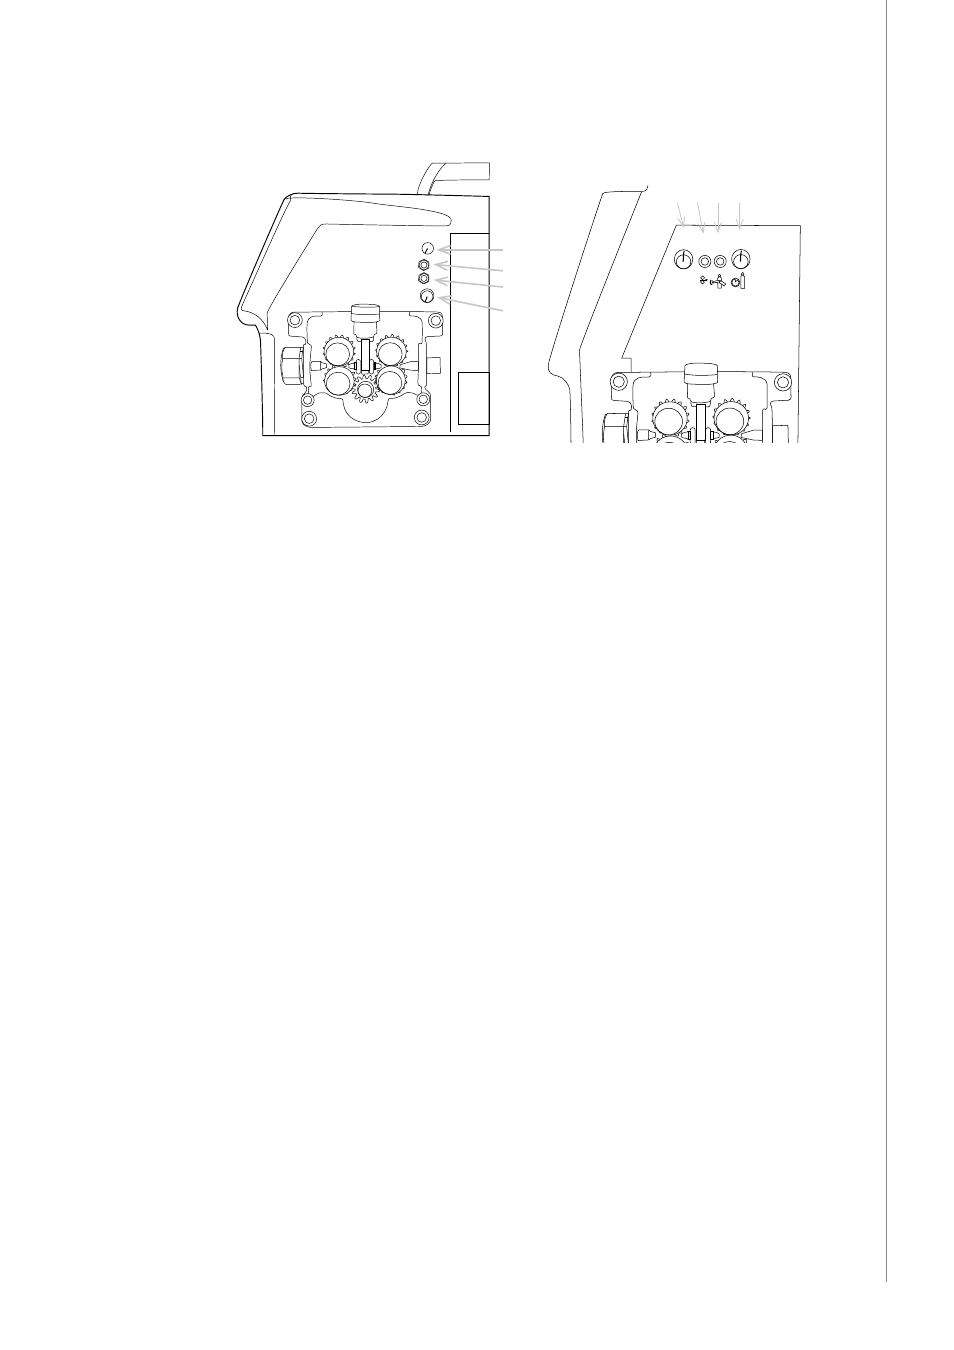
using the inside COntrOls
BURNBACK
WIRE INCH
GAS TEST
POST GAS
1
2
3
4
WIRE INCH
GAS TEST
POST GAS
BURN
BACK
WIRE
INCH
GAS
TEST
POST
GAS
1 2 3 4
ArcFeed 200
ArcFeed 300, 300p and 300rC
4.2.1 Burn back time
Burn back time control knob (1) lets you adjust the length of the post-welding current. Using
Burn back feature makes it easy to stop welding without wire sticking or burning back to the
contact tip.
4.2.2 gas test
Gas test button (2) lets you test the shielding gas and measure the gas flow.
4.2.3 wire inch
Wire inch button (3) lets you drive the welding wire without turning on the welding current.
This feature can be used for example when feeding in the new wire.
4.2.4 post gas time
Post gas time (4) control knob lets you adjust the length of the post-welding gas flow. This
feature, combined with the burn back time, provides a smooth finish of the weld.
4.3
hAnging the deviCe
The Kemppi ArcFeed 200 wire feeder should never be hanged by its handle. Use a special
hanging frame for hanging it to a welding beam or other. See 'Accessories' in Chapter
'Ordering numbers' at the end of this manual.
The Kemppi ArcFeed 300, 300P and 300RC models can be hanged by their handle by using a
special hanging device, KFH 1000. See 'Accessories' in Chapter 'Ordering numbers' at the end
of this manual.
13
A
rcF
eed 200, 300, 300P
, 300R
C / © Kemppi O
y / 1117