Quick start guide, Pt4000, 20” monitor – ikan PT4000 User Manual
Page 8
3903 Stoney Brook Dr. Houston TX 77063 | +1.713.272.8822 | www.ikancorp.com | [email protected] | © 2009 ikan Corporation. All right reserved.
1
2
3
4
5
Powering The Monitor. To do this, you have two options.
a) You can plug the AC power adapter into the power input jack.
See Figure 2.
b) You can connect a pro battery using the optional accessories, PBK17-S or PBK17-A (Pro Battery Kit)
and then plugging that plate into the DC-In connector.
You can connect PT4000 to your computer with VGA cable (not included in the PT4000 package).
Connect with DVI: You can also use a DVI signal from your source with this input.
Connec with A/V for PiP: You can connect a BNC cable to your PT4000 to receive a composite signal, in order to use
Picture-in-Picture.
3ft minimum for best viewing distance.
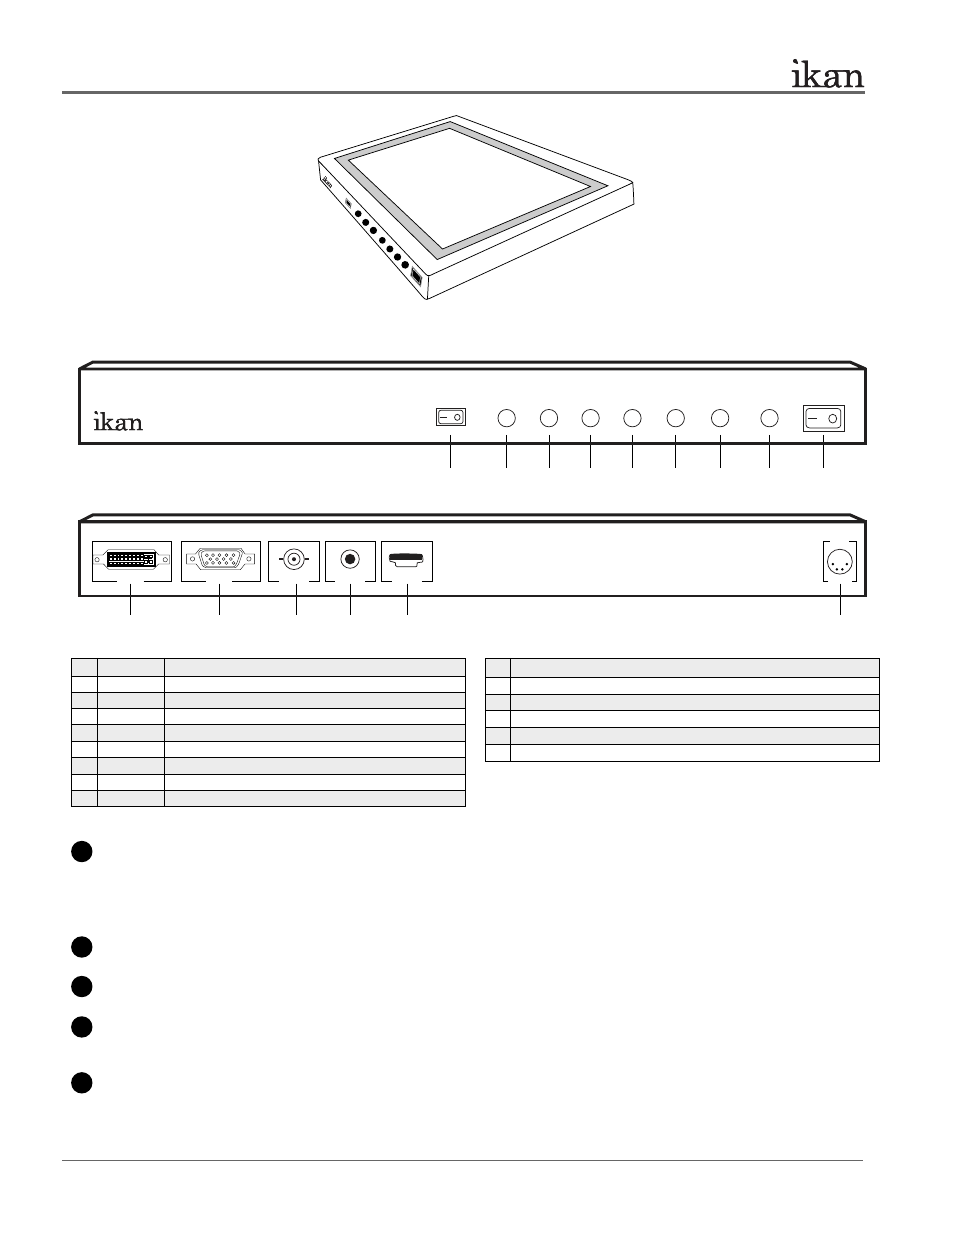
Figure 2 - Rear view
Figure 1 - Front view
PT4000
20” Monitor
Quick Start Guide
FLIP
MENU PiP INPUT ON/OFF
A
B
C
D
E
F
VGA
DVI
VIDEO
12V 4A
USB
12V-24V
DC IN
20” Monitor
1. POWER
Power switch (I = On, O = Off)
2. INPUT
Video input: DVI, VGA, BNC
3. PiP
Picture in Picture
4. MENU
Access to all monitor settings: Brightness, Contrast, etc
5.
While in MENU mode, toggle adjust setting down
6.
While in MENU mode, toggle adjust setting up
7.
While in MENU mode, toggle adjust setting right
8.
While in MENU mode, toggle adjust setting left
9. FLIP
Flip image horizontally
1
2
3
4
5
6
7
8
9
A. DC 12V-24V Power Connection
B. USB - Firmware Update used only
C. AC 110V-220V Power Connection
D. A/V - Input for standard definition composite signal
E. VGA - Connection for PC
F. DVI - Connection for Mac
7 of 10