Installing in a pit or posthole 1 2 4 3 – Guralp Systems CMG-3ESPC User Manual
Page 2
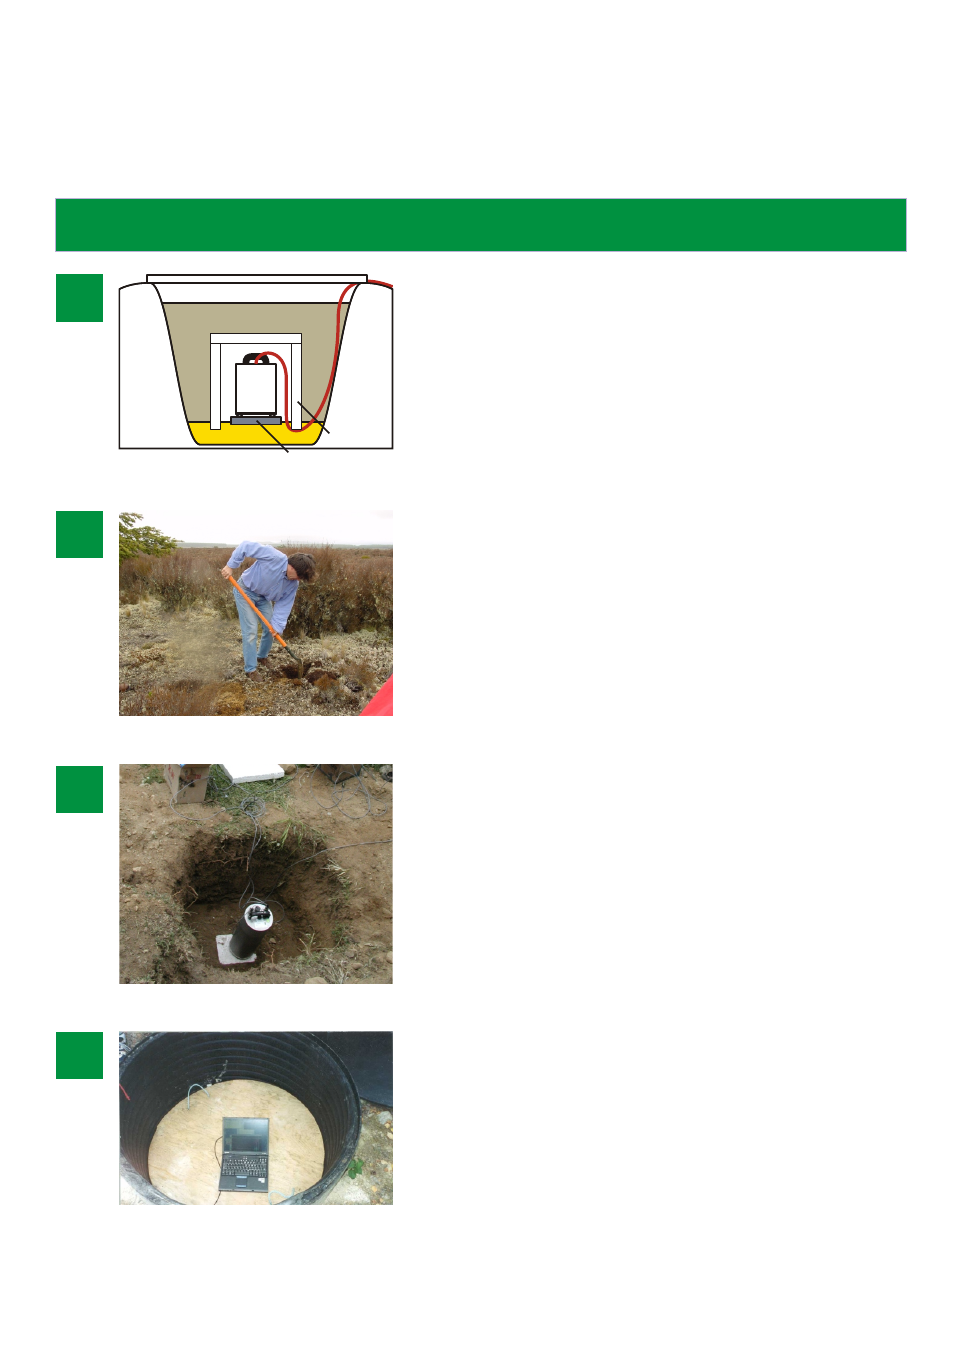
Cover
Backfill
Dry sand
Marble or
granite plinth
Polystyrene
shielding
Sensor
Signal cable
Installing in a pit or posthole
1
2
4
3
Check you have all necessary equipment and select a
suitable location for the pit installation. You will need:
• the sensor and other seismic equipment;
• an angle-grinder, if mounting on bedrock;
• otherwise, a supply of dry sand and a marble or
• granite plinth for mounting the sensor;
• a protective shield of polystyrene or other suitable
material.
Dig a pit at least 60 cm deep at your chosen location,
down to the bedrock if possible.
•On bedrock, use the angle-grinder to plane off part of
the surface. Clean the hole and go to step 3 on this
page.
•On compacted subsoil, pour a layer of fine sand over
the bottom of the hole, and mount the sensor on the
granite plinth on top of this sand layer.
In rapid installations, a large stone may serve adequately
instead of the granite plinth.
Connect the sensor cables, then level and unlock the
components as described in steps 3 and 4 overleaf.
Check the system is working and cover the sensor with its
protective shield.
If you are installing in a cased pit (as in this picture),
install the digitizer and power supply inside if possible,
then seal the installation with a weatherproof cover.
Otherwise, backfill over the shield with fresh soil. Mark
the sensor position, e.g. with its GPS unit. Install the
recording equipment and batteries, if used, in separate
pits.
MSH-C3E-0001-B : Page 2 of 2