Guralp Systems CMG-3ESPCD Installation User Manual
Cmg-3espcd, Digital sensor, Installation
CMG-3ESPCD
Digital sensor
Installation
Check you have all components and cables.
- CMG-3ESPCD digital weak motion seismometer
- GPS receiver
- Brown GPS—sensor cable
- Blue/grey combined sensor—PC and power cables
- Sensor calibration data booklet
You will need a Windows or Linux PC with an RS232 port
and a 12–24 V DC power supply.
Choose suitable sites to install the sensor and GPS.
The sensor should be mounted
- at, or ideally below, ground level
- in contact with bedrock, if possible
- otherwise, on a hard granite or concrete pier
- in an environment with constant temperature
- shielded from air currents
- away from electrical cables and appliances
The GPS should be placed
- within 15 m of the sensor
- in a place with a wide view of the sky and a low
horizon.
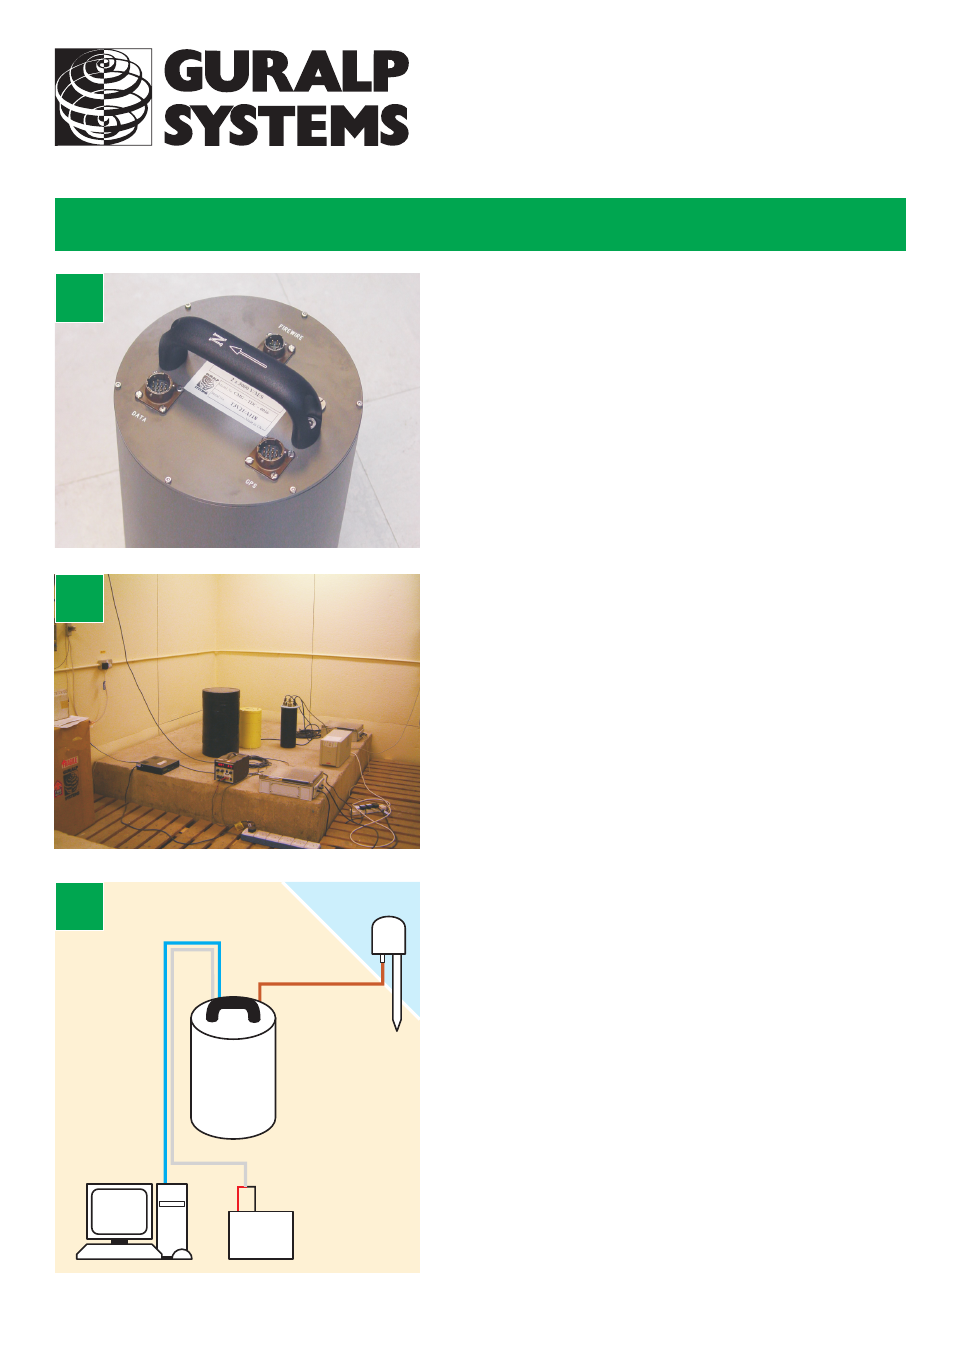
Connect the various parts together.
- Connect the brown cable attached to the GPS
to the GPS connector on the sensor.
- The blue cable ends at a 9-pin RS232 socket.
Connect this socket to your PC’s serial connector.
- The attached grey cable ends in
red and black wires. Connect the black wire to the
negative (–) terminal of the power supply,
and the red wire to the positive (+) terminal.
- The blue and grey cables are joined together at
a 10-pin mil-spec socket. Attach this to the DATA
connector on the sensor. Do this step last.
To test the installation, follow the steps overleaf.
1
2
3
RS232
GPS
Power
supply
+
–
PC
CMG-
3ESPCD