Our commitment – Greenheck RBD & RBDR Series (473325) User Manual
Page 2
RBD & RBDR Series dampers are driven by a 9 volt actuator. The 9 volt power is supplied from a Greenheck “EZ Balance”
hand held remote. The “EZ Balance” remote is plugged into a wall or ceiling jack that is wired to the damper actuator using
wire and connector assemblies.
After the damper and wiring is installed, operation of the damper and wiring circuit must be visually verified by connecting
the “EZ Balance” remote to the wall jack and power up the unit. Using the switch on the “EZ Balance” remote, run the
damper through a complete cycle from full close to full open and reverse back to closed position. Document that proper
operation has been verified.
Electrical Guidelines
Installation Instructions
Damper Troubleshooting
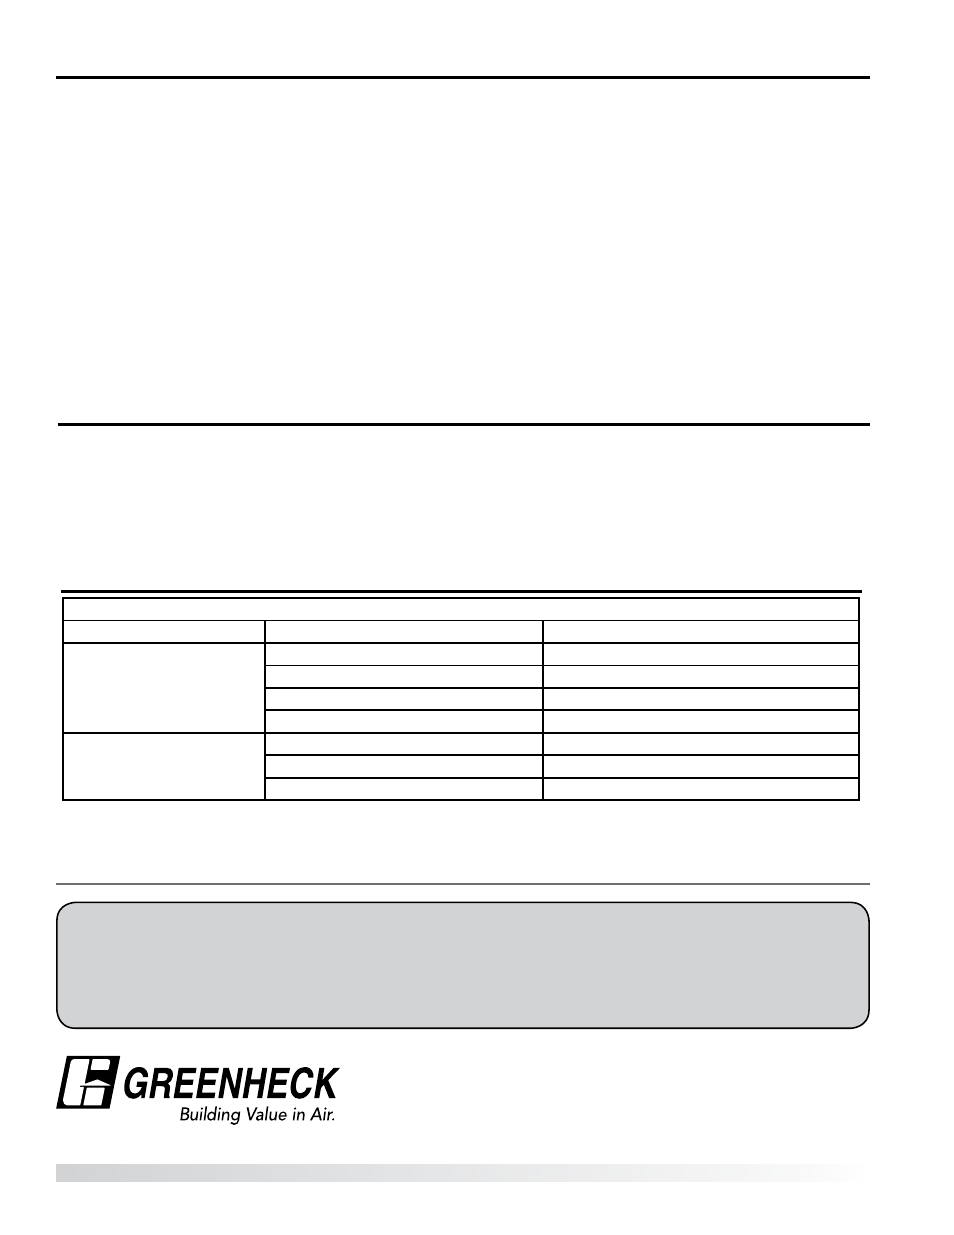
The following is a cause and correction list for common concerns with the dampers.
Symptom
Possible Cause
Corrective Action
Damper does not fully open
and/or fully close
Frame is 'racked' causing blades to bind Adjust frame such that it is square and plumb
Screws in damper components
Locate screws and remove
Contaminants on damper
Clean with a non oil-based solvent
Defective motor
Replace
Damper does not operate
Remote battery is dead
Replace with a 9 volt battery
Broken wire connection
Check all wire connections
Broken wire
Check wire for cuts, replace if necessary
4) With the blade closed, install the actuator by aligning
the coupler over the end of the square pin (as shown in
Figure 2) and sliding the actuator assembly onto the pin
until the bracket is in contact with the duct surface.
5) Check the blade clearance to be sure that the blade
can move side to side in the frame and it is not pressed
against the opposite side of the damper frame. If the
blade is pressed against the opposite side, the pin may
need to be pounded a little further into the blade.
6) Connect a Greenheck EZ Balance control device to the
actuator. While holding the actuator assembly against
the duct, press and hold the “Close” button until the “full
closed” light flashes.
7) Rotate the actuator assembly to hold the blade closed
then secure the actuator to the duct using the two
supplied screws.
8) Recheck the blade clearance and damper operation by
cycling the actuator.
9) All wire connections from the wall or ceiling jack to
the damper actuator must be secured to the building
structure in such a way as to prevent strain on the wire
connections (for example: use wire ties to secure a wire
loop at each connection and intermittently between the
connections).
10) The actuator mounting bracket has a factory installed
wire tie for the purpose of providing strain relief at the
actuator. Thread the wire through the wire tie, loop
around and back through the wire tie before connecting
to the actuator box. Tighten the wire tie leaving a short
loop at the actuator.
473325• RBD Rev. 5, April 2014
Copyright 2014 © Greenheck Fan Corporation
As a result of our commitment to continuous improvement, Greenheck reserves the right to
change specifications without notice.
Specific Greenheck product warranties are located on greenheck.com within the product
area tabs and in the Library under Warranties.
®
Phone: (715) 359-6171 • Fax: (715) 355-2399 • E-mail: [email protected] • Website: www.greenheck.com
Our Commitment