Grandstream GXV3240 Quick Installation Guide User Manual
Page 4
3
4
CONNECTING THE PHONE:
OVERVIEW:
PHONE SETUP:
GXV3240 represents the future in personal IP multimedia communication, featur-
ing Android™ Operating System 4.2 and its vast number of 3rd party applications,
a 4.3” (480x272) capacitive touch screen, a tiltable mega-pixel CMOS sensor,
dual Gigabit network ports, integrated Wi-Fi, PoE and Bluetooth. The GXV3240
delivers superior HD audio & video, leading edge telephony features and integra-
tion of rich Web content with access to the rapidly growing Android™ applications
base and automated provisioning. GXV3240 redefines the desktop communica-
tion experience with a raised level of innovation and integration of state-of-art real
time video conferencing, personalized rich media presentation & delivery, popular
Web and social networking applications and advanced business productivity tools.
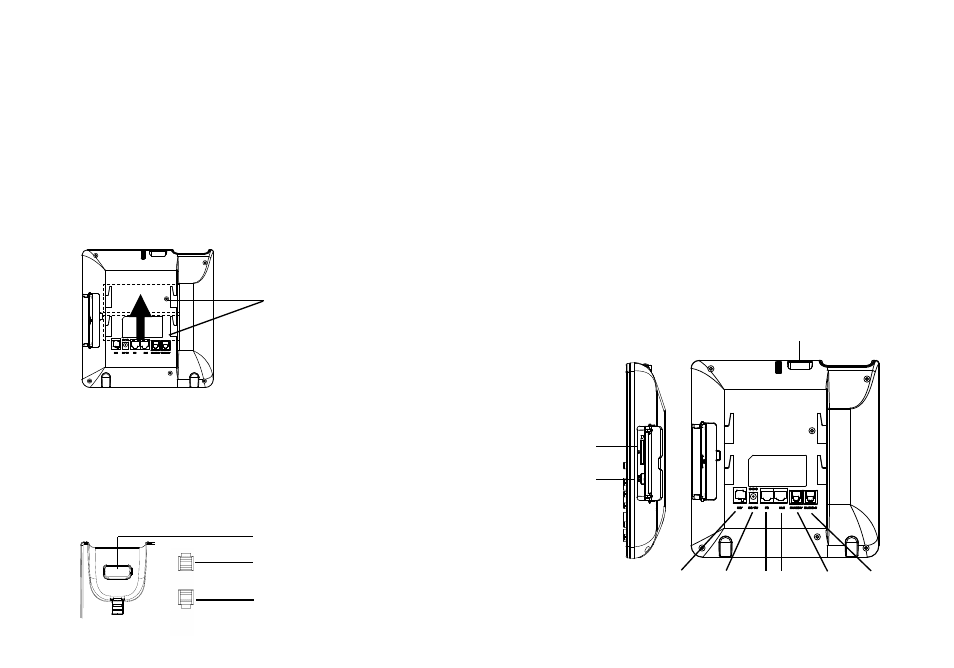
1. Attach the wall mount to the slots on the back of the phone;
2. Attach the phone to the wall via the wall mount hole;
3. Pull out the tab from the handset cradle (see figure below);
4. Rotate the tab and plug it back into the slot with the extension up to hold the
handset while the phone is mounted on the wall.
Installing The Phone (Wall Mount):
1. Connect the handset and main phone case with the phone cord;
2. Connect the LAN port of the phone to the RJ-45 socket of a hub/switch or a rou-
ter (LAN side of the router) using the Ethernet cable;
3. Connect the 12V DC output plug to the power jack on the phone; plug the power
adapter into an electrical outlet. If PoE switch is used in step 2, this step could
be skipped;
4. The LCD will display booting up or firmware upgrading information. Before con-
tinuing, please wait for the main screen display to show up;
5. Using the web configuration interface or from the menu of the touch screen, you
can further configure network connection using static IP, DHCP and etc.
HDMI Port
PC
Port
LAN
Port
Handset
Port
Power
Headset
Port
SD Card Slot
USB Port
Slots for the wall mount
and phone stand
Tab with extension up
Handset Rest
Tab with extension down
Attach the phone stand to the back of the phone where there is a slot for the
phone stand. Upper part and bottom part are available for two angels.
Installing The Phone (Phone Stand):
EXT
Port