Chapter: hardware installation, Chapter: driver installation – Freecom TD SSD User Manual User Manual
Page 7
7
FREECOM MOBILE HARD DRIVE
FREECOM DESKTOP HARD DRIVE
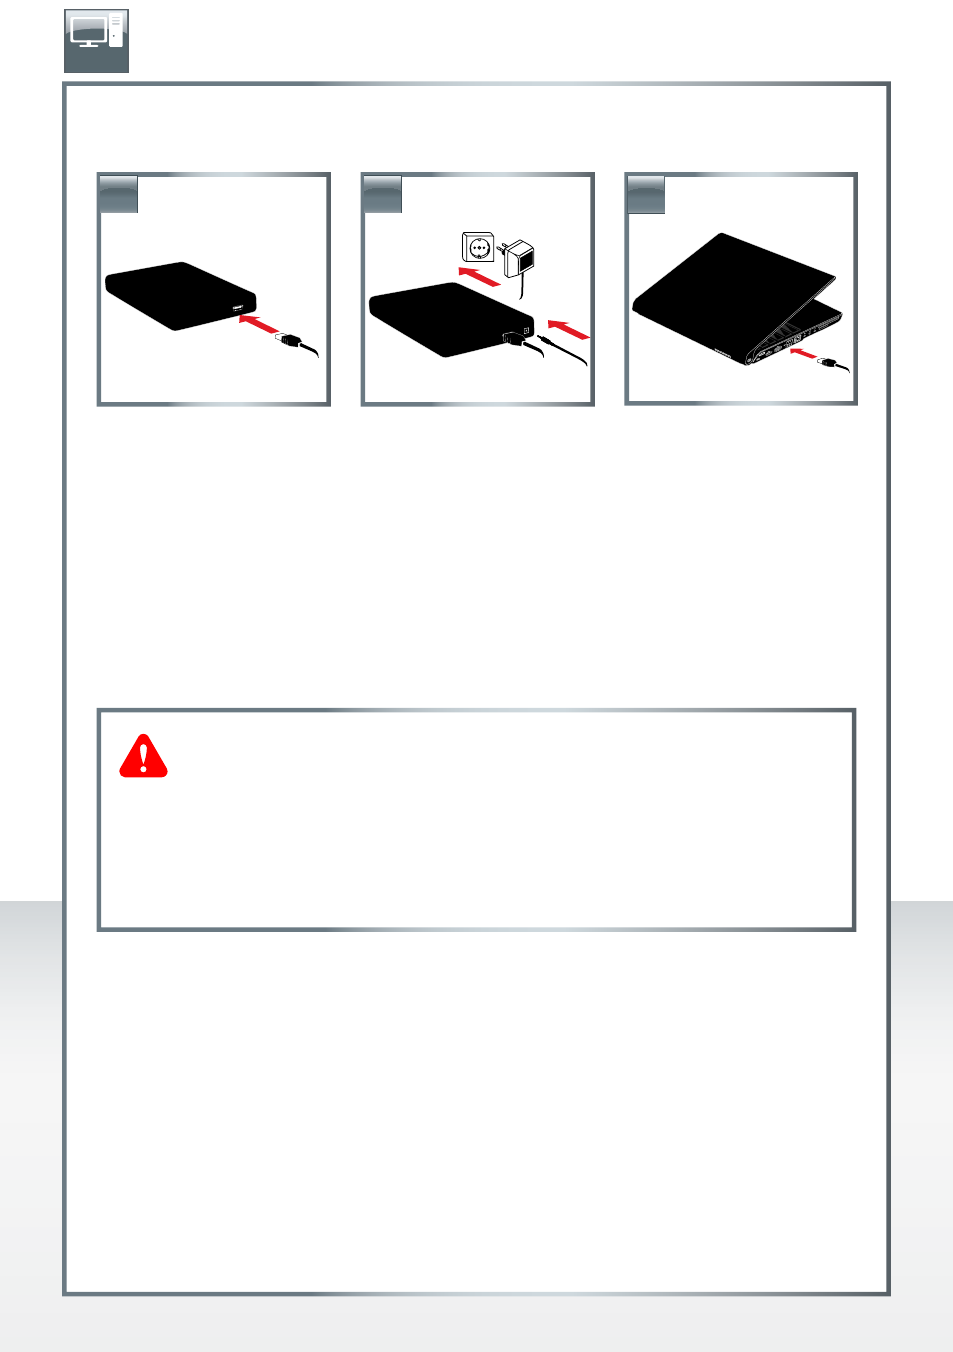
Chapter: Hardware Installation
1. Connect the interface cable* to the Freecom Mobile Hard Drive / Desktop Hard Drive.
2. Optional: Connect the cable of the power supply to the Freecom Mobile Hard Drive /
Desktop Hard Drive and the power supply itself to the socket.
3. Connect the interface cable* to the interface port of your computer.
4. Optional: if your device comes with a power switch, switch on the device before using
it.
*
Please use the interface cables that come with your device (e.g. USB, Thunderbolt, eSATA, Firewire,
LAN) for connecting the device to your PC/Mac.
Chapter: Driver Installation
Under Windows XP / Windows Vista / Windows 7 / Windows 8 and Mac OS X a separate
Freecom driver is not required. The drivers will be installed automatically by the operating
system after plugging in the Freecom Mobile Hard Drive / Desktop Hard Drive into the
interface port of the computer.
Since USB 3.0 is backwards compatible with USB 2.0, the Freecom Mobile
Hard Drive / Desktop Hard Drive can be connected to all USB ports. When
connected to a USB 2.0 port, however, the performance (data transfer rate)
of the Freecom Mobile Hard Drive / Desktop Hard Drive will be much
lower than when the drive is connected to a USB 3.0 port.
For optimum performance the Freecom Mobile Hard Drive / Desktop
Hard Drive should always be connected to a USB 3.0 interface.
EN
3.
2.
1.