Operation – Formax FD 1200 User Manual
Page 9
5
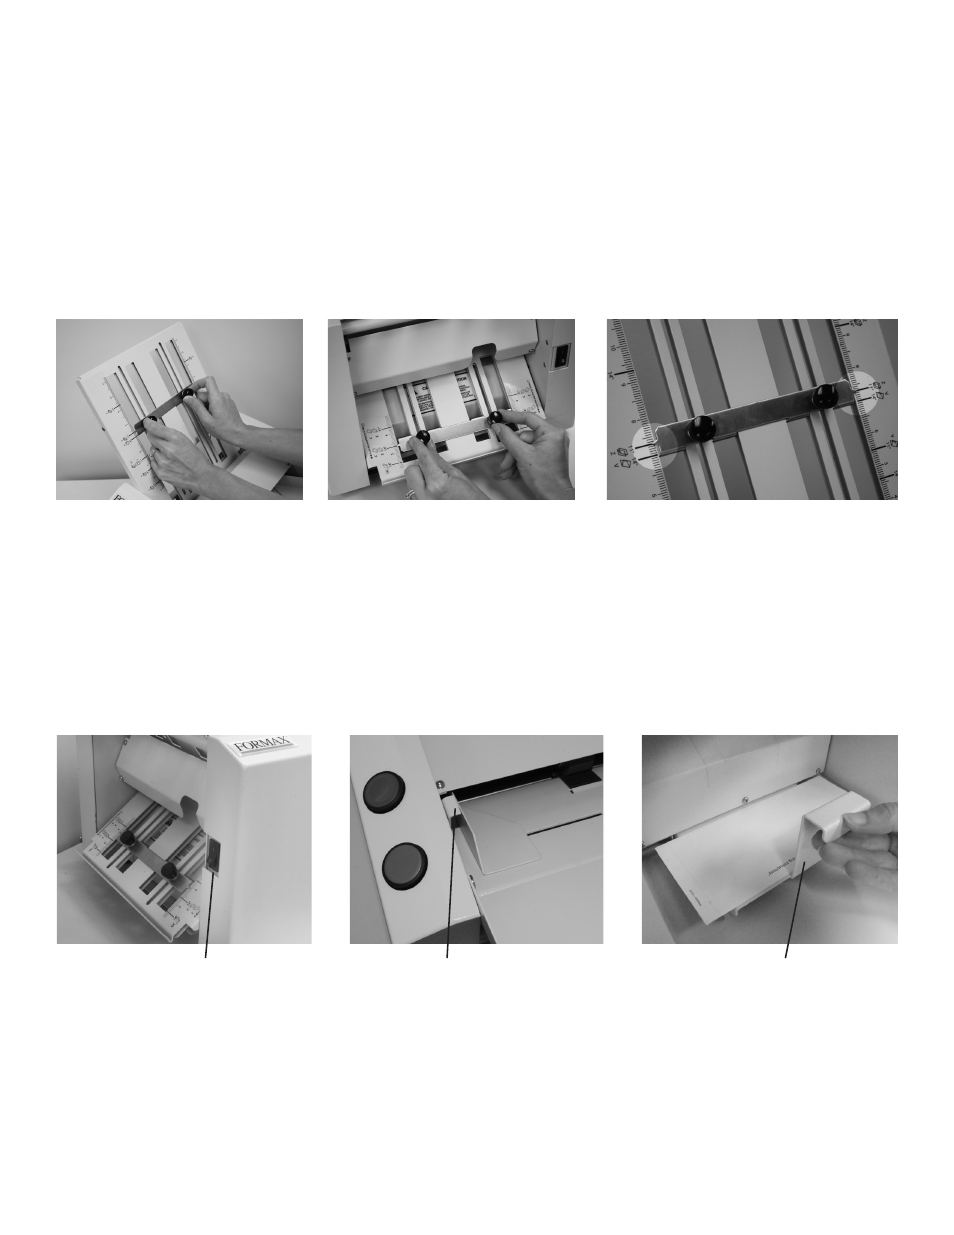
Adjust fold plates to the correct fold type and paper size. Leaving the fold plates in position, loosen the two
thumbscrews (Fig 2a & 2b) that hold the fold stop in place. Align the arrows at each end of the fold stop with the
marks on the fold plate, be sure each side matches up (Fig 2c) and tighten the thumbscrews.
Note: For “Half”
folds remove the lower fold plate, turn it around 180° and reinstall with diverter edge leading.
1. Setting the fold type
N
ote: The fold plates are pre-marked for standard 11” and 14” Z, C & Half folds and 14” Uneven Z & C folds for
quick setup (refer to page 6 to help determine fold type and pg 8 to measure for custom folds.).
OPERATION
Test fold settings: Turn the power on (Fig 3) push the paper feed lever (Fig 4) down, place one form onto the
in-feed tray and press the start button. Examine document and adjust fold plates if necessary.
Catch tray adjustment: Set the test fold into the catch tray (Fig 5) and slide the catch tray in or out so that the
folded form lies flat in the tray. The catch tray can be further adjusted as forms are running, for best stacking
results.
Adjusting upper fold plate
Adjusting lower fold plate
Setting fold stop
Fig. 2a
Fig. 2b
Fig. 2c
2. Test fold settings and catch tray adjustment
To load forms, push the paper feed lever down and load paper neatly stacked and squared onto the in-feed tray.
Paper can be stacked up to 75 sheets (24# bond).
Note: Standard “Z” fold forms can be loaded face up or down with the glue edge trailing. All “C” fold forms must
be loaded face up with glue edge trailing.
Tip: It is recommended to let forms cool for one-half hour, from the laser printer, before folding and sealing.
This allows toner to set on the forms, and static electricity to discharge.
3. Loading Forms
Fig. 4
Paper feed lever
Fig. 3
Power switch
Fig. 5
Catch tray