G4 marathon, g4r marathon – Flowserve G4 Marathon Sleeveline Plug Valves User Manual
Page 9
9
SECTION V
A. VALVE ASSEMBLY –
1
/
2
" &
3
/
4
" G4 MARATHON, G4R MARATHON
Flow Control Division
Section 1.0
14. Apply thread locking compound to the threads of the
top cap fasteners. Tighten the four top cap fasteners to
7 ft-lbs using a torque wrench. Reference Torque Table
#1a & 1b on page 12.
15. Loosen the adjuster fasteners to approximately
3
/
16
"
above adjuster. Then rotate the valve plug back and forth
3 times, making it rise upward.
16. Retighten adjuster fasteners to a torque of 10 to 12 in-lbs.
or until the height of the plug port is positioned approxi-
mately
1
/
16
" above to flush with the body port, whichever
occurs first.
17. Rotate plug back and forth a couple times to make sure
the stops and ports line up properly. The final assembled
valve should look similar to Figure V A-10.
18. LEAK TESTING: Anytime a valve has been modified in
any manner, including fastener changes, it should be
retested. Normal testing using gas, should be at 150 PSI
for Class 150 and 300 PSI for Class 300 valves from
1/2" through 6". It should be noted, however, that this
test does not meet the requirements of ANSI, API, or
MSS. For test procedures complying with these specifi-
cations, refer to the appropriate published specification
or contact Flowserve.
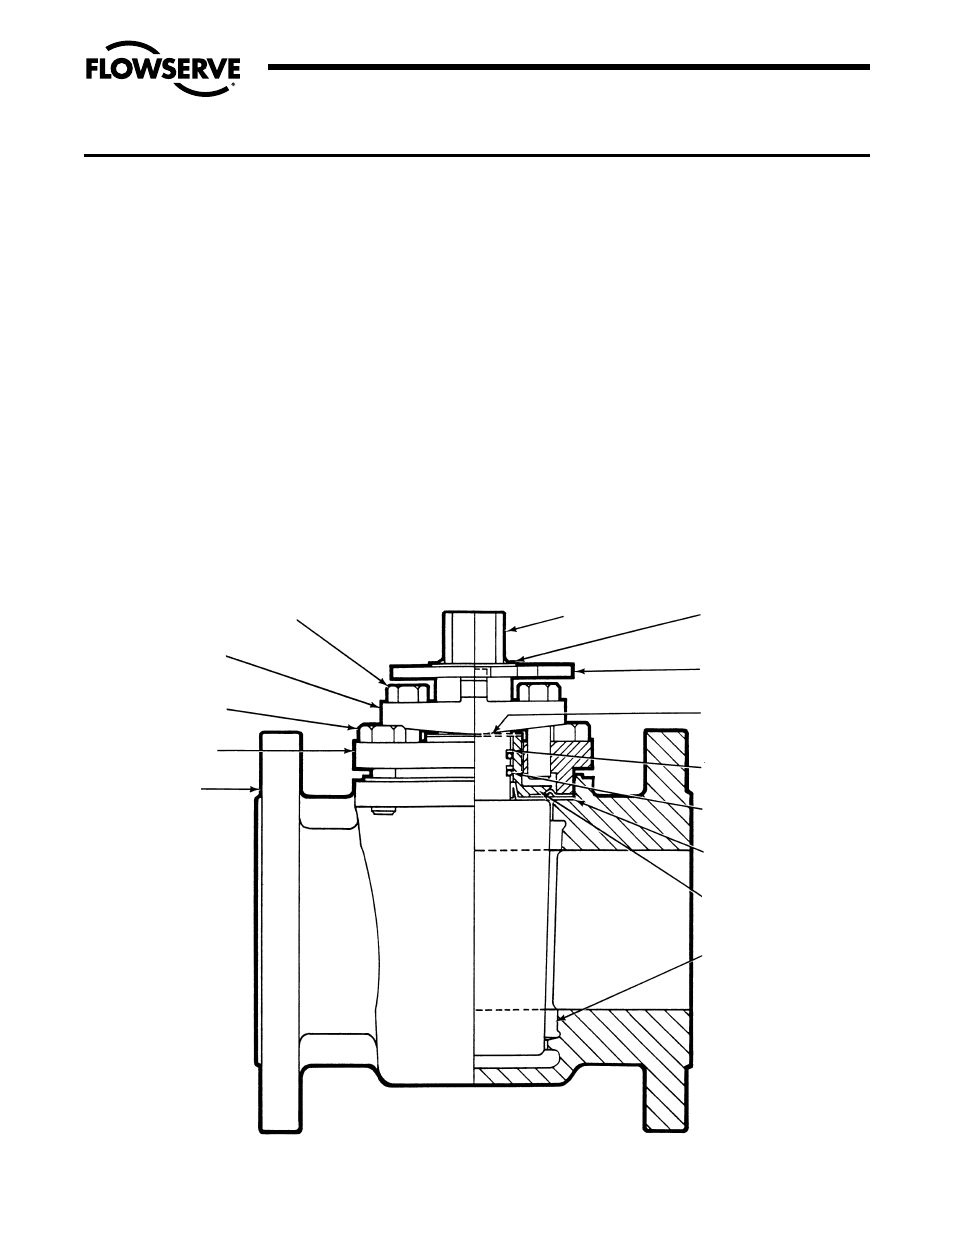
FIGURE V A-10
ASSEMBLED VALVE
ADJUSTER FASTENER
ADJUSTER
TOP CAP
FASTENER
TOP CAP
BODY
TEFLON BACK-UP
RINGS (2)
O-RINGS (2)
PLUG
STOP COLLAR
RETAINER
STOP COLLAR
GROUNDING
SPRING
THRUST
COLLAR
DIAPHRAGM
SLEEVE