Servicing – Flowserve HV 215 User Manual
Page 39
39
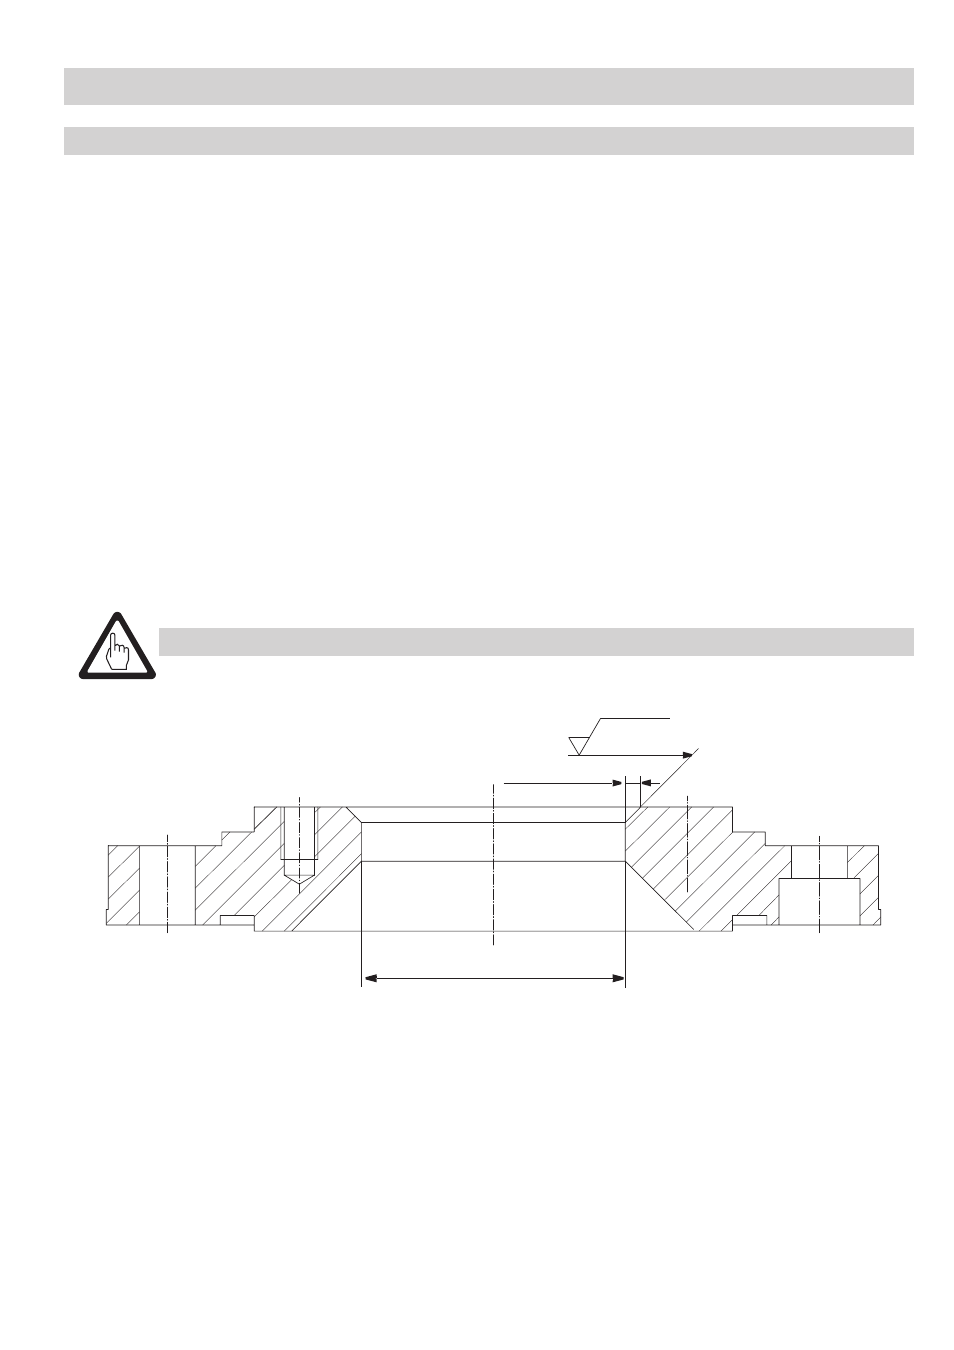
Reworking seat flange
If the seatings surface of the seat flange is slightly damaged you can remove and rework the seat flange.
For more details see drawing below.
To remove the seat flange please proceed as follows:
See drawing on page 38
. Remove body and actuating cylinder.
2. Unscrew the 2 socket-head cap screws
c and their associated locking washers d and remove
the seat flange. Take out the gasket
6.
3. Unscrew the six stay bolts
4 together with their sleeves 5 out of the seat flange 7.
Re-assembly in reverse order:
See drawing on page 42
. First push the sleeves
5 onto the six stay bolts 4 and then screw them with a torque of 25 Nm
to the seat flange
7. Apply a commerically available lubricant to the screws and tighten them.
2. To mount the valve head follow the indicated steps (see page 38).
3. Then put a new gasket
6 onto the seat flange 7.
4. Use the 2 socket-head cap screws
c together with their locking washers d to mount the valve head
to the mounting flange. Tighten them with a torque of 20 Nm. Apply a commercially available lubricant
to the screws and tighten them in several steps in diagonally opposite pairs.
Servicing
– continued –
Attention
The specified torques must be strictly observed.
∅ 85
Ra 0.8
max. 5 x 45°