Assembly instructions akh3, Technical manual – Flowserve AKH3 Atomac Lined Ball Valve IOM User Manual
Page 6
AKH3 -
atomac ball valve - reduced port
Ahaus GmbH
von-Braun-Straße 19a
D-48683 Ahaus
Postfach 1162 D-48661 Ahaus
Telefon: +49(0) 2561-686-100
Fax: +49(0) 2561-686-200
Register:
3
Page:
6
Date:
05.1996
Revision: 08.2010
Technical Manual
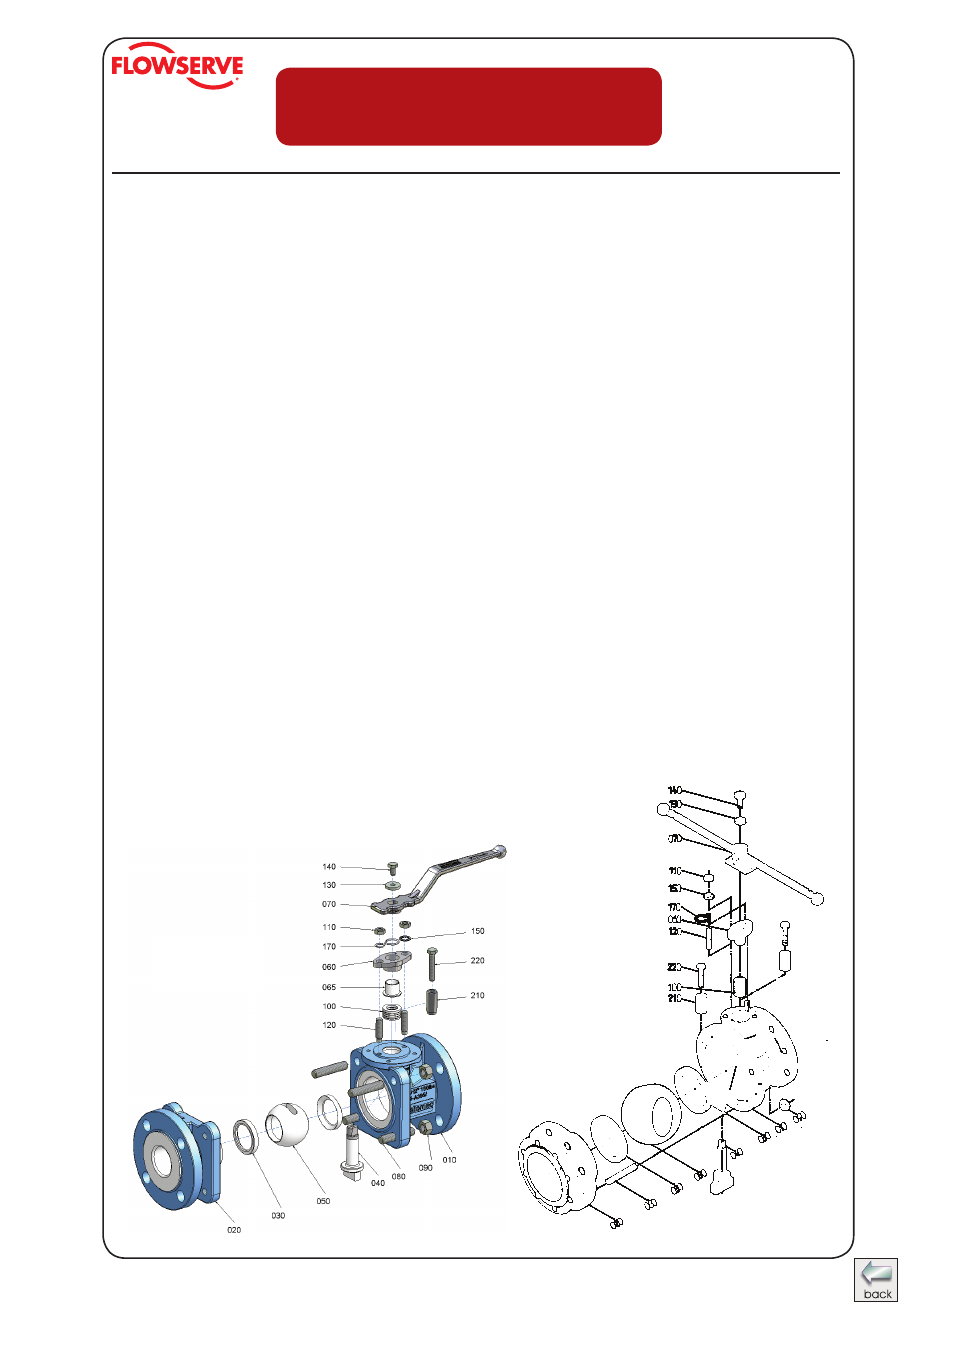
DN8“ and 10“
Assembly Instructions AKH3
DN 1“ - 3“ = square flange
DN 4“ and 6“ = hexagonal flange
The general installation and maintenance instructions must be observed.
1. Screw stud bolts
(120) into body (010).
2. Insert stem
(040) from inside of body in such a way that the flat side is parallel to body longi-
tudinal axis.
3. Insert chevron packing
(100).
4. Install gland inersert
(065), gland follower (060), safety washers (150), hexagon nuts (110)
and grounding strap
(170) also on valves with actuator.
5. Install hand lever
(070) on to stem (040) and tighten it using lock washer (130) and hexagon
bolt
(140).
6. Insert first ball seat ring
(030) into body (010).
7. Insert ball
(050) to valve stem by pushing the ball in a downward motion through valve body.
8. Turn hand lever 90° of longitudinal axis of body.
9.
Install second ball seat ring
(030) on to ball (050).
10. Install side piece
(020) on to body (010), making sure that recess for stem is on the correct
side.
11. Install body bolts
(080) and hexagon nuts (090) and tighten by crisscross method to
recommended torques.
12. Assemble stop
(210) with hexagon bolt (220).
13. Make sure that the valve DN 10“ is in open position when it is installed into the piping
system.