Assembly instructions – Flowserve PLUS 5Q User Manual
Page 11
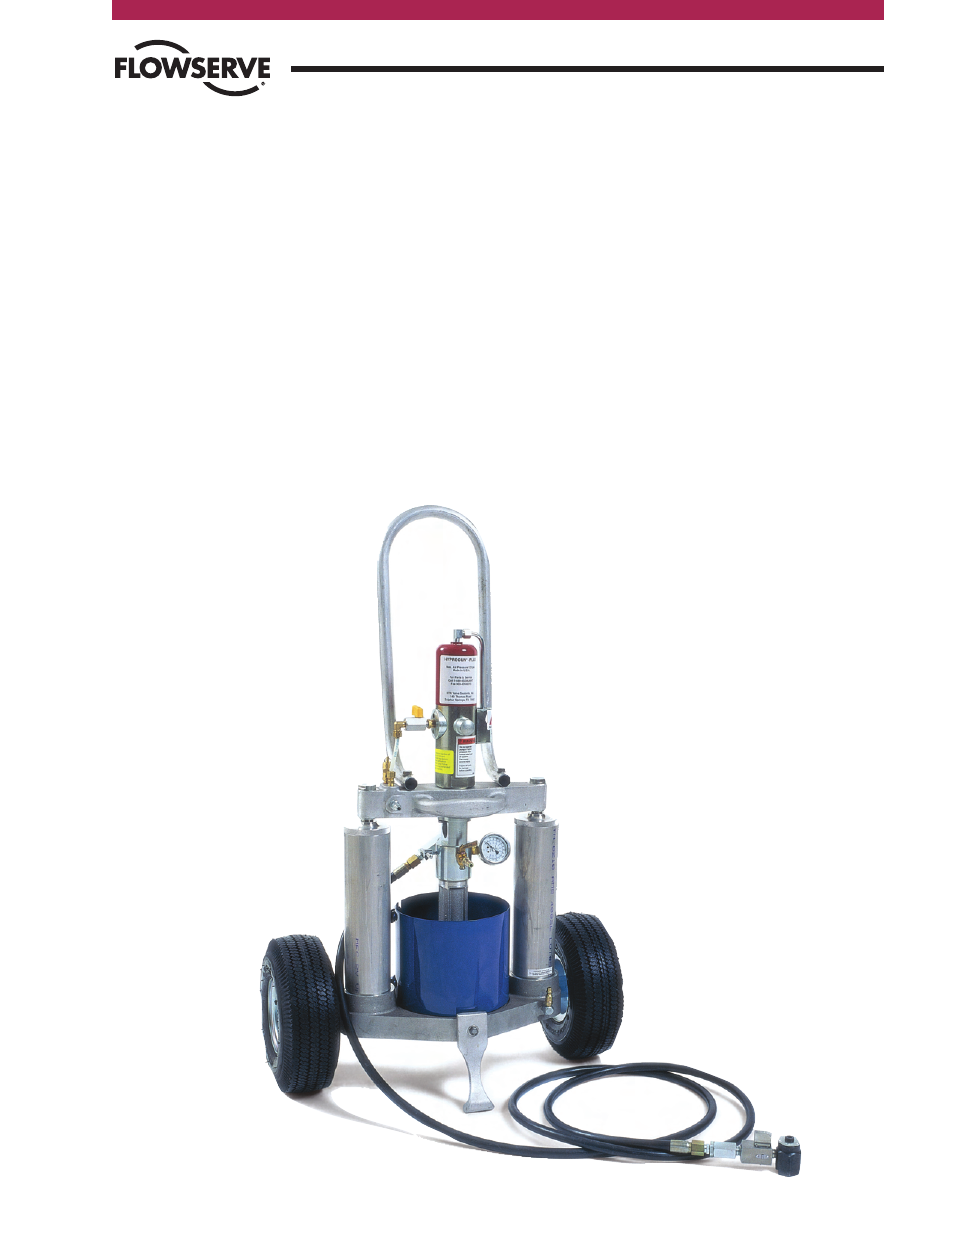
NORDSTROM HYPREGUN-PLUS 5Q
Flow Control
Nordstrom Valves
Flow Control
Nordstrom Valves
Assembly Instructions
Kick Stand Assembly
1. Locate two kick stands (74), one hex nut (85), one hex nut
(86), two washers (83), one capscrew (87), one capscrew (84),
one spring (76), and one washer (82).
2. Locate the kick stand mounting hole on the front of the
base (18).
3. Align the hole in the kick stand with the hole in the yoke.
4. Secure the kick stand into position using capscrew (87), lock
washer (83), and nut (86). The lock washer is to be positioned
between the base and nut.
5. Tighten firmly using the adjustable wrench and socket.
6. Locate the kick stand mounting hole on the back of the base
(18).
7. Align the hole in the kick stand with the
hole in the yoke.
8. Secure the kick stand into position
using capscrew (87), washer (82),
spring (76), lock washer (83), and nut
(85). The washer (82) is to be placed
on the capscrew and the spring against
the washer. This assembly is to be
placed through the kick stand and base
holes. Install the lock washer and hex
nut. The nut should be threaded onto
the capscrew until the threads appear
through the nut. If the nut is tightened
too much, the kick stand spring will be
too compressed to allow for free
movement of the kick stand.
9. Stand the Hypregun-Plus 5Q
upright and place the kickstand in
the down position.
Preparing the
Hypregun-Plus 5Q for Use
1. Using an adjustable wrench, install the hose assembly by
attaching the L-type swivel to the pump body (33).
2. Raise the follower (34) by connecting the air supply hose to the
nipple (57) located on the base (18) of the gun.
3. Remove the can shield (72) and install it on the five-quart (4.7
litre) can of Nordstrom valve sealant. To prevent the can from
splitting at the seam, the can shield should be installed with the
opening on the side of the can shield positioned opposite the
seam on the can. The top and bottom of the can shield should
not overlap the lip of the can.
4. Apply a coating of light machine oil to the follower wiper (35)
before loading the gun with a can of sealant. This will lubricate
the seal and allow for easy entry into the can.
5. The spring loaded kick stand is “kicked” to one side to allow
the gun to be tilted backward and rolled.
11