9 fitting an actuator to the valve – Flowserve Trunnball DL Ball Valves IOM User Manual
Page 9
9
NAF Trunnball DL Ball Valves NFENIM4168-00-A4 01/15
flowserve.com
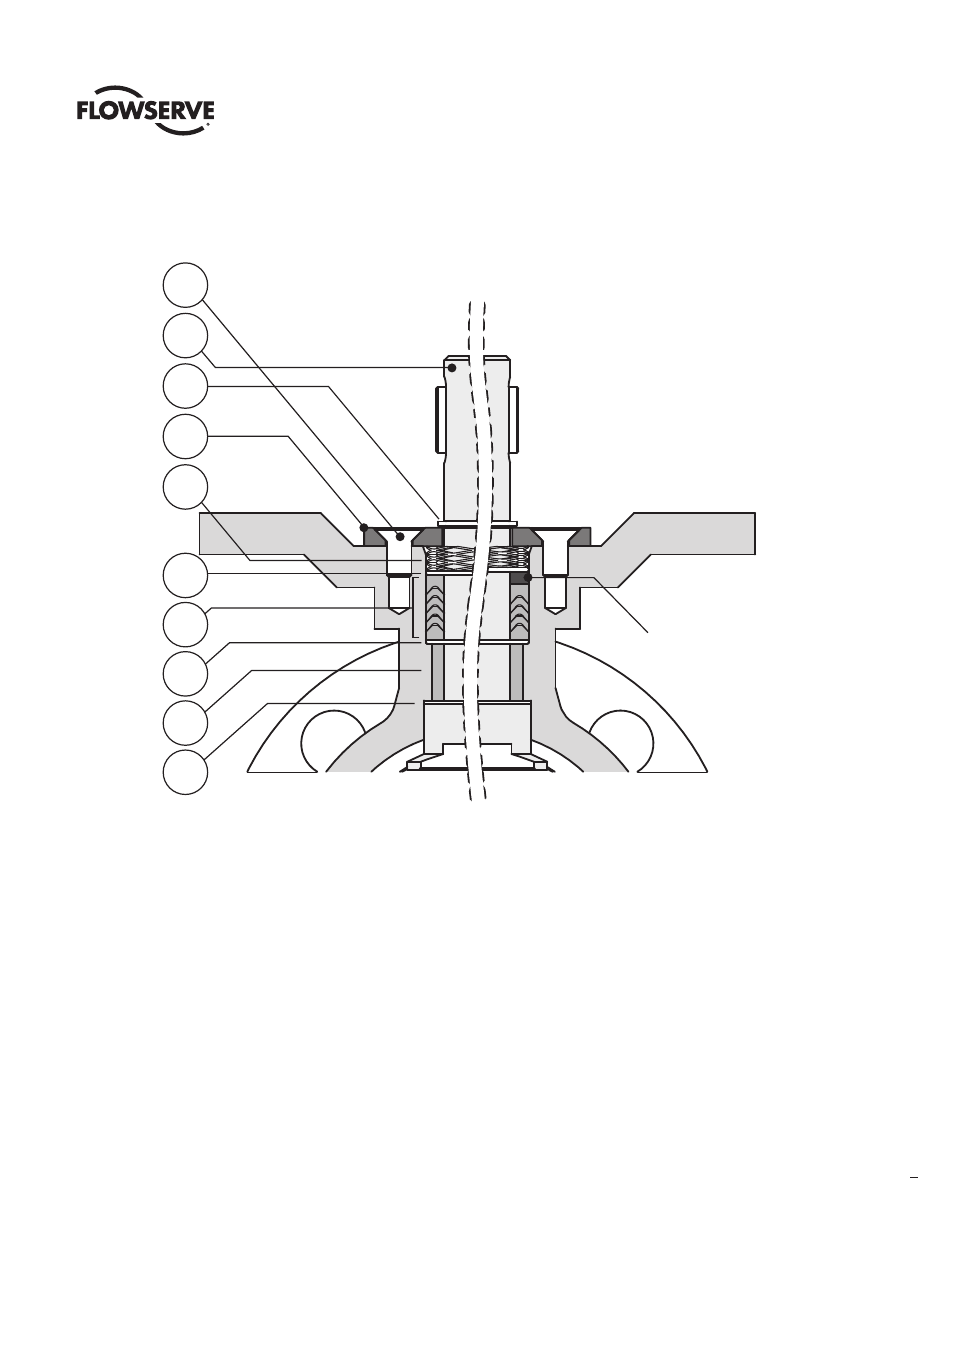
Figure 7 – Stem packing for standard (left) and fire-safe version
(right)
8 Fit a new anti-friction washer (13) to the stem (5) followed by a
new bushing (12). Then fit the stem assembly (5, 12, 13) into the
valve body.
9 Fit washer (11) and a new stem packing (10) using a suitable
silicon grease.
Please note that for valves in a fire-safe version, the graphite
ring of the stem packing (10) must be placed on top of the
stem packing. See right part of Figure 7.
10 Fit washer (9) and spring (8).
11 Fit cover (7) and tighten the screws (16) alternately in several
stages.
12 Fit the circlip (6).
13 Assemble and, if possible, pressure test, the valve as described
in section 8.3.
9 Fitting an Actuator to the Valve
1 Fit the actuator to the valve. Ensure that both the valve and the
actuator are in the closed position before fitting the actuator. The
valve is in the closed position when the keys (20) in the stem (5)
face in the direction of flow. (An actuator which uses compressed
air to close the valve and a return spring to open the valve should
be fitted with the actuator and valve in the open position.)
2 Check the operation and check that the end stops have been
correctly preset or adjust them so the ball is in the correct posi-
tion.
Note: The direction of closure must always be clockwise, as viewed
from the actuator.
Standard stem packing
Stem packing for fire-safe
version
Note: correct location
for graphite ring
7
6
5
16
10
9
8
11
13
12