5 valves with ball and seats in alloy 6, 6 replacing the stem packing – Flowserve Trunnball DL Ball Valves IOM User Manual
Page 8
8
8.4 Valves with hard chrome plated ball and
seat rings in Alloy 6
1 Check the sealing surfaces of the seat rings (4). Minor damage
to the seats can be rubbed down with fine emery cloth. Check the
seats on a face plate to ensure that they are perfectly flat. Don’t
lap the seats and the chromium-plated ball together. Change the
seats if they are severely damaged.
2 Inspect the sealing surface of the ball (3). Minor damage may be
rubbed down with fine emery cloth. If the existing ball must be
used for a further period of time, remove all sharp edges, dents
and irregularities with a fine file or emery cloth. If the ball is
severely damaged, the ball must be replaced.
3 Grease the ball (3) with a suitable grease, such as Klüber
Unisilicone L641 or similar.
Note: If the valve is intended for service in an oxygen system a
grease suitable for oxygen service must be used.
4 Continue assembling the valve as described in items 2–15 in
section 8.3.
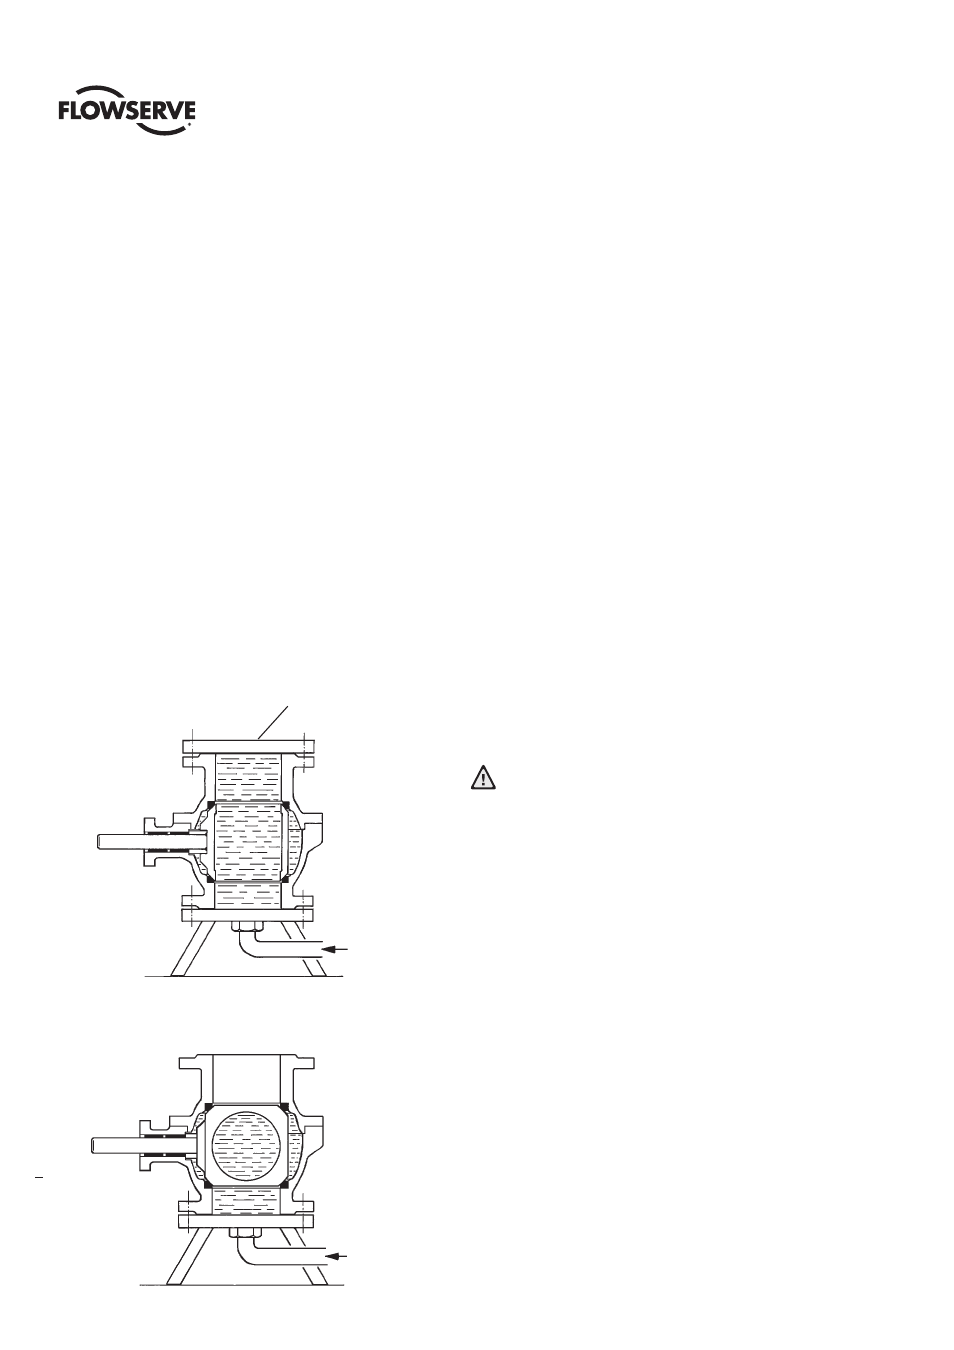
Figure 5 – Testing of body tightness
Figure 6 – Testing of ball and seat tightness
8.5 Valves with ball and seats in Alloy 6
1 The instructions for these valves are the same as those in section
8.4. If the sealing surfaces are damaged, we recommend that
the valve is returned to Flowserve for overhaul. This applies in
particular if the ball must be ground before lapping. Assemble the
valve before dispatching it to Flowserve.
2 The ball (3) and seat rings (4) can be temporarily overhauled
by lapping them together. This can be done manually with a
compound with grit size 200. Take great care to ensure that the
ball and seat rings do not become oval.
3 Balls in Alloy 6 must be carefully cleaned and greased before they
are fitted. Use a suitable solvent for cleaning. Then grease the
ball with Klüber Barrierta L55/3 H8 or similar. This coat of grease
must be very thin.
Note: If the valve is intended for service in an oxygen system a
grease suitable for oxygen service must be used.
8.6 Replacing the stem packing
If the stem seal is leaking, the stem packing must be replaced. Even
if the stem seal does not leak, we always recommend replacing the
stem packing every time the valve is disassembled. This will prevent
unnecessary extra work and downtime caused by a stem leakage in
the future. We always recommend the use of a stem sealing kit, spare
part kit A.
Make sure that the valve is not under pressure.
1 Remove any actuator.
2 Remove the keys (20).
3 Remove the circlip (6), back off the screws (16), and remove the
cover (7) and the spring (8).
4 Disassemble the valve as described in section 8.2.
5 Press the stem (5) down into the body and remove it.
6 Press the bushing (12) down into the body and remove it.
7 Remove the stem packing (10) and washers (9) and (11). See
Figure 7.
Valve open
Water
Sealing flange
Valve closed
Water
NAF Trunnball DL Ball Valves NFENIM4168-00-A4 01/15