12 features and accessories, Warming rack installation – Fire Magic Custom Gourmet Unibody Series 12 & 13 User Manual
Page 12
12
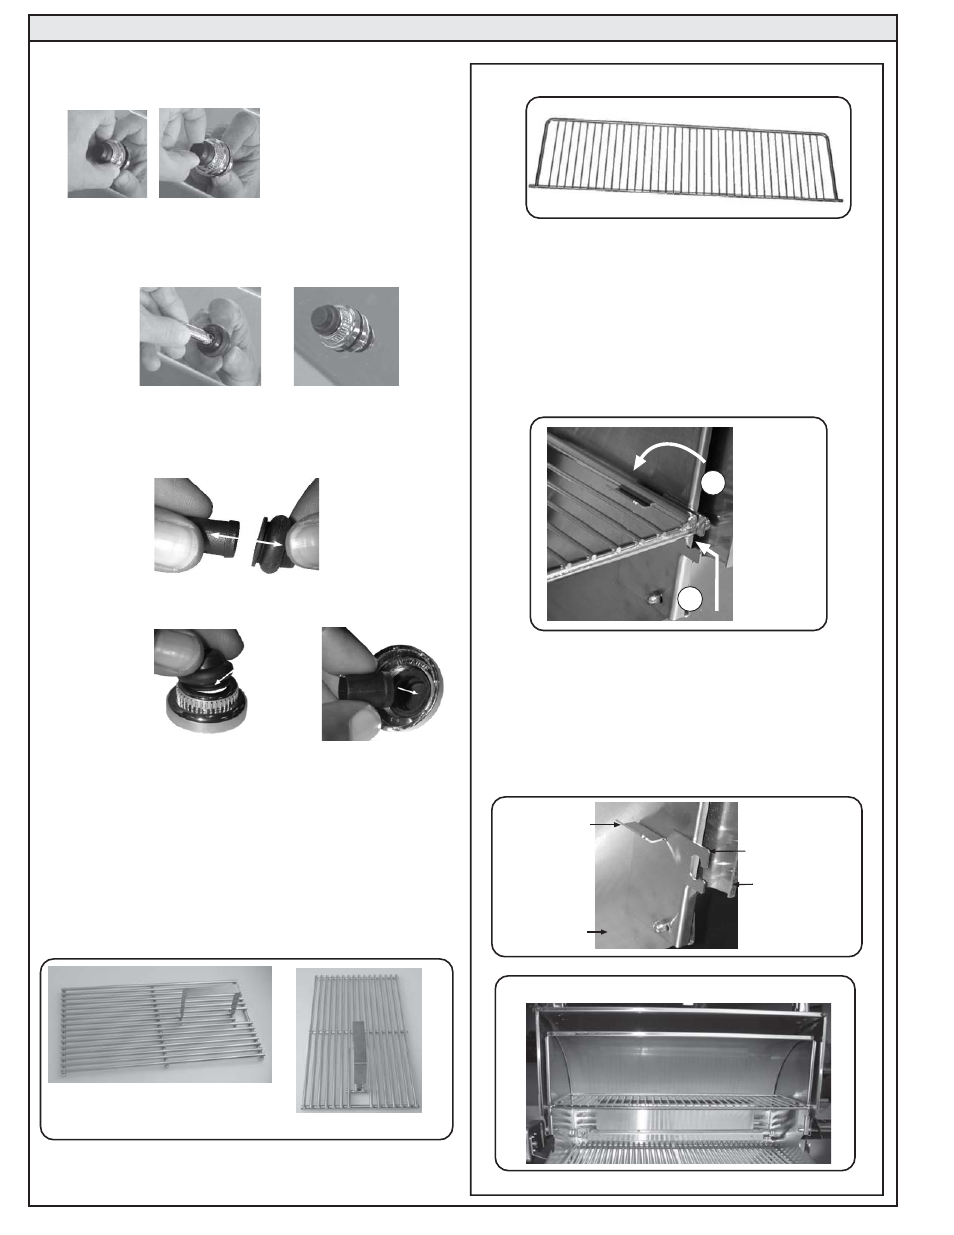
FEATURES AND ACCESSORIES
1. Remove the ignitor cover by turning the cap
counterclockwise and lifting it away.
2. The battery is now accessible for removal and replacement.
Make sure that the battery spring is reinstalled with the
new battery, and the battery is negative (-) end up.
3. Replace cover by turning it clockwise until it locks into
place.
WRONG!
REPLACING THE SPARK GENERATOR BATTERY
NOTE: DO NOT ATTEMPT
TO PULL ON THE RUBBER
CAP.
USING THE COOKING GRILL LIFTER
Hold the grill lifter by gripping the center section with the prongs
pointing down (use an oven mitt or heavy glove if the grill is
hot). Insert the notched end of the grill lifter into the grill, in
front of the midway point (front to back- Figure 15A) and central
(left to right-Figure 15B). Twist the grill lifter (clockwise or
counterclockwise) so the handle is parallel to the grill rods.
This 'seats' the spiked end of the grill lifter between two rods
enabling you to safely lift the grill out of the barbecue. Lift
slowly and adjust the grill lifter if necessary to balance.
WARMING RACK INSTALLATION
Taking the warming rack, grip along the bottom edge and
hold the rack vertical so the rounded shoulders are top
most and the rod bottom most. Following the arrows (A &
B) in Figure 17:
(A) Carefully lift it up under the outer oven edges and place
the rod ends into the hanging brackets.
(B) Allow the rack to rotate away from you so that the
sides rest on the support lip. As the shelf rotates into
position it will lock into the holding bracket. Check it is
secure in position before use (Figure 19).
The warming rack can be easily removed (A&B above in
reverse order) for cleaning. Simply follow the stainless
steel cleaning instructions in the 'Owner’s Manual' supplied
with your barbecue.
WARNING: Never install this accessory while the
barbecue is in operation or while the barbecue is
‘HOT’. Warming rack should not be in place when
rotisserie is being used.
Figure 16
A
B
Figure 17
Figure 19 Warming Rack in place inside Oven
WARMING RACK
SUPPORT LIP
WARMING RACK
HANGING BRACKET
OVEN LID
(INTERIOR)
OVEN LID
(EXTERIOR)
Figure 18
Placement of the Grill Lifter in Grill
Figure 15A
Figure 15B
WRONG!
RIGHT!
*NOTE: IF YOU HAVE ACCIDENTLY REMOVED THE
RUBBER CAP, FOLLOWING INSTRUCTIONS BELOW
TO REPLACE IT.
1. Pull the rubber cap and the inner plastic sleeve apart.
2. Carefully insert rubber cap
into the ignitor cover so it sits
behind inner lip.
3. Turn the cap over and slide
the inner plastic sleeve into
the cap.