Step 13, You’ll need – Dynex DX-WD1202 User Manual
Page 19
19
DX-WD1202
Need help? Call 800-305-2204
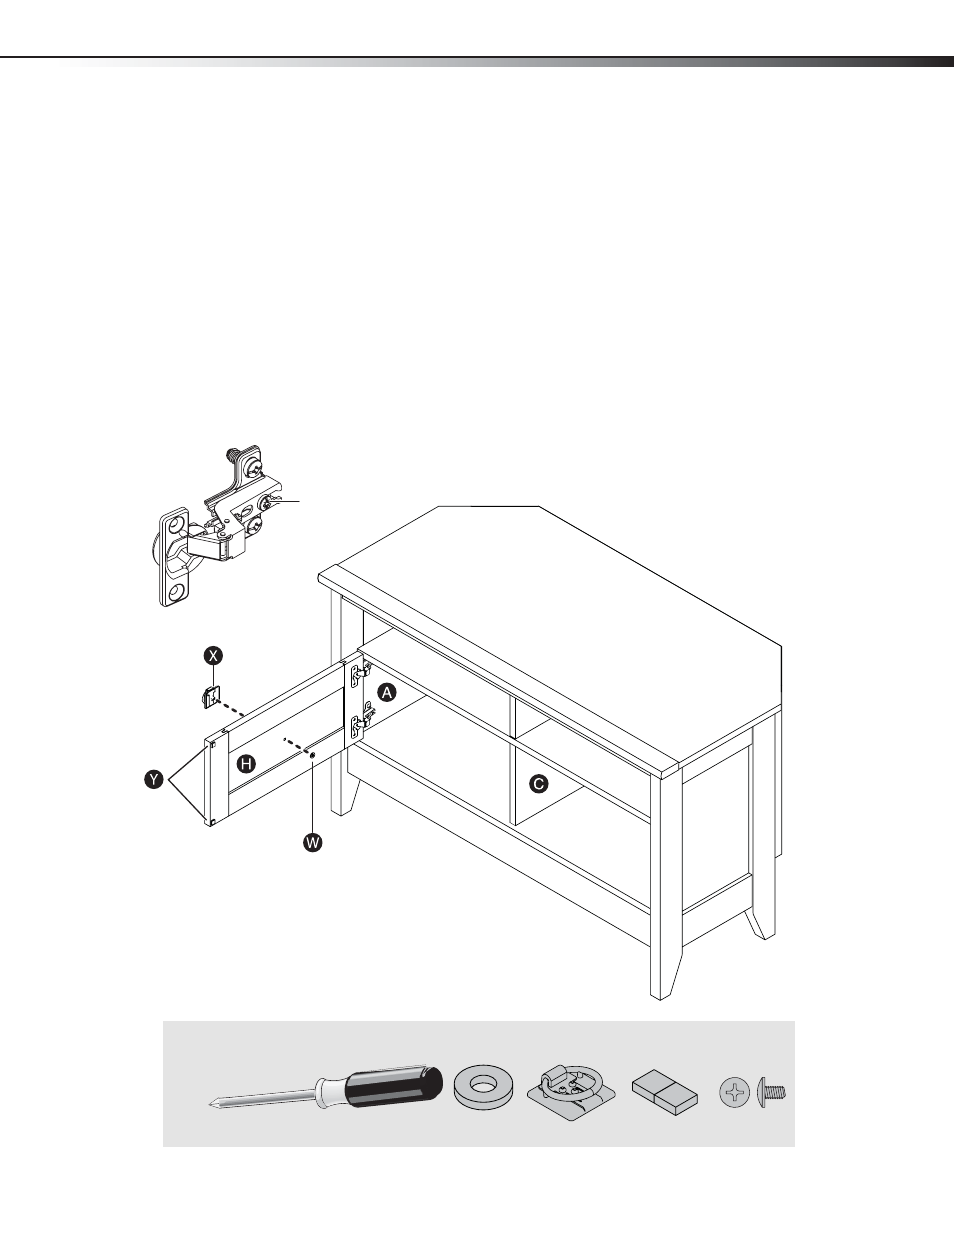
Step 13:
Carefully turn the unit so the left end is facing down, then fasten one of the doors (H) to the left end (A). Use
a Phillips screwdriver and the screws in the hinges.
Note: You may need to loosen the mounting screw to slide the hinge part way out of the slot. Retighten the screw before you
mount the hinge to the end.
Carefully turn the unit so the right end is facing down, then fasten the other door (H) to the right end (A). Use
a Phillips screwdriver and the screws in the hinges.
Carefully turn the unit so it is right side up.
Align a pull (X) with the screw hole in the middle of the door (H). Place a washer (W) over the screw hole on
the back of the door, then insert a silver 1/4" machine screw (JJ) through the washer and into the pull screw
hole. Tighten the screw. Repeat this step for the other door.
Peel two bumpers from the bumper card (Y) and stick them on the inside of the door where the door comes
in contact with the lower upright (C). Repeat this step for the other door.
You’ll need:
Mounting screw
Phillips screwdriver
W (2)
X (2)
Y (4)
JJ (2)