Daktronics DMP-1500/M3 (SS & ST) Setup With Show Control User Manual
Page 2
DMP-1500/M3 (SS & ST) Setup With Show Control Quick Guide
2 of 11
201 Daktronics Drive PO Box 5128, Brookings, SD 57006
Tel: 1-800-325-8766 or 605-697-4300 Fax: 605-697-4746
Website: www.daktronics.com
DD1805670 Rev 11
2 July 2012
3.
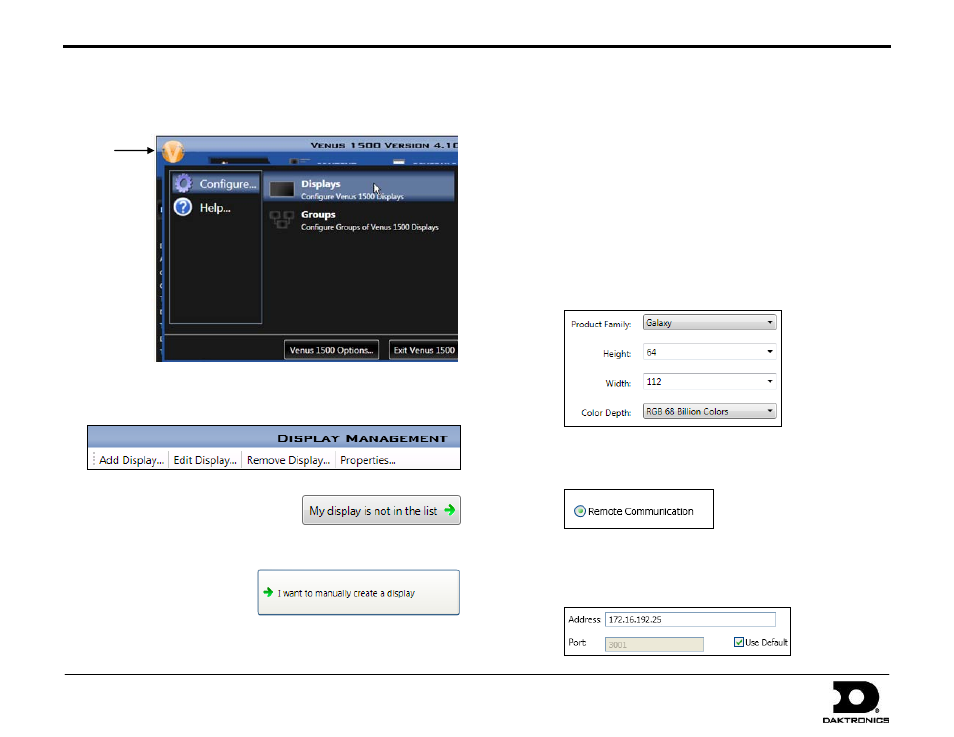
On the Venus 1500 main window, click on the Venus 1500 Hub button,
then go to Configure > Displays.
4.
In the Display Management Window, click Add Display to start the
Configuration Wizard.
5.
The sign may or may not be detected
and displayed in the Configuration
Wizard window. DO NOT select it.
Instead, click My display is not in the list.
6.
In the Display Creation
window, click I want to
manually create a display.
7.
In the Display Configuration window, use the following settings:
Product Family: Galaxy
Height: The height in pixels of the display (see previous page)
Width: The width in pixels of the display (see previous page)
Color Depth: RGB 68 Billion Colors
Note: ST-2014 scorer’s tables have a height of 32 and a width of
144, while ST-2016 tables have a height of 64 and a width of 288.
The total width will be multiplied by the number of tables that
are being used as a single display face.
Click Continue when finished.
8.
In the Communication Types window, select Remote
Communication and then click Continue.
9.
In the Remote Communication window, type in Address
“172.16.192.25”. Make sure Use Default is checked, and then
click Continue.
Hub
Button