Installing the display on horizontal beams, Power connection – Daktronics FL-3000 and FL-4500 FuelightTM 36- and 48-Inch Petroleum Display User Manual
Page 2
FL-3000 and FL-4500 Fuelight
TM
36- and 48-Inch
Petroleum Display Installation Quick Guide
Page 2 of 6
DD2766540 Rev 00
25 June 2014
PO Box 5128 201 Daktronics Drive, Brookings, SD 57006-5128
tel: 800-325-8766 fax: 605-697-4700
www.daktronics.com
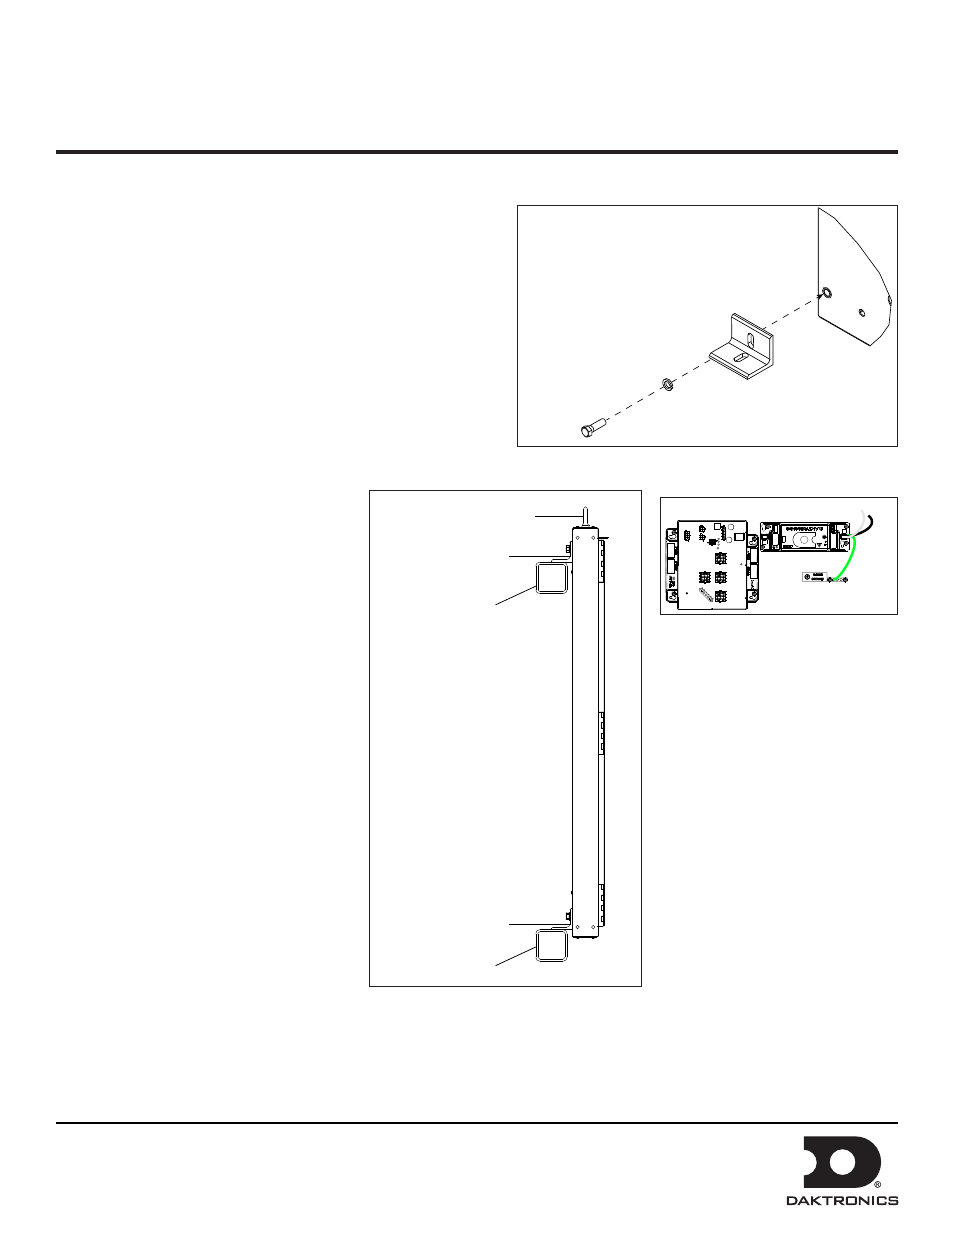
Installing the Display on Horizontal Beams
See Drawing B-1154625 for more detailed information regarding
this type of installation. Use the display shop drawing to
locate the holes used to attach the mounting hardware in this
installation type.
Two horizontal beams must be provided to accommodate the
Fuelight
™
Petroleum Price display for this installation.
1. Attach six clip angles to the back of the display using
3/8-16 hardware kit, shown in
Figure 4, which includes
the following parts:
• 3/8-16 Threaded Insert
• Clip Angle
• Lock Washer
• 3/8-16 Bolt
2. Use lift eyes to lift the display into
position on the horizontal beams.
3. Weld or use appropriate hardware
to secure the clip angles to the
beams, as shown in
Power Connection
1. Route power cable into the display
through one of the knockouts on the
display’s backsheet.
2. Use wire nuts or other appropriate
hardware to connect power wires to the
power supply harness or pigtail.
3. Connect supply power ground wire to
Note: Verity the power supply ground
wire is connected to the ground bus bar.
Note: Refer to the display shop drawing
for power requirements.
3/8-16 Bolt
Lock Washer
Clip Angle
3/8-16 Threaded Insert
Figure 4: Install Clip Angles to Back of Fuelight Display
Lift Eye
(removed after
installation)
Clip Angle
Horizontal Beam
In Sign Structure
Di
s
pla
y
F
a
c
e
Clip Angle
Horizontal Beam
In Sign Structure
Figure 5: Side View of Fuelight Display
Mounted on Horizontal Beams
Ground (Green)
Hot
(Black)
Neutral (White)
Power Supply
Driver
Figure 6: Power Wiring