Cybex 12231 VR3 Dip Chin User Manual
Page 11
Cybex Owner’s Manual
11
Move to machine to the desired location
1. Remove the four shipping cones using a 3/4” socket or wrench.
2. Attach foot pads to each foot of frame.
WARNING: Anchoring equipment:
•
Cybex is not responsible for the actual anchoring of equipment. Consult with a
professional contractor.
•
Use fasteners having a minimum of 500 lbs. tensile capacity (3/8’’ grade 2 bolts or
better).
•
If legs/frame does not contact surface, DO NOT pull down with anchors. Shim
any leg or frame not in contact with surface using flat washers.
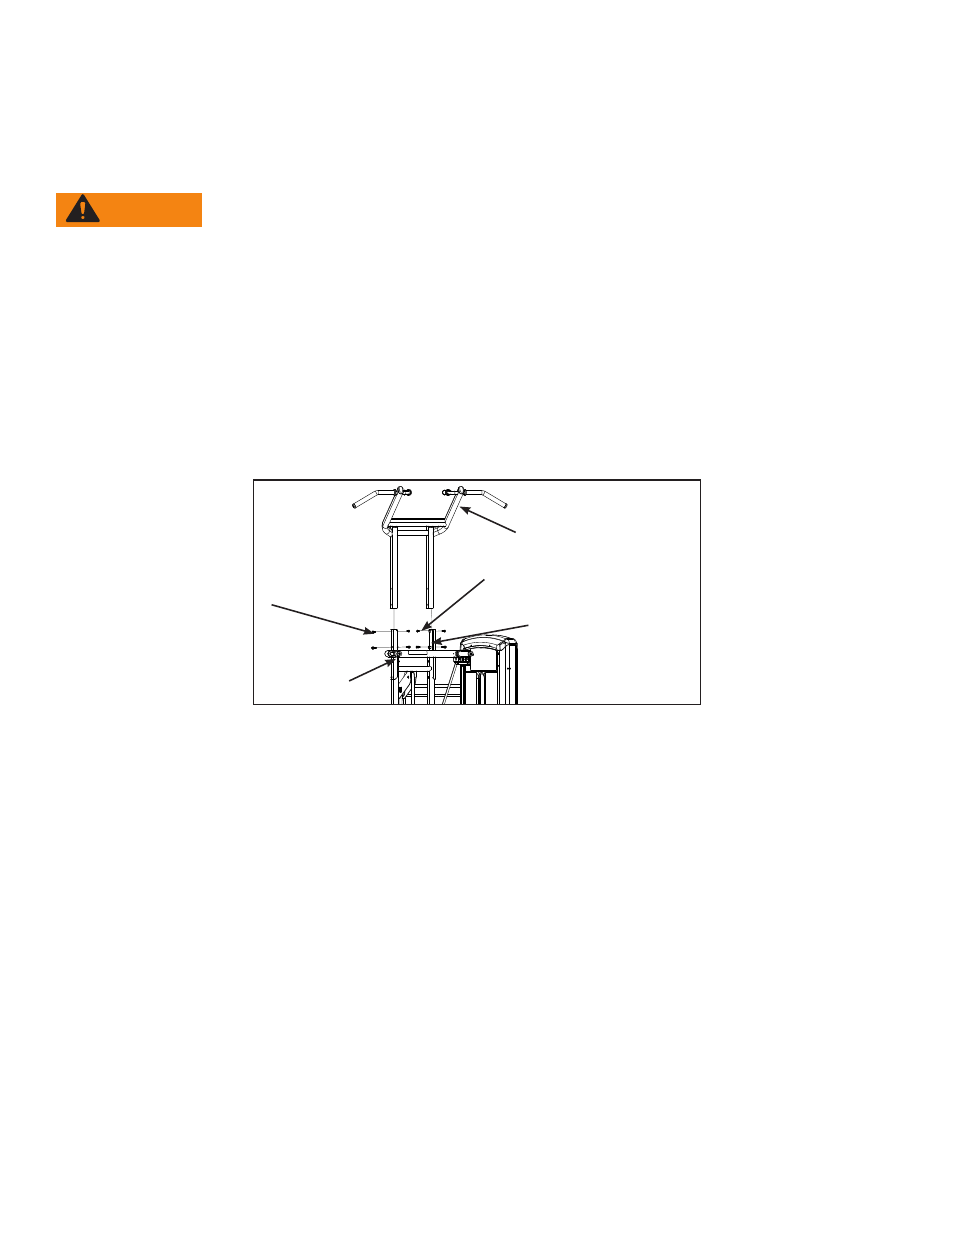
Install Chin Handle
1. Carefully remove hardware kit, chin handle and support leg secured to frame. With an
assistant, carefully lift chin handle onto dip handle.
Chin Handle
Dip Handle
BHSCS
.375-16 x .875 (6)
BHSCS .375-16
x .625 (6)
Connection
Plate
2. Align holes with connection plate. If holes do not line up then loosen the 12 Button Head
Socket Cap Screws (BHSCS) securing dip handle to frame.
3. Apply loctite #242 to the BHSCS (supplied in hardware kit). NOTE: BHSCS .375-16 x .625
are installed on the inside of connection plate. BHSCS 3.75-16 x .875 are installed on the
outside of connection plate.
4. Apply loctite to holes of connection plate.
5. Using a 7/32” Allen wrench (supplied in kit) securley tighten all BHSCS securing chin handle
in place.
6. BHSCS securing dip handle were loosened in step 5B then remove one BHSCS, apply loctite
to hole in connection plate and BHSCS and then reinstall BHSCS. Repeat this step until all
12 BHSCS are loctited then securley tighten all BHSCS. NOTE: Do not remove all BHSCS at
the same time as connection plate will fall.