Inserting a smartmedia card, Inserting a smar tmedia card – Dazzle Multimedia Universal 8 in 1 Reader/Writer None User Manual
Page 21
Dazzle Universal Reader/Writer User’s Guide • Using the Universal Reader/Writer • Page 21
Inserting a SmartMedia Card
Before you inser t a Smar tMedia card, be sure to place the Universal Reader/Writer in it’s
base with the Dazzle logo on the right side. If you plan on writing to or deleting from your
SmartMedia card, make sure the card is not locked. To inser t a Smar tMedia Card, follow
these steps:
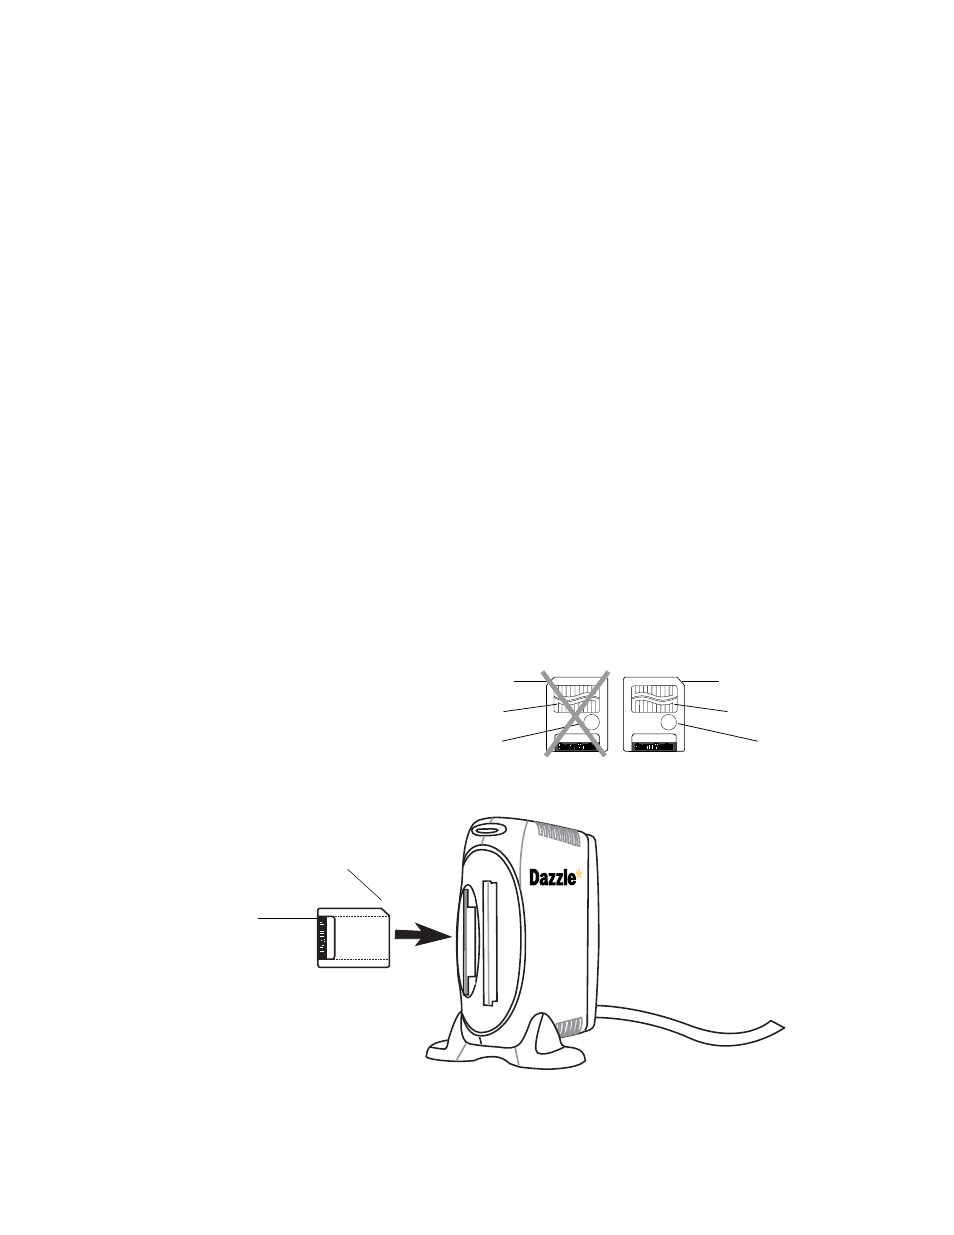
1. Position the Smar tMedia card in the direction shown in the illustration below.
Note: The Universal Reader/Writer accepts only 3.3V Smar tMedia cards. It does not
support 5V Smar tMedia cards.
2. Insert the card in the left media slot with the gold contacts on the left side. The card’s
notch must be located at the top corner.
Notice the notched corner of the Smar tMedia card. The notch appears on the
right-hand side when you are looking directly at the gold contacts on the top of a 3.3V
SmartMedia card (see the illustration below).
Caution: Be careful not to inser t the Smar tMedia card in the wrong direction. Be sure
to inser t the Smar tMedia card with the gold contacts on the left side. If it is forced in,
the reader/writer or the Smar tMedia card may be damaged, or data on the card may
be lost or corrupted. If the computer does not recognize the media, or if it does not fit
correctly, re-position the card and tr y reinser ting it.
3. Gently push the card in all the way until it locks in place.
Insert the SmartMedia
card in the left slot
with the gold contacts
inserted first and facing to
the left
SmartMedia Card Comparison (view of cards from top)
5V SmartMedia card
(
not compatible)
3.3V SmartMedia card
(compatible)
Left notch
indicates 5V card
Right notch
indicates 3.3V card
Gold contacts
Gold contacts
Write protect
area
Write protect
area
SmartMedia
Notch on top