Connections and setup, Connections – Dish Network Solo 381 User Manual
Page 74
Connections and Setup
69
Connecting to a TV
1
Connect an DISH DVI cable between the DISH DVI connection on the receiver and HDTV set or
monitor.
2
Turn on your receiver and TV using the front panel buttons.
3
Confirm that you are getting a picture from the receiver. Consult your HDTV user’s guide if you
need to change your HDTV to display from the Digital Audio/Video input.
4
If you do not see a picture, see No Picture on the HDTV on page 70.
Note: In most cases connecting the Digital Audio/Video cable will provide plug-and-play control of
the monitor’s display resolution and other settings. However, your HDTV may require selecting a
different format to display from the receiver during setup.
5
Turn up the volume on your HDTV and confirm you have sound. If you don’t have sound, your
system may require you to connect audio (red and white) RCA-type cables between the receiver
Audio Outputs and audio input connections.
YP
B
P
R
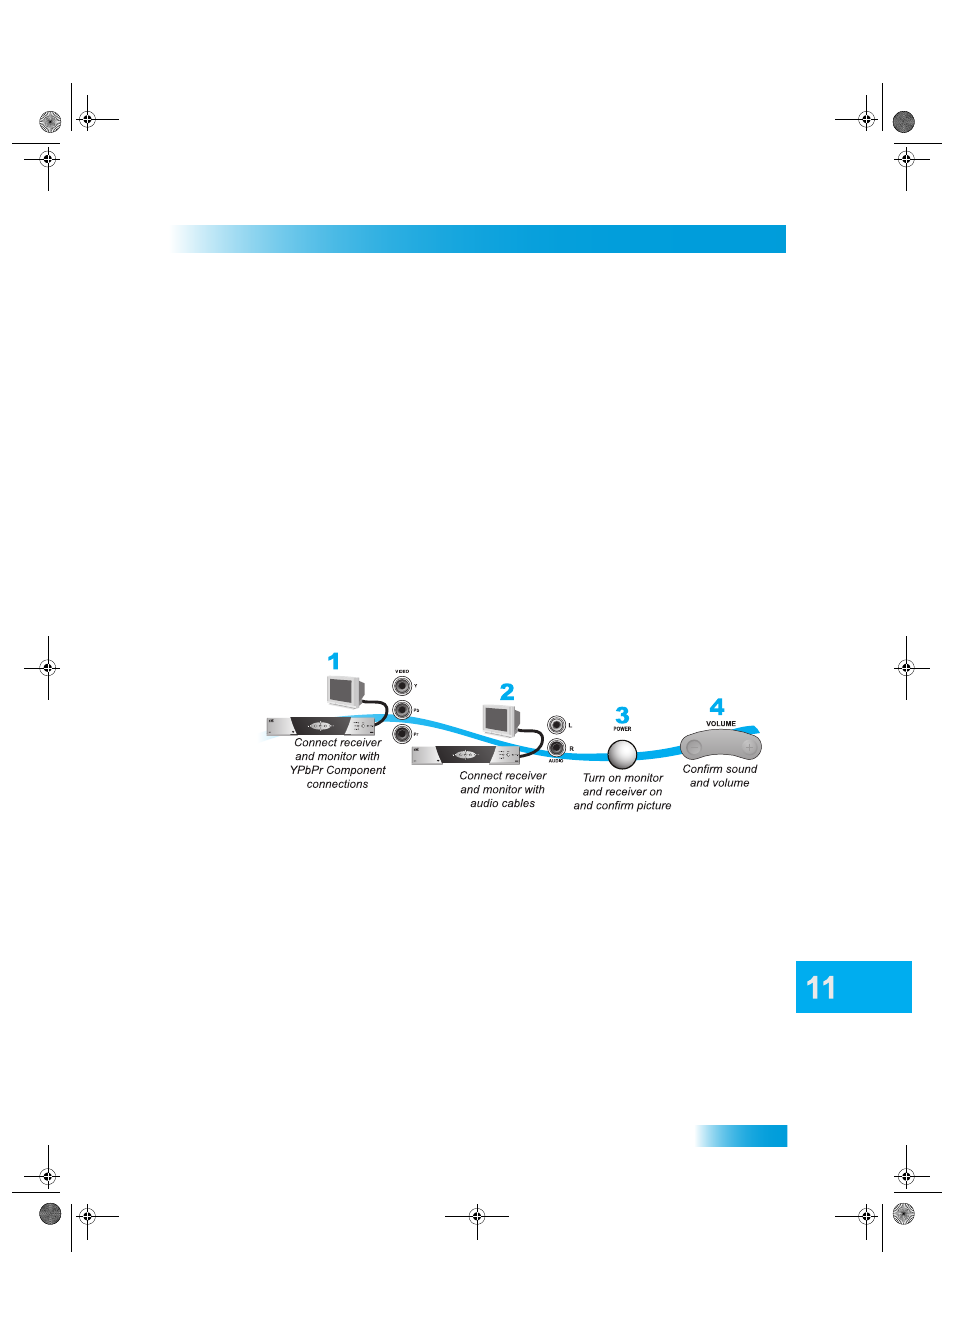
Connections
The YPbPr connections provide high-quality audio and video to your HDTV or HD monitor.
1
Connect between the YPbPr component connections on the receiver and the HDTV using
component video cables.
2
Connect audio (red and white) RCA-type cables between the receiver Audio Outputs and audio
input connections that go with the YPbPr connectors on your HDTV or monitor.
3
If you do not see a picture, change the resolution setting on the receiver.
4
Turn up the volume on your HDTV and confirm you have sound. Check the RCA-type connections
if you don’t have sound.
381.book Page 69 Thursday, June 29, 2006 11:00 AM