Compx elock, Surface mounting, Hole function – CompX eLock Numeric Keypad Quick Programming Guide User Manual
Page 4: Warranty card, Warning
4
1.81
7.77
NoTe:
Don't forget
to fill out and
return your
warraNTy
card!
CompX eLock
®
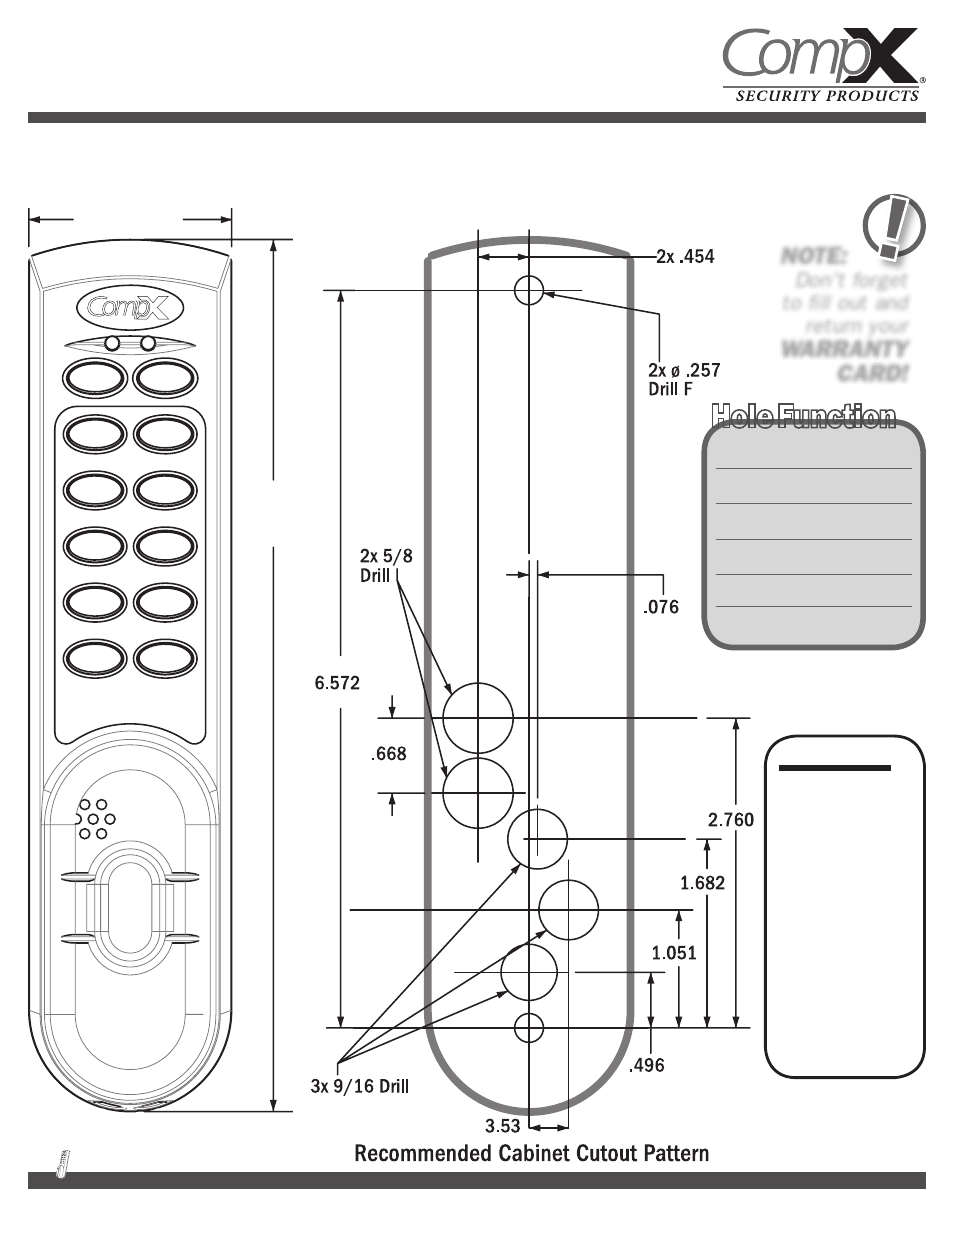
Surface Mounting
Use the diagrams below as a template for holes to be drilled and for mounting your CompX eLock
®
.
Put this template on the
outside
of the cabinet door where the eLock will go, and you can drill right through
it to mount your CompX eLock
®
.
Mount with 2 shorter, steel colored screws.
#1a
#2
#3
#4
#5
#6
#1b
#1a, b
Mounting Holes
required
#2
battery Latch Cable
required
#3
Alarm
optional
#4
battery Cable
*
optional
#5
RJ11 Port
required only if using LockView
#6
AC Wall Adapter
*
optional
* If you're using a battery
cable, then a wall adapter
is not required. If you're using
a wall adapter, then battery
cable is not required.
Hole Function
warNiNg:
Print this page and
measure the line
above. It is one
incH long. If it
measures less than
or more than one
inch, the template
measurements also
need to be scaled
accordingly.
FaiLure To
do so couLd
resuLT iN
misdriLLed
hoLes.
1”